Deploy using Ploi
In this series, we’ve seen how to deploy a Laravel application from scratch by creating our server manually. Whilst it’s good to know how to do it ourselves to understand the mechanics of our server, it can be a pain to maintain in the long run.
That’s why SaaS applications such as Laravel Forge and Ploi exist. They provide an abstraction layer between you and your server by automating its provisioning, its maintenance and by allowing you to configure it directly inside a user interface.
This article focuses on creating a server using Ploi and deploying to it using Deployer. The previous one focused on Laravel Forge.
Preparations
Before we start, I’m going to assume you already have a Ploi account and that you’ve configured it appropriately.
If you’re going to follow along, make sure the following points are configured.
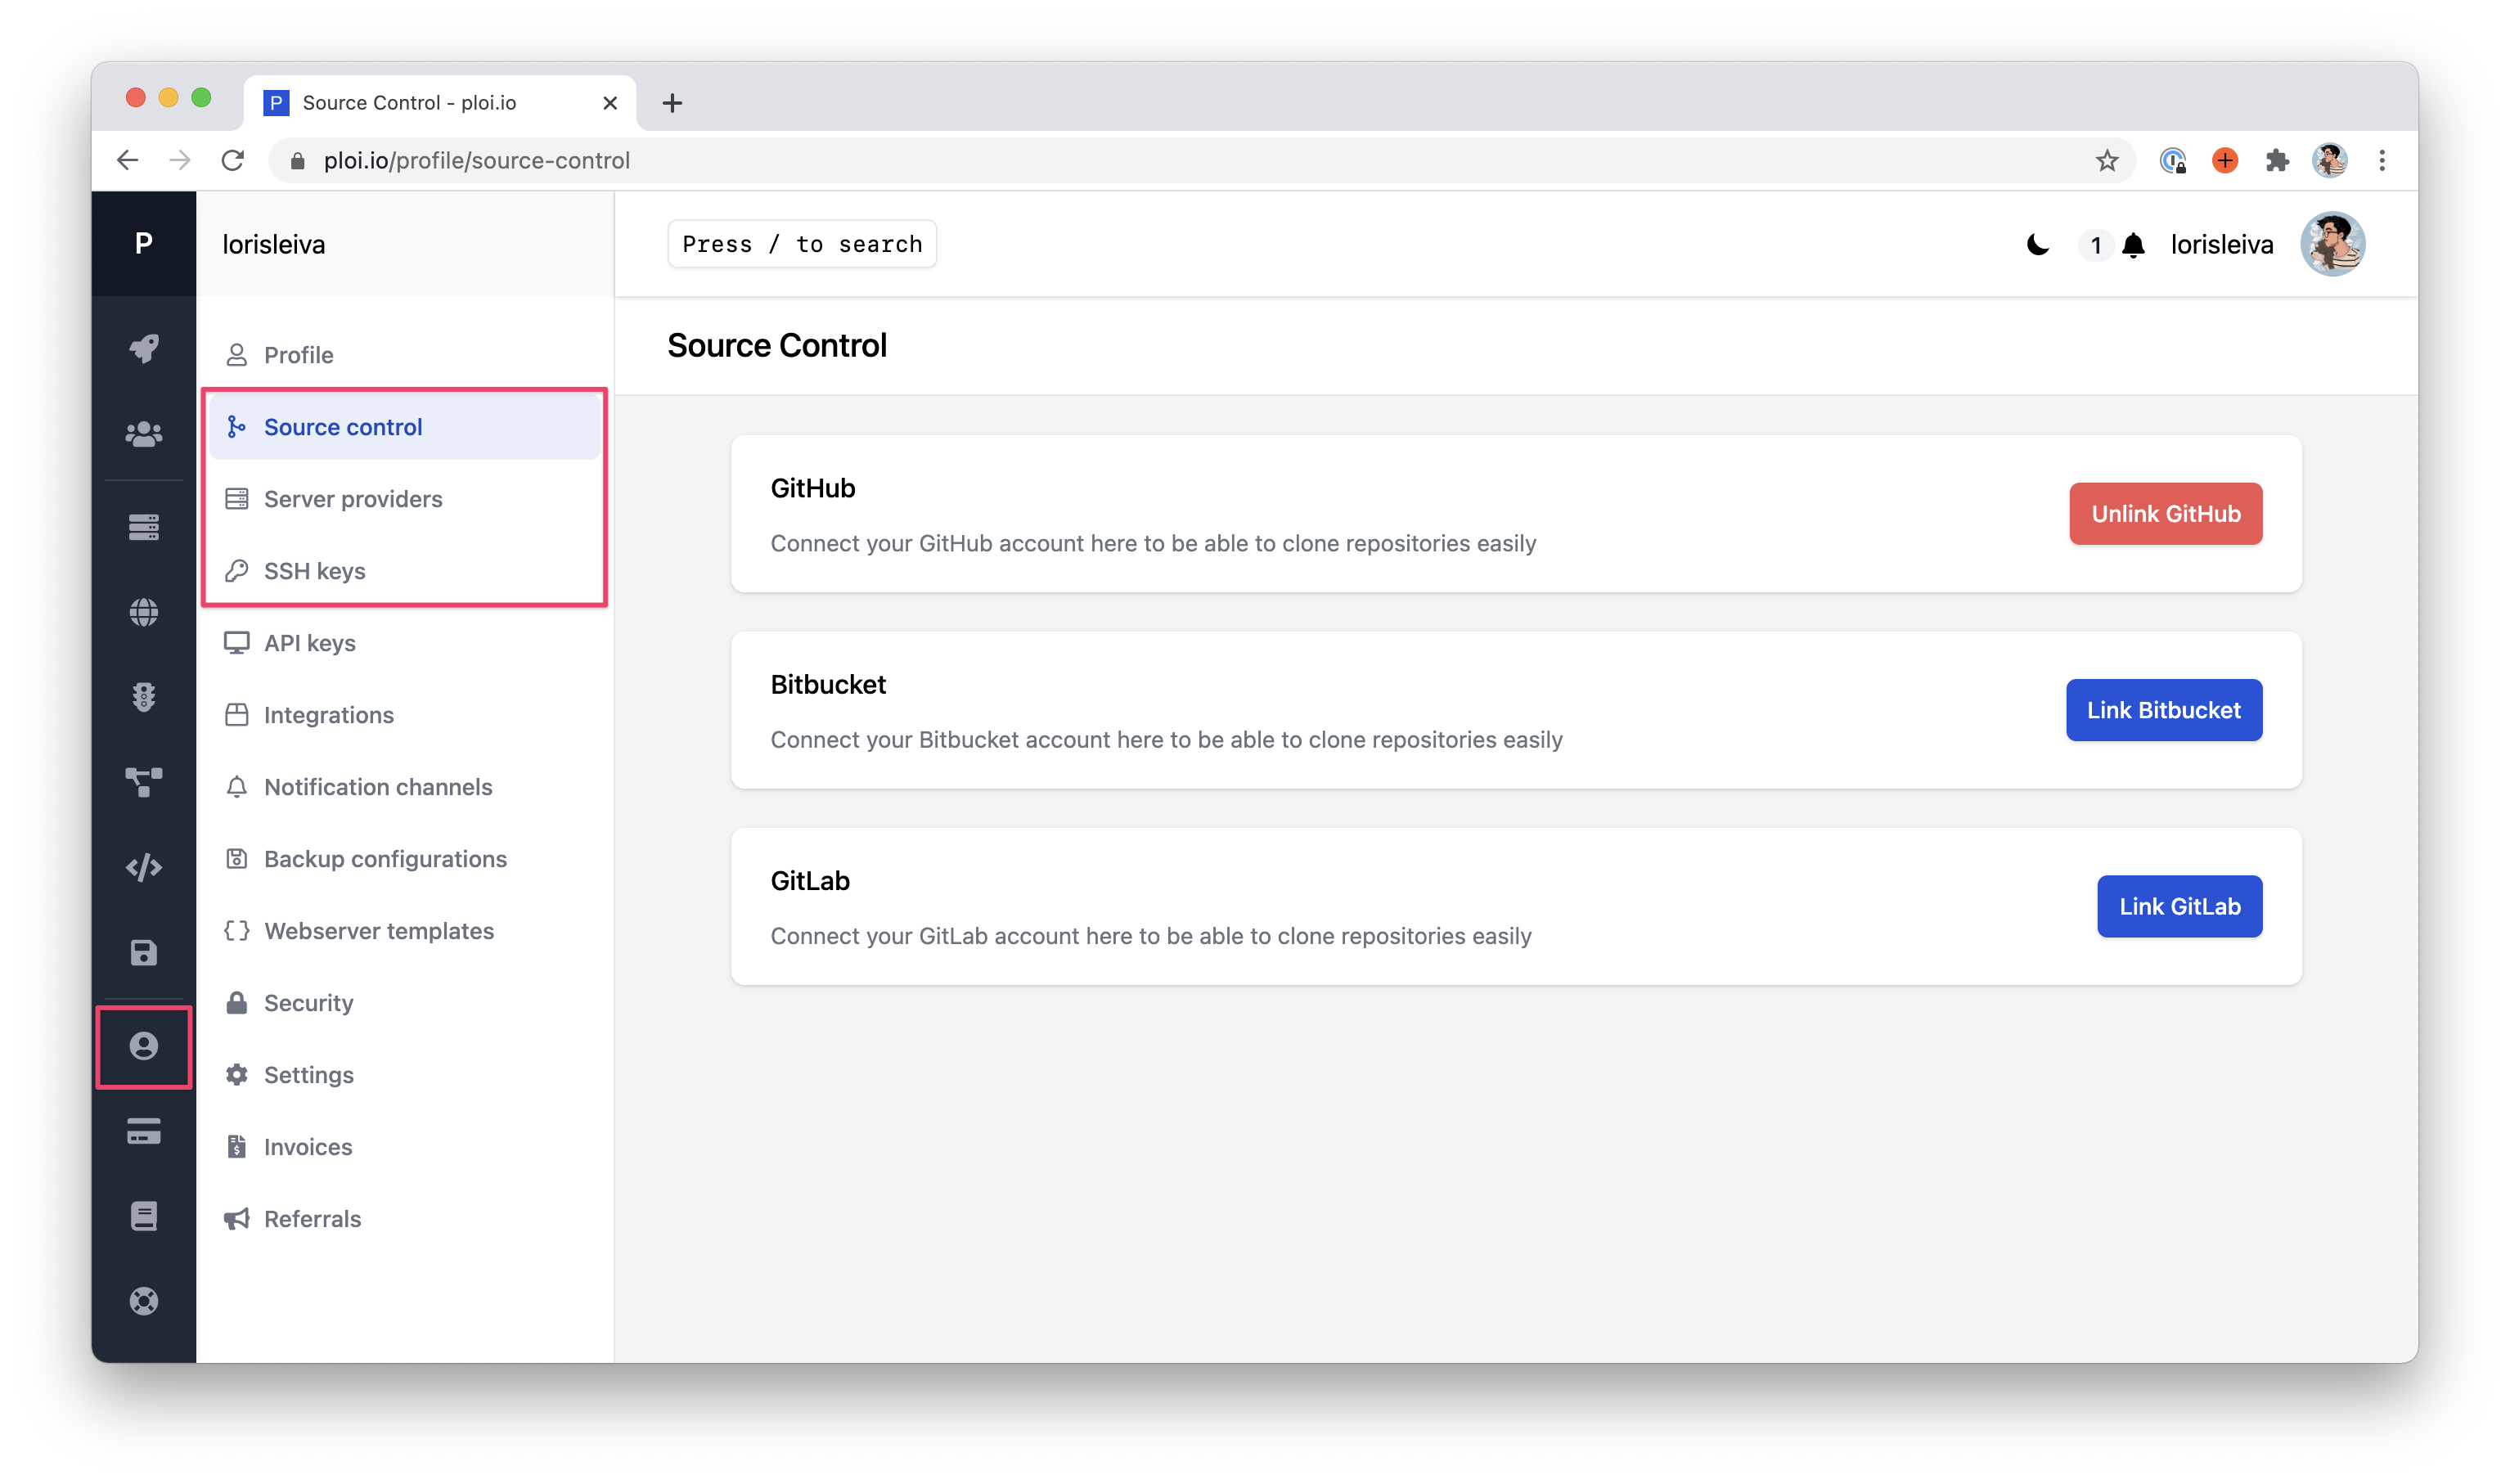
- Add a Digital Ocean provider by generating an API key first. We’ll use Digital Ocean again here to create our server but feel free to choose any of the alternative providers.
- Add your SSH key to your account. This will ensure your key is automatically added to every server created. Alternatively, make sure you add it to your server configurations after creating it.
- Add a Git provider to your account. Even though we’ll be deploying using Deployer that already knows your repository URL, we’ll need to provide our repository when creating a site in order to unlock part of the UI.
All of these configurations can be found on your profile pages on Ploi.
Create your server on Ploi
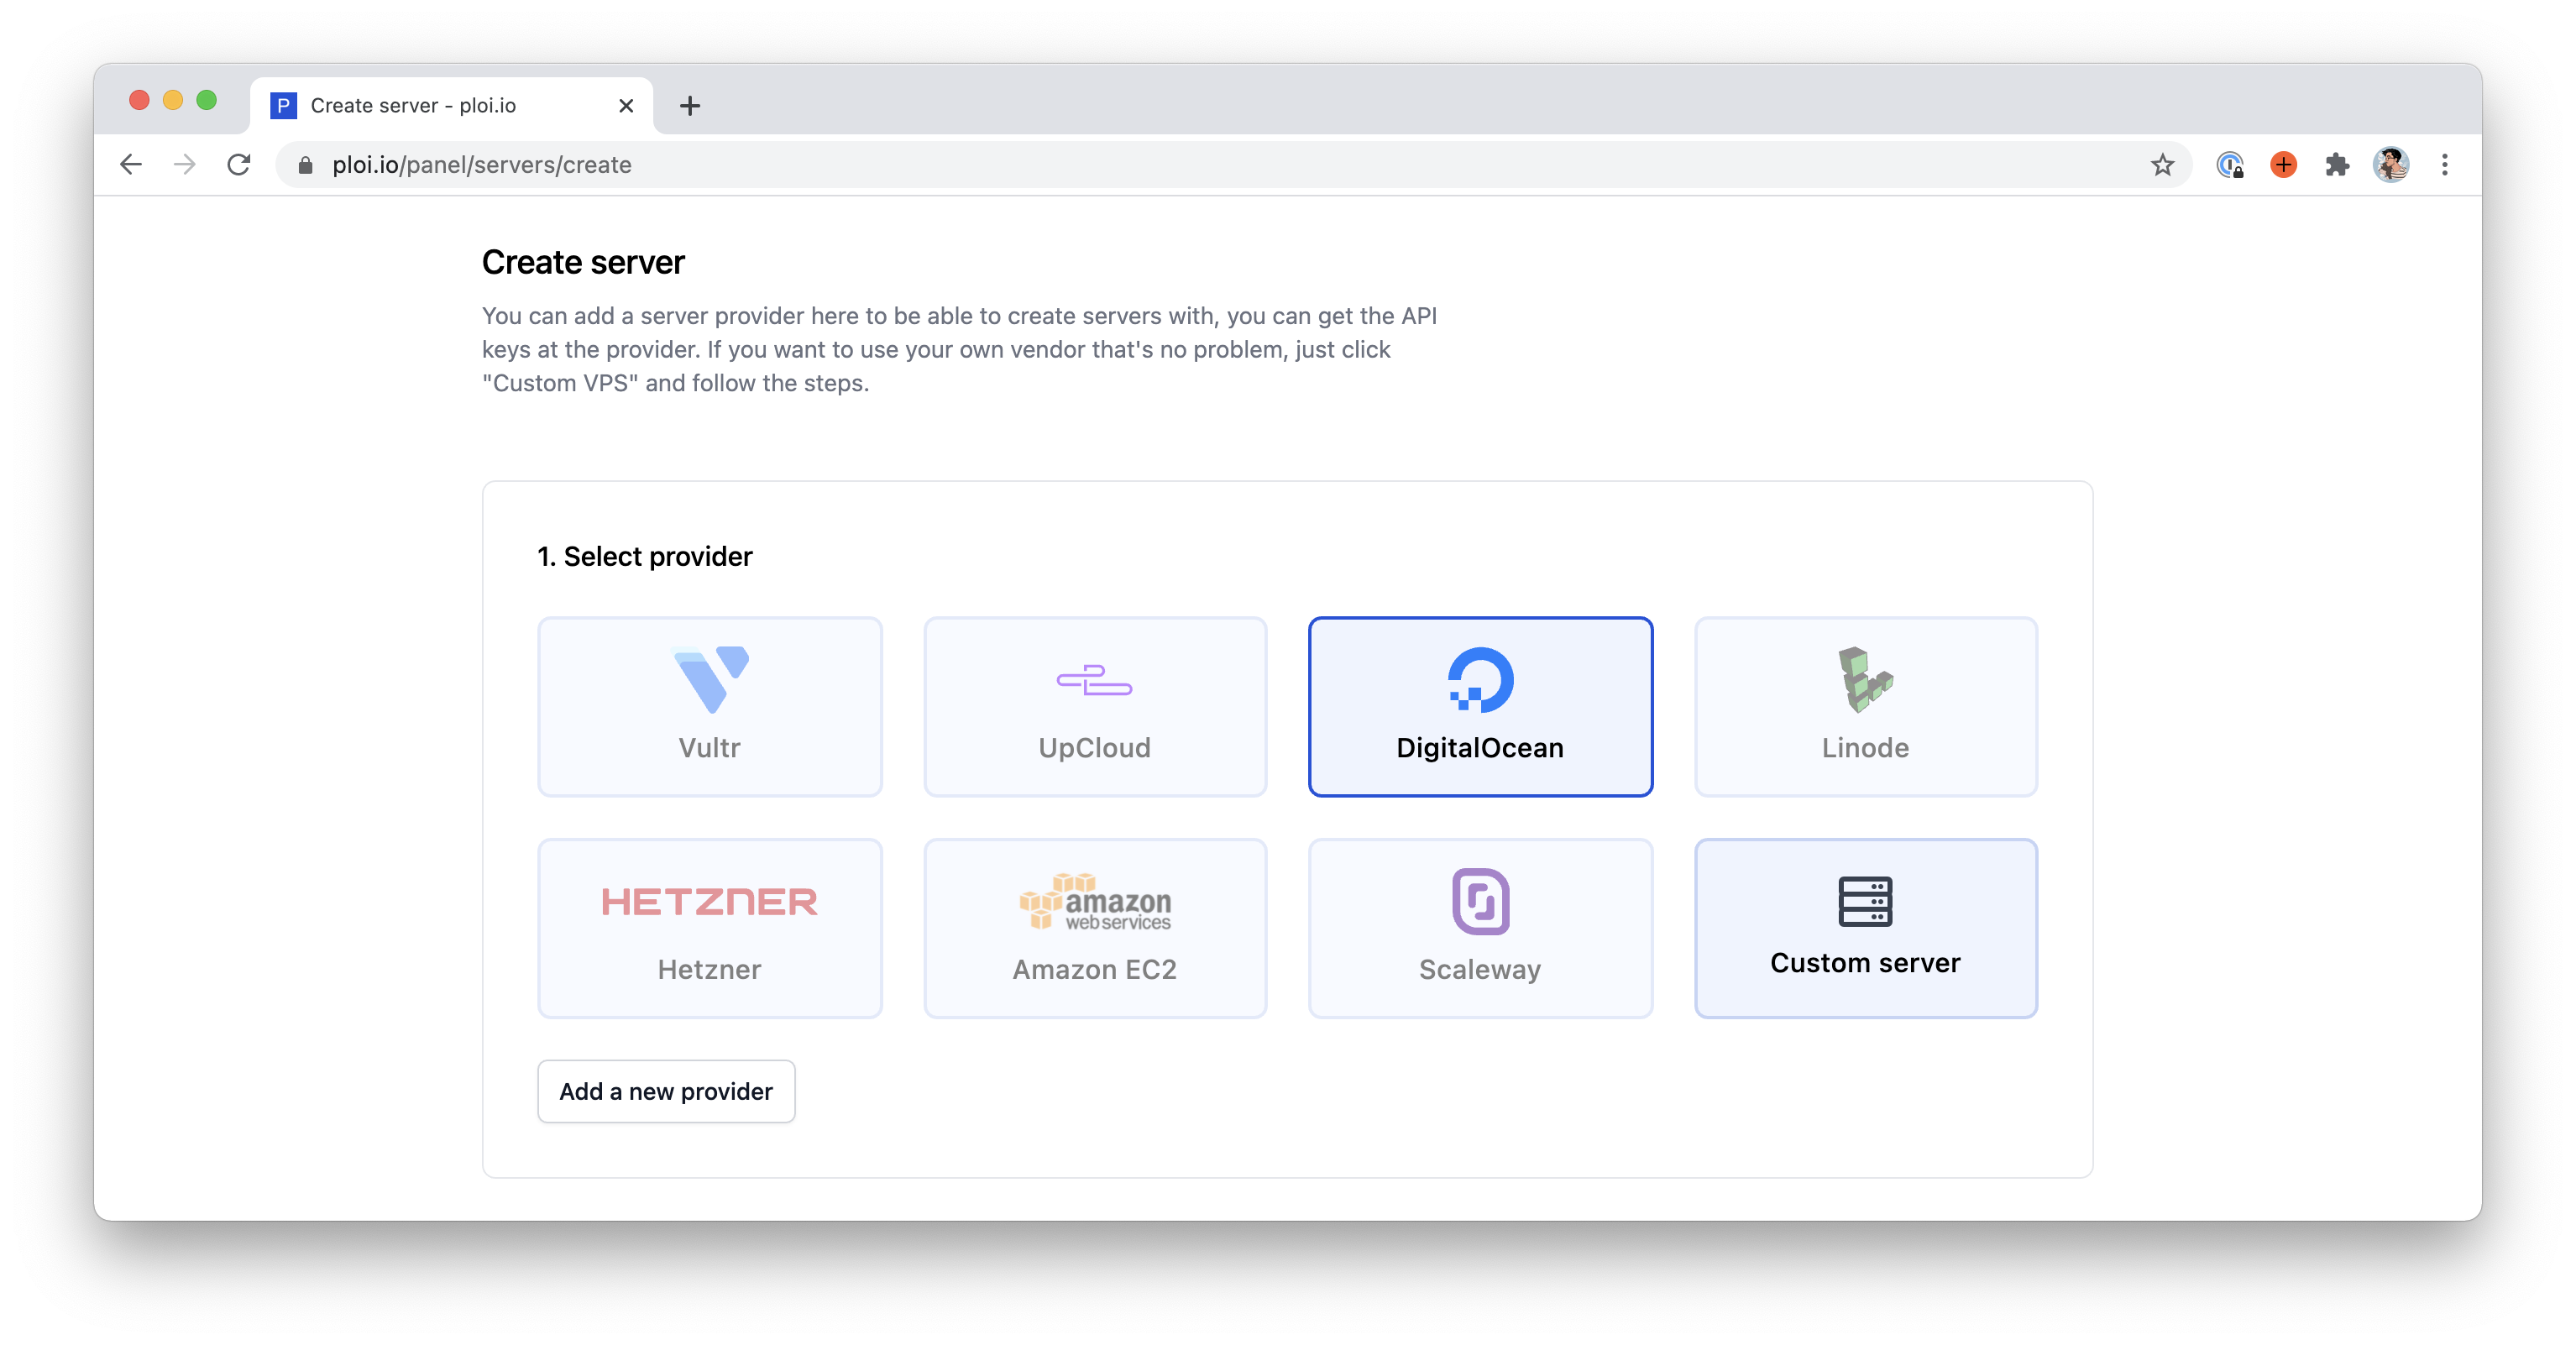
Alright, let’s get started. We’ll create a new server directly on the Ploi interface.
Select the server provider of your choice — in our case, we’ll use Digital Ocean.
Then, select your credentials, select “Server” as a "Server type" and fill the rest of the form however you like.
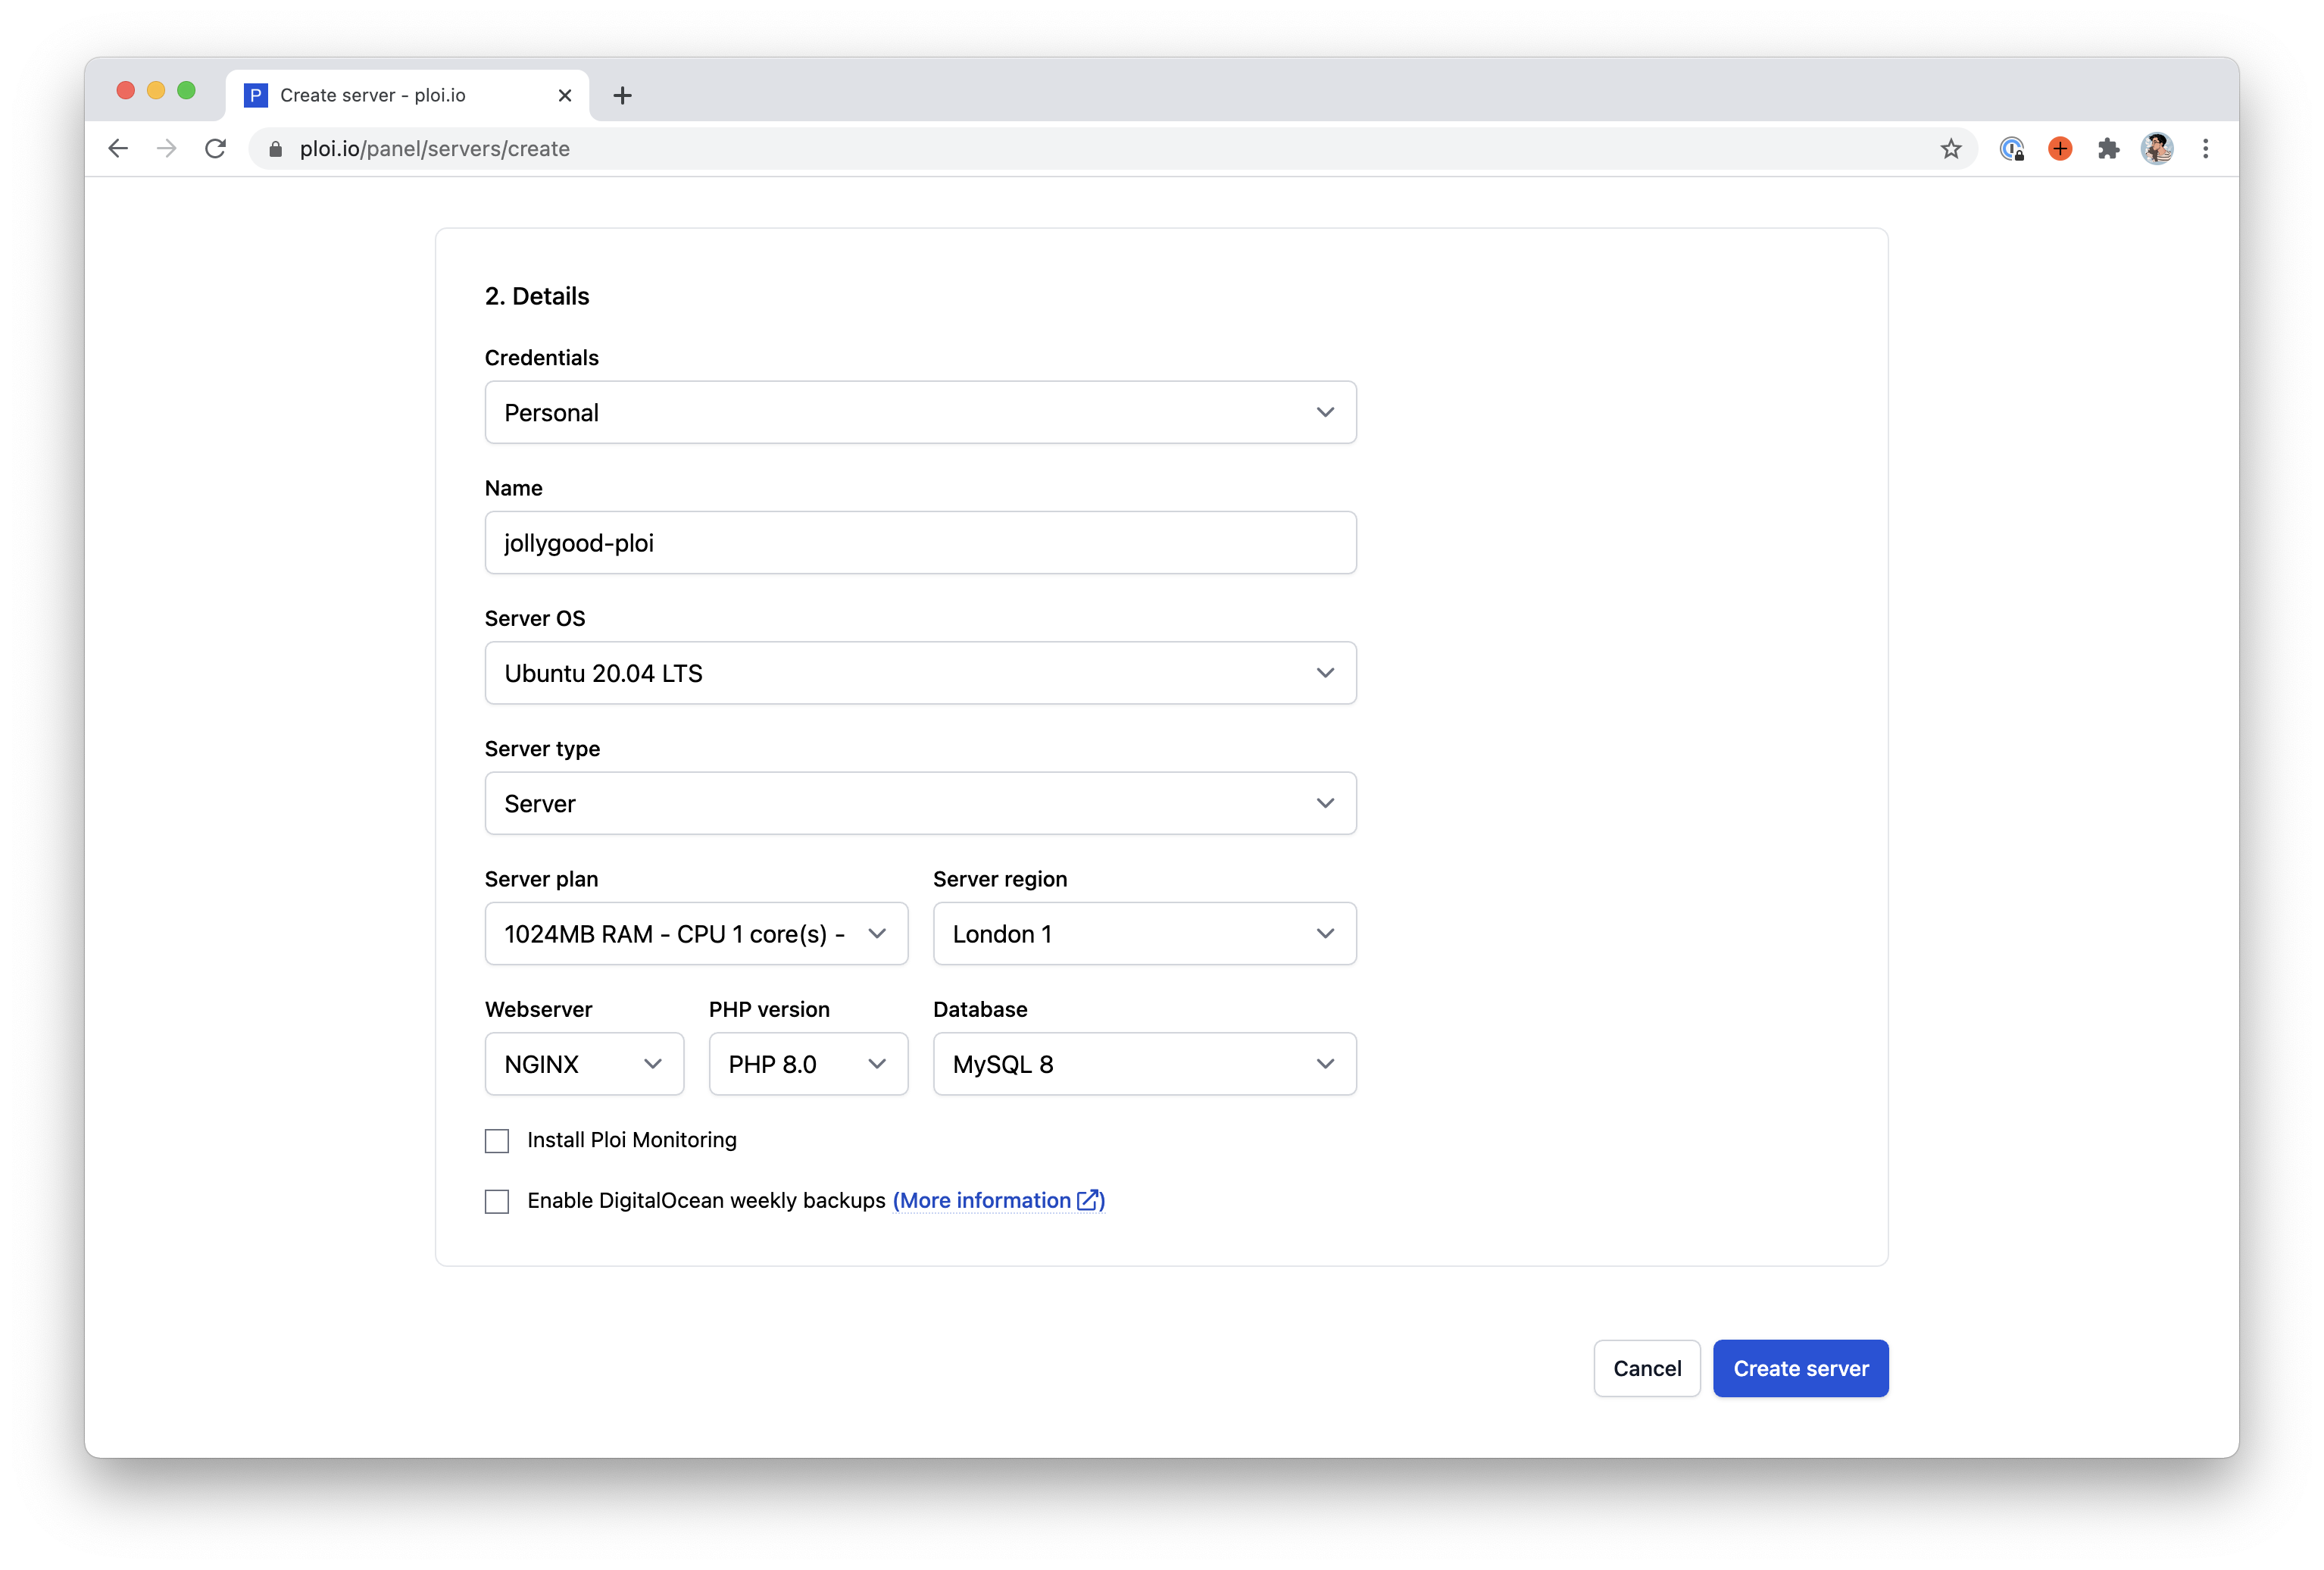
Notice how you can select the PHP version of your choice before creating the server. Additionally, you’ll be able to upgrade or downgrade PHP versions later on with only one click. That’s much easier than having to do it ourselves as we did in the second episode of this series.
When you’re done, click “Create server” and you should see a "Server installation" page showing you the progress in percents. This means your server is being created on Digital Ocean and Ploi is running a bunch of scripts on it to install everything we need for our Laravel applications.
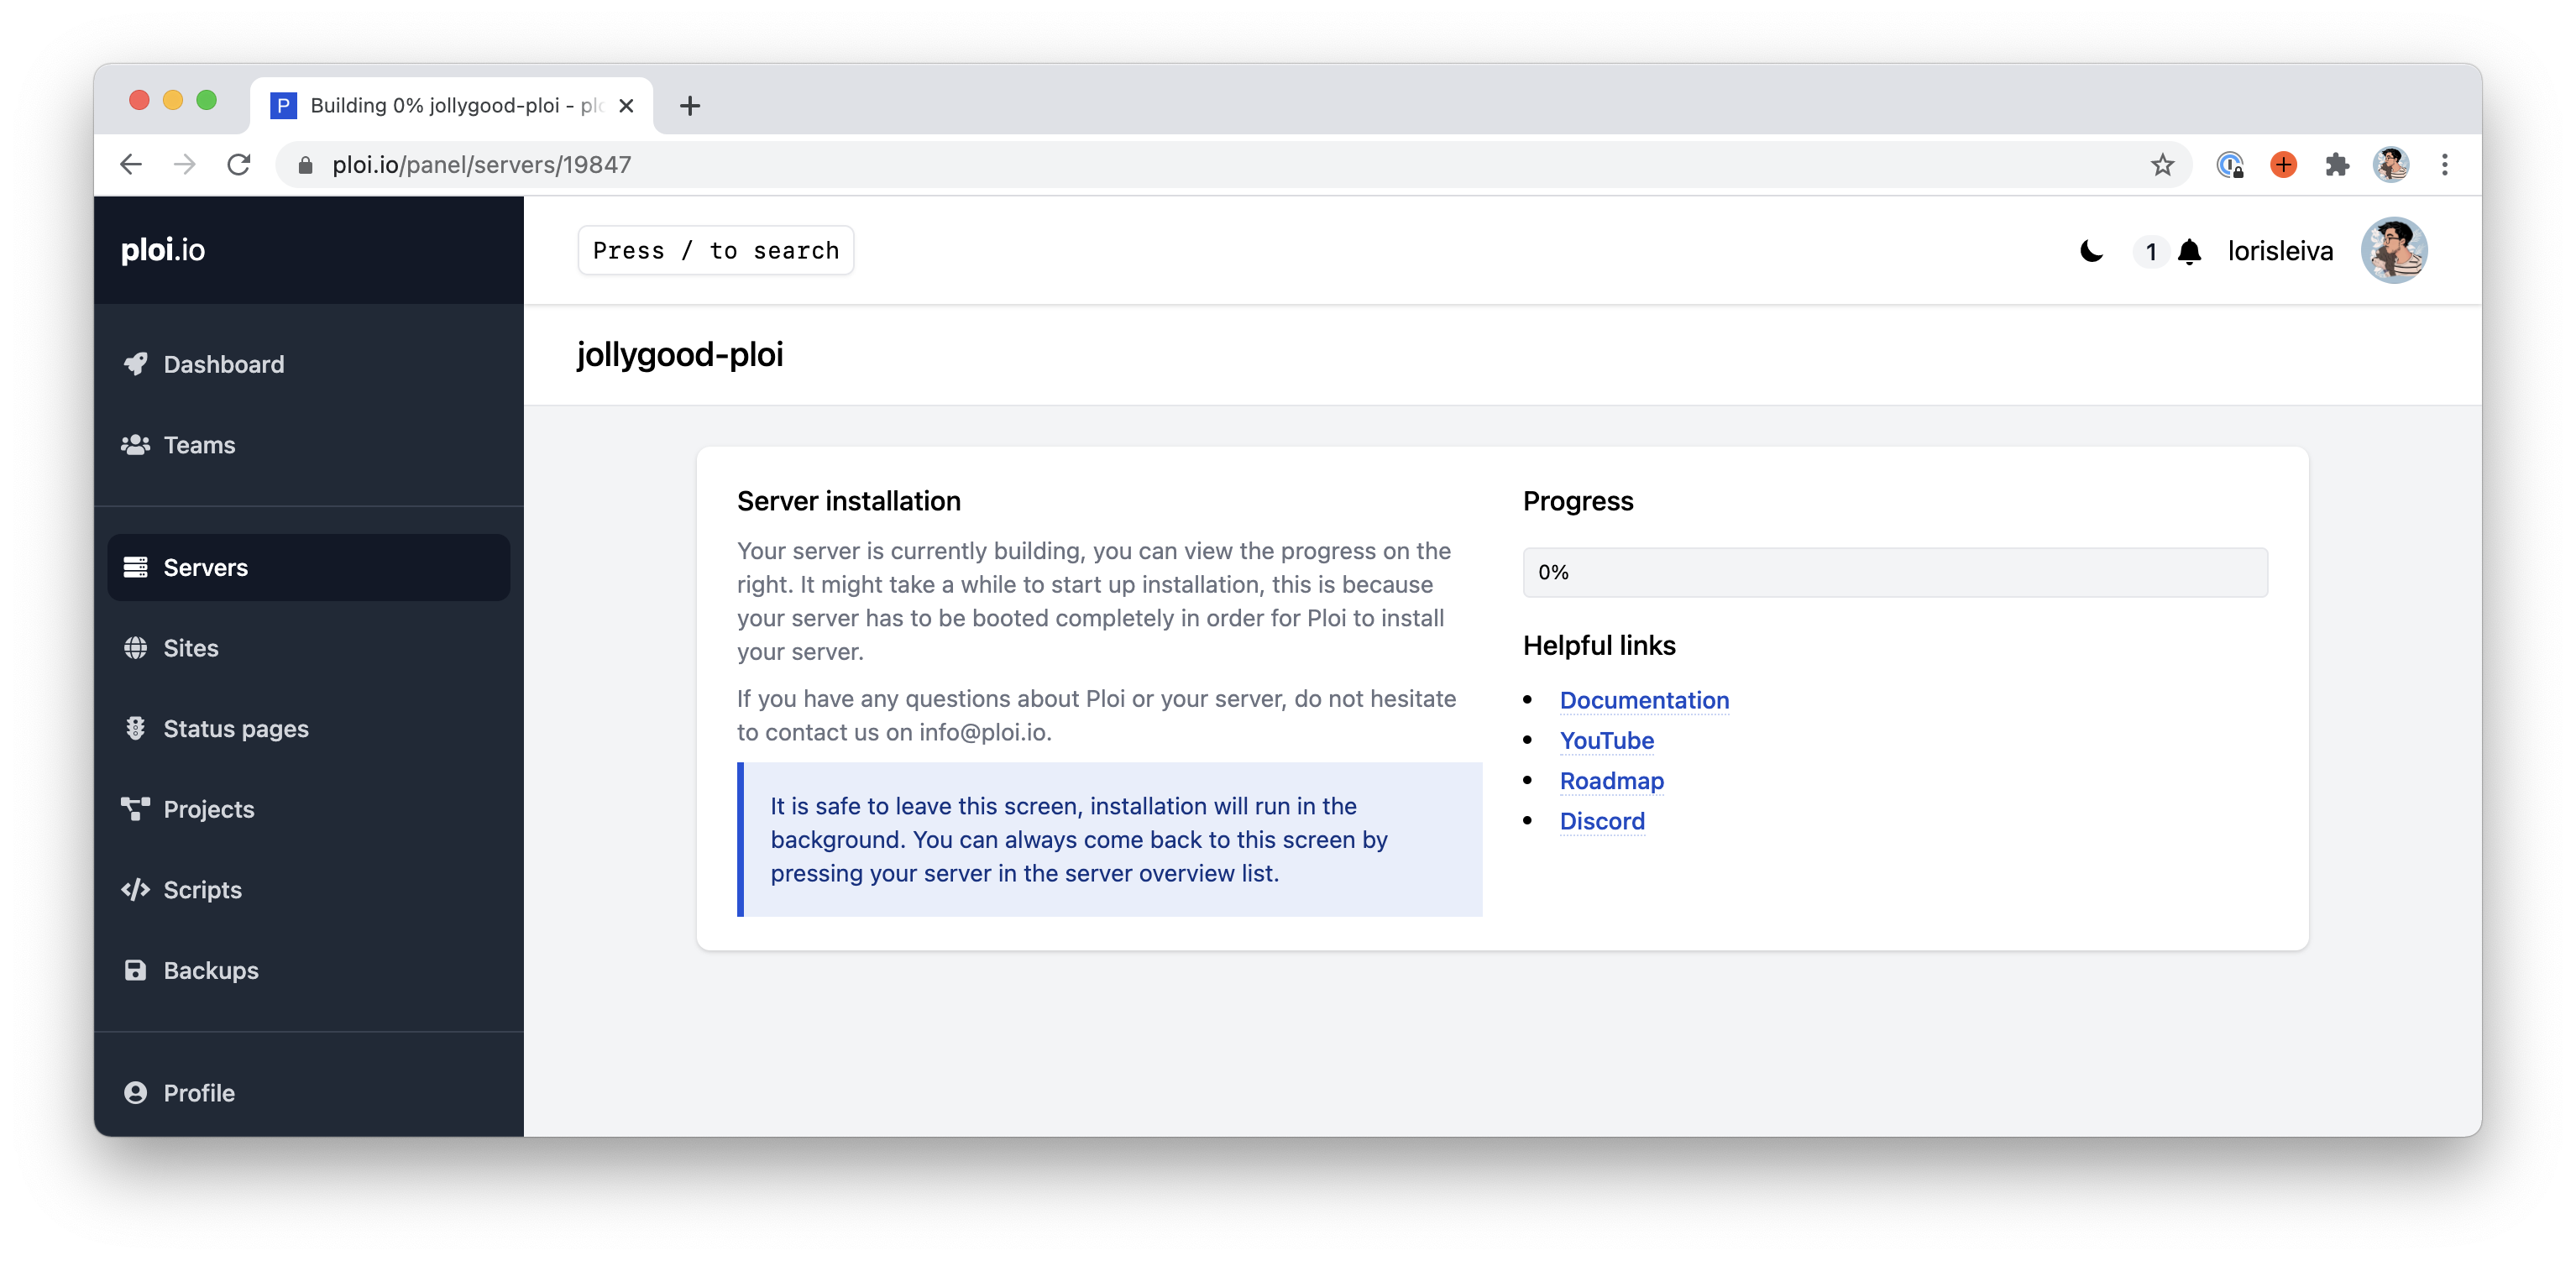
Now this may take a little while so, whilst we’re waiting, let’s point our domain name to our new server.
Configure your domain
As we’ve seen in episode 2, we need to add a record in our DNS configurations for our domain name to point to the IP address of our server.
In this tutorial, we’ve already assigned jollygood.app to the server we manually created in episode 2. Thus, I am going to use the subdomain ploi.jollygood.app to point to our new server created by Ploi. Of course, feel free to use any domains and/or subdomains for your new server.
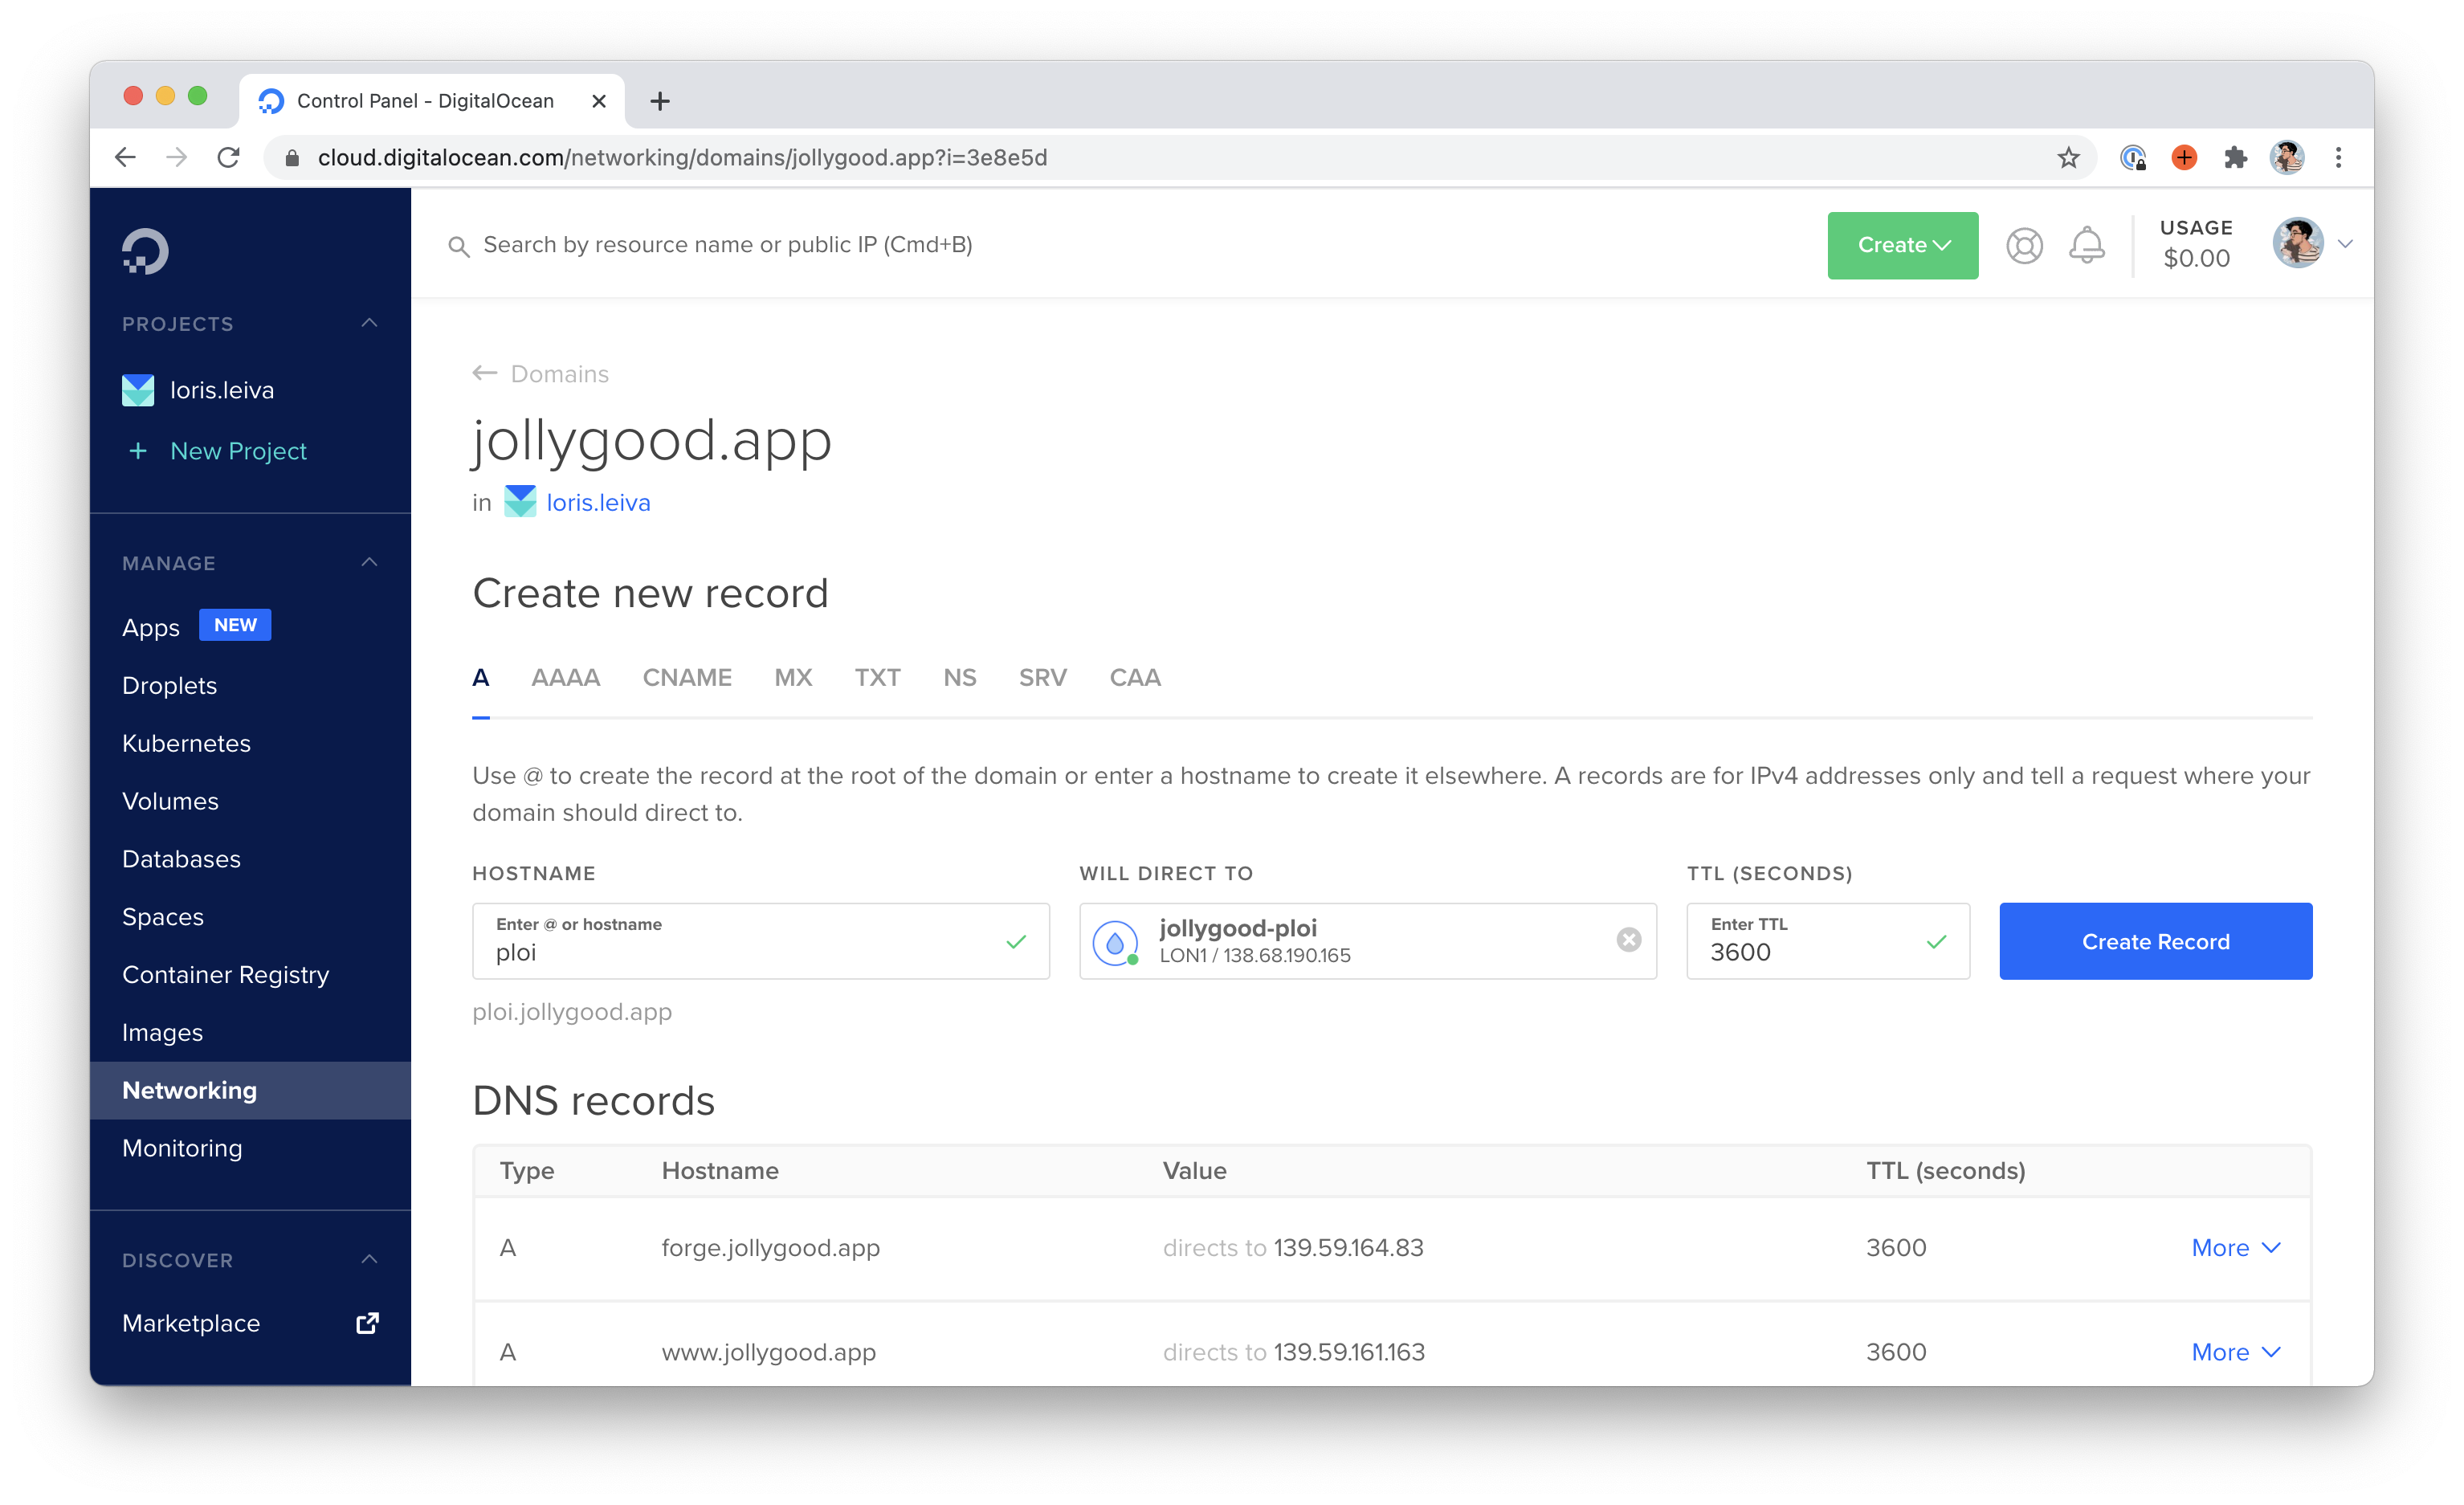
Once that’s done, it may take a few minutes or even hours for the changes to be live so it’s better to do this as soon as we’ve got the IP address of our server. Whilst Ploi will not tell you the IP address of your server until it is fully configured, you should be able to see it fairly quickly on Digital Ocean.
With any luck, the DNS changes should be live by the time the server has finished being configured on Ploi.
Finish configuring your server
As soon as the server has been successfully installed and configured, you should receive an email from Ploi with important and confidential credentials.
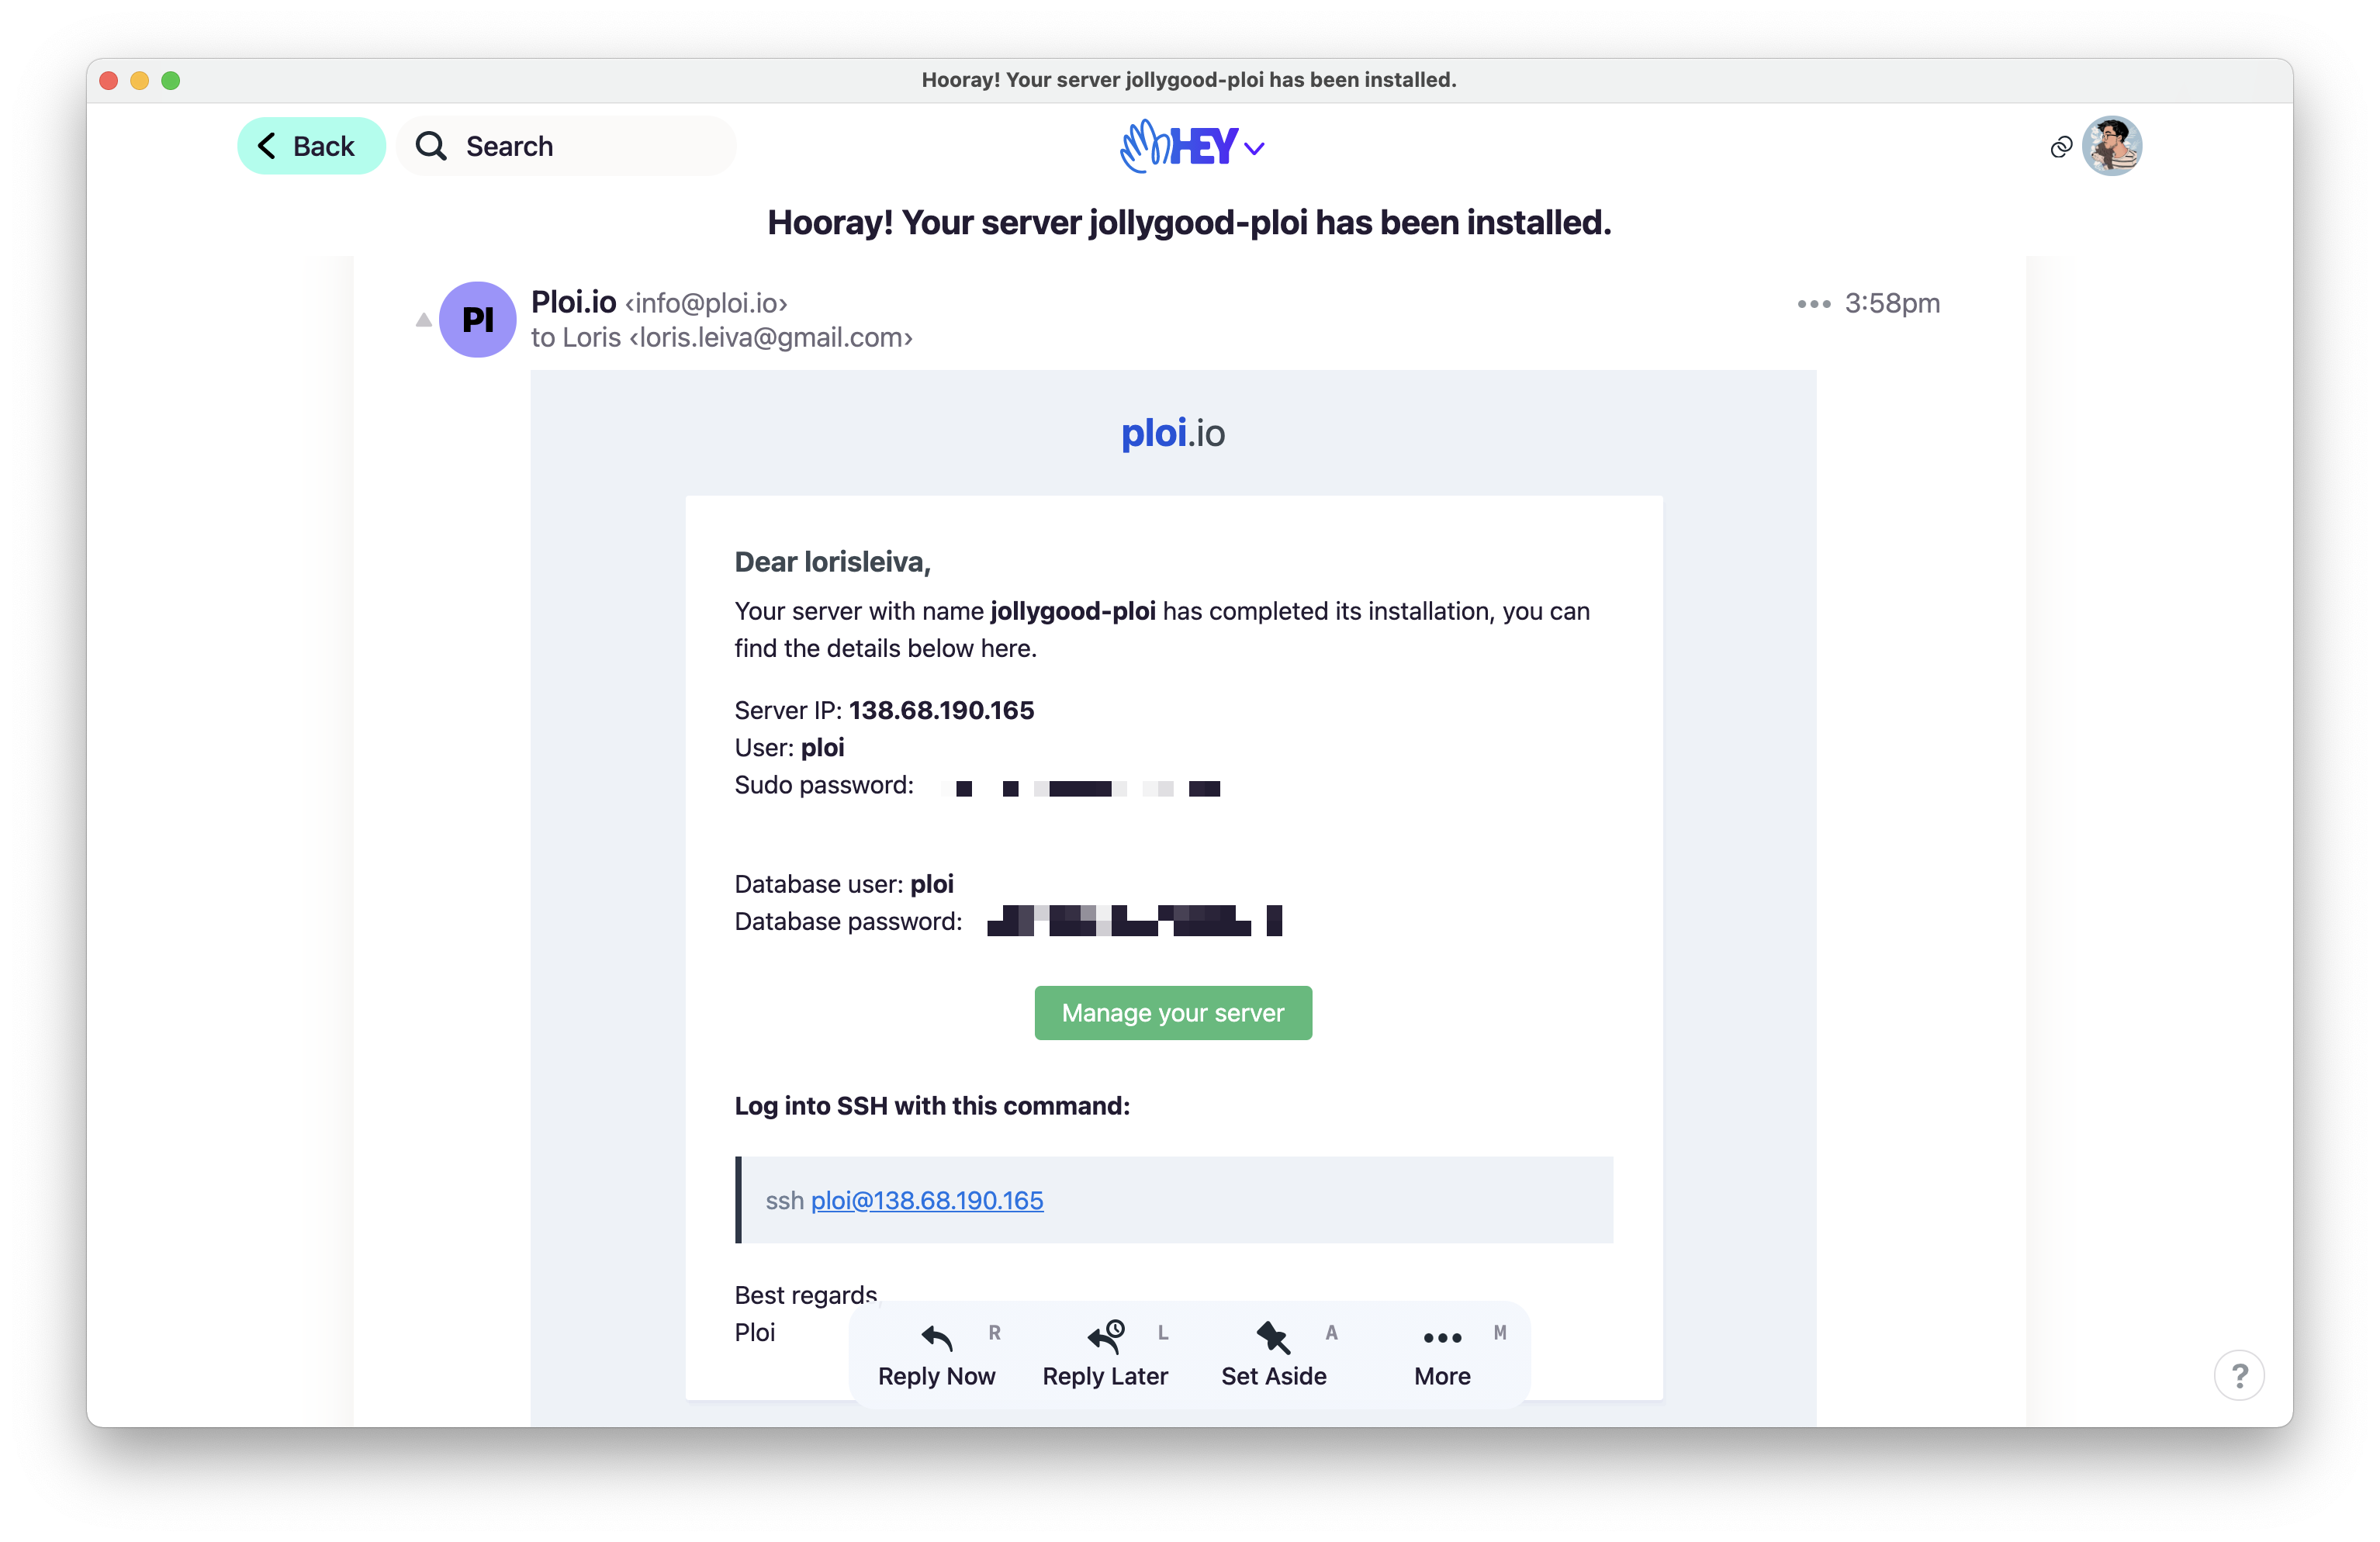
- The first one is the password you’ll be asked to enter whenever you enter a
sudocommand on your server. - The second one is the database password of the
ploiuser. We’ll need this to access our production database later on.
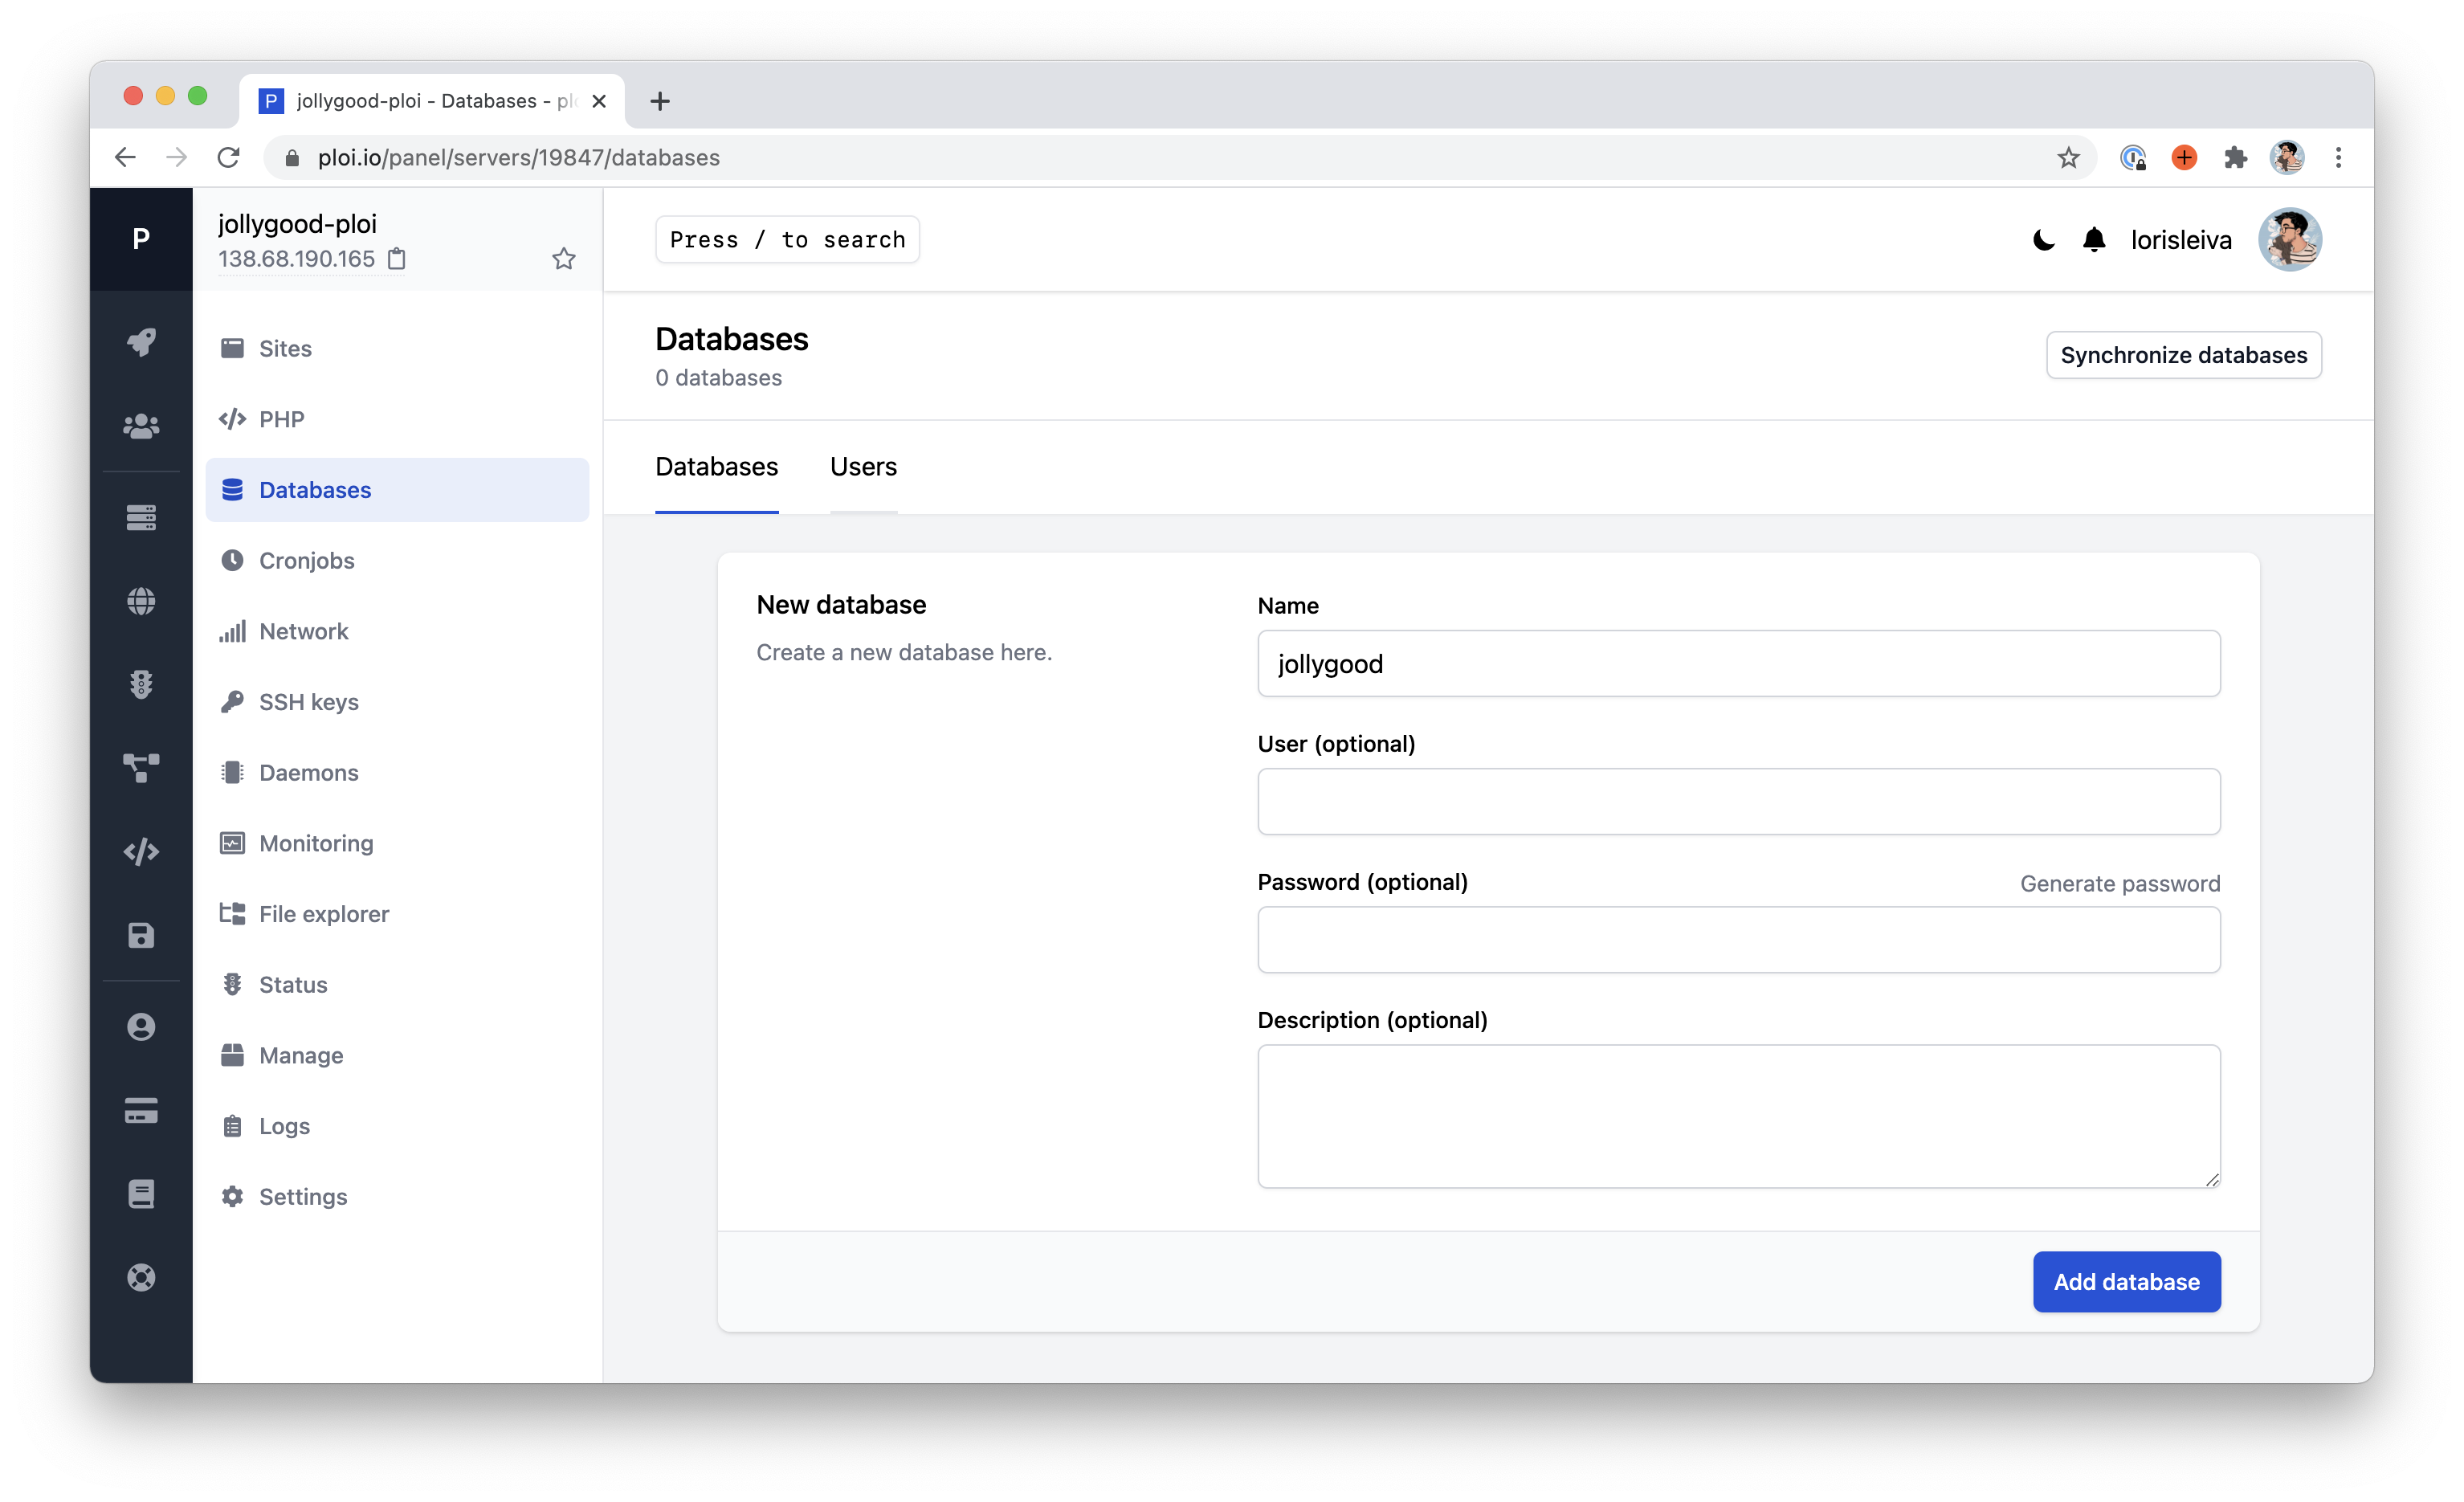
Speaking of databases, we'll need one for our application, so let's create one right now. On your server page, click on "Databases" on the sidebar and create a new database. We'll call ours jollygood for this article.
Add a site to your server
Now that our server has been successfully configured, let's add a site to it by going on the "Sites" page accessible via the sidebar.
First, click on "Advanced settings" to have access to all fields.
Then, enter the domain of your application that matches the DNS record created on Digital Ocean — in our case ploi.jollygood.app.
Finally — and that’s important — replace the “Web directory” and "Project directory" fields with /current/public and /current respectively. This is because, as we’ve seen in episode 4, when deploying with Deployer, a subfolder named current will be created pointing to the latest stable release. This will ensure Ploi knows where to run commands in our application and update the Nginx configuration accordingly.
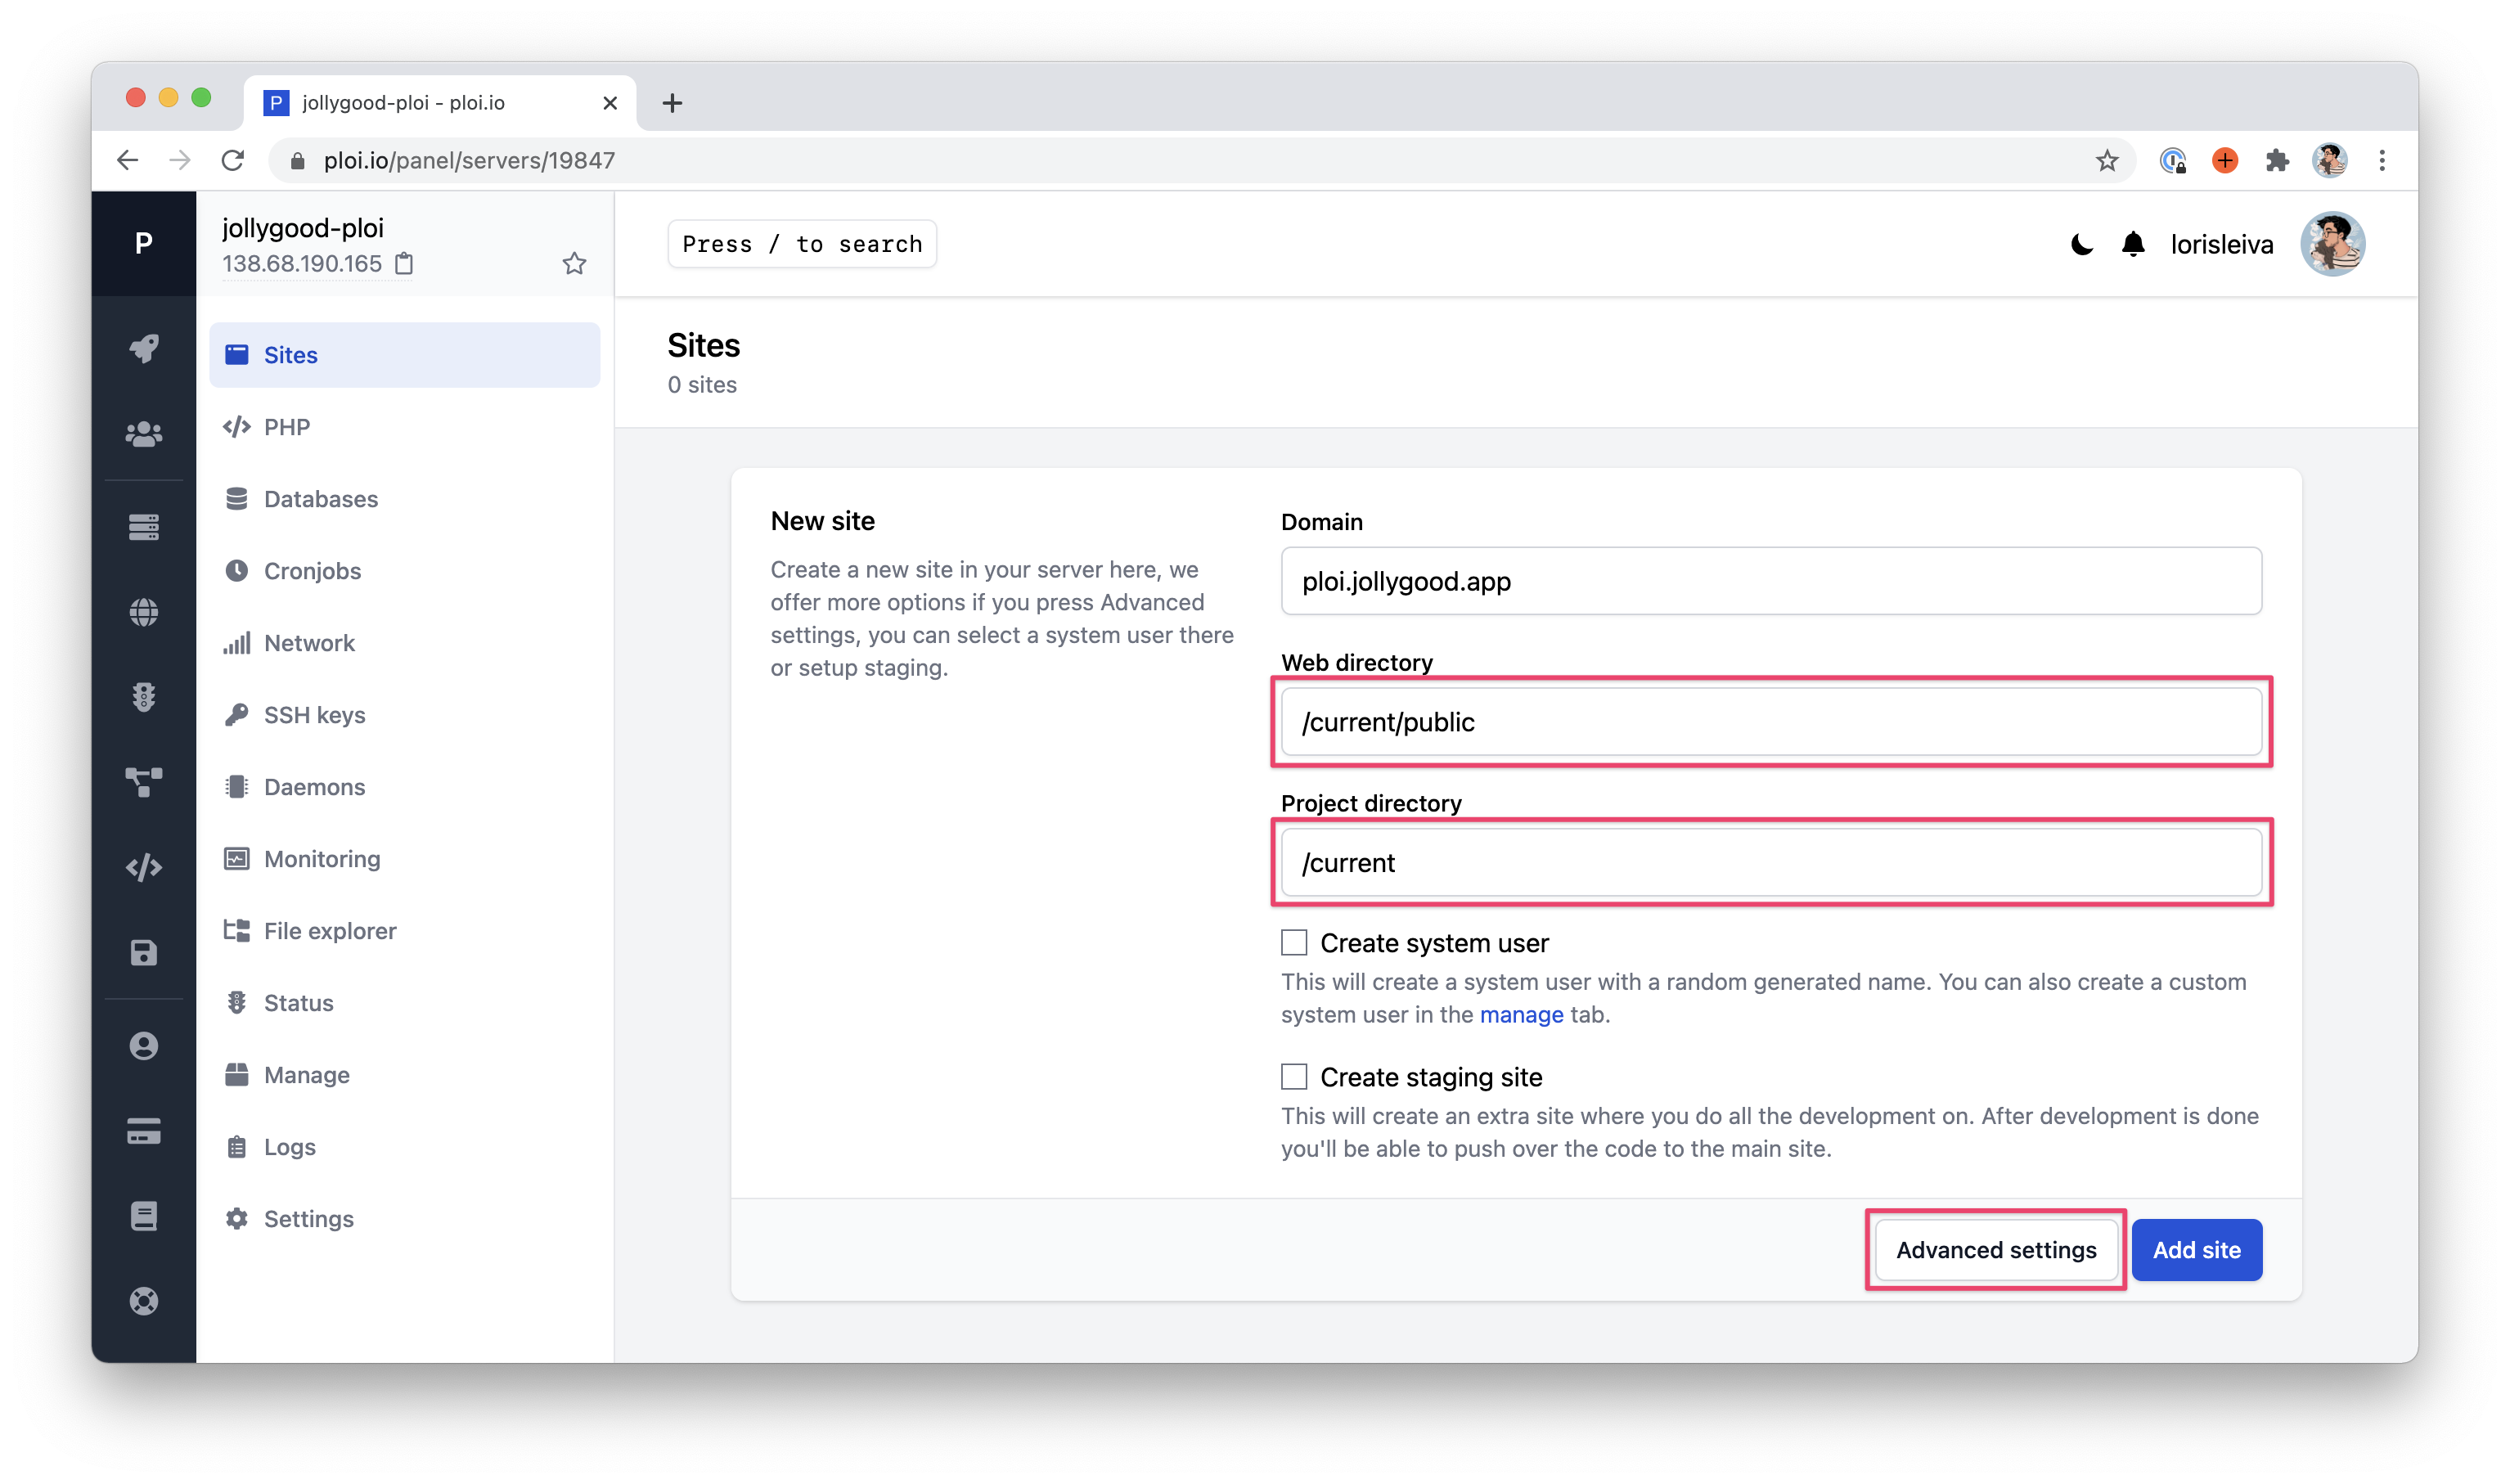
After clicking on “Add site”, you should see the following page.
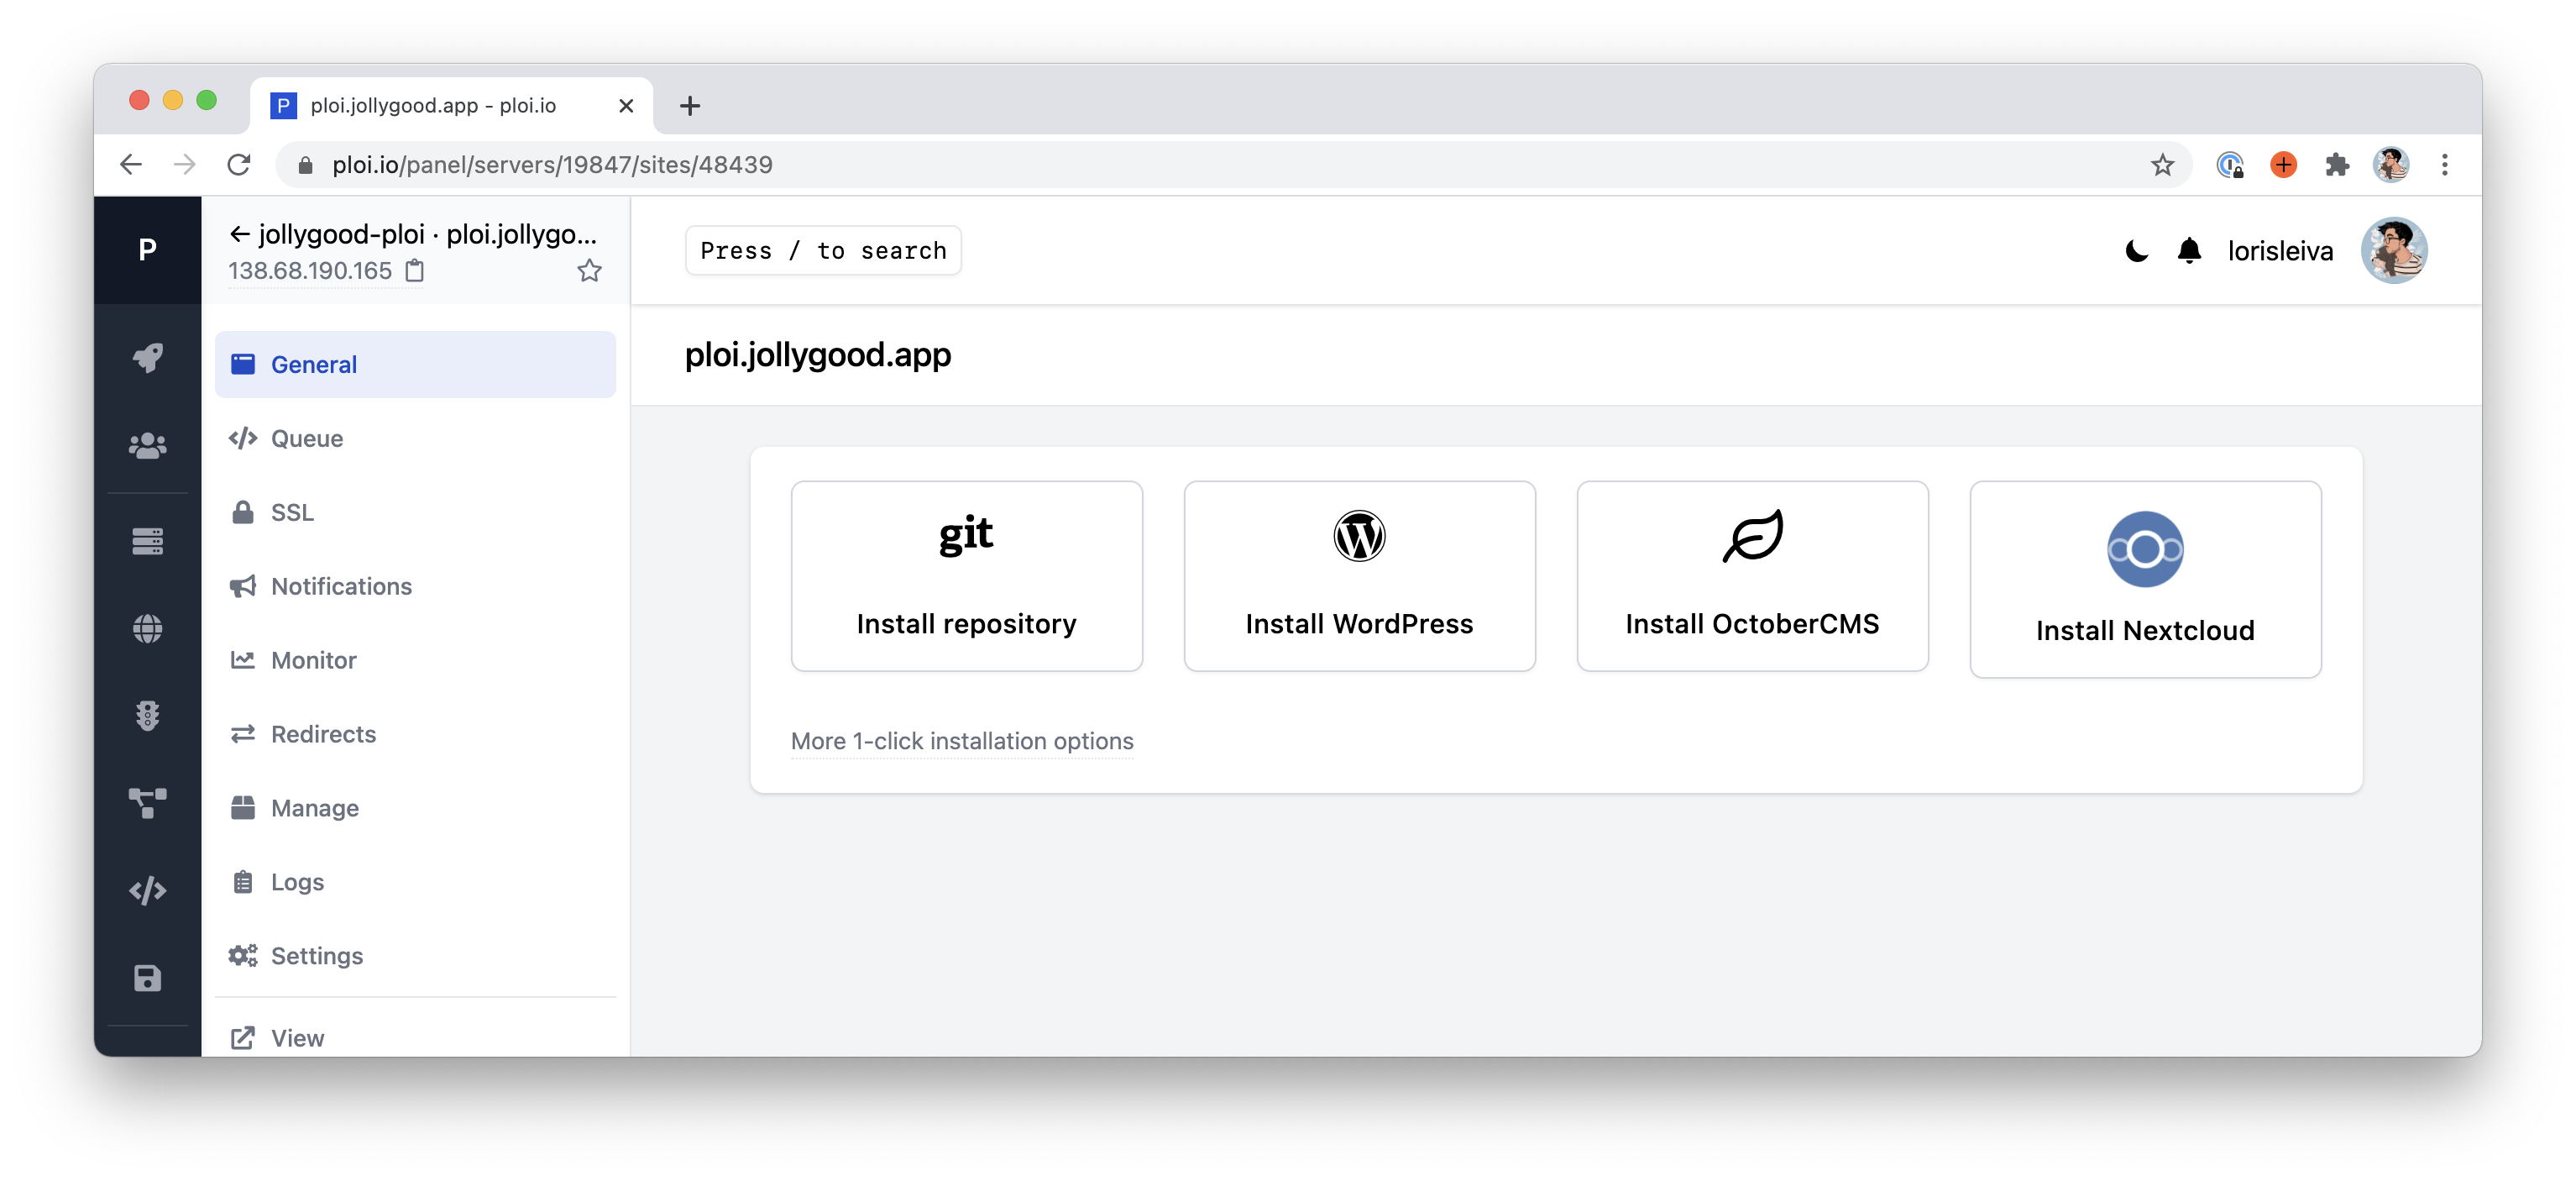
If we ignore the "1-click installation" options, Ploi is asking us to provide a Git repository so it can clone it inside the server for us.
Technically, we’ve got no need for that since we’ll be deploying using Deployer who already knows our repository URL. However, if we don’t, the user interface for our new site will be locked in this state which is not very helpful to maintain it.
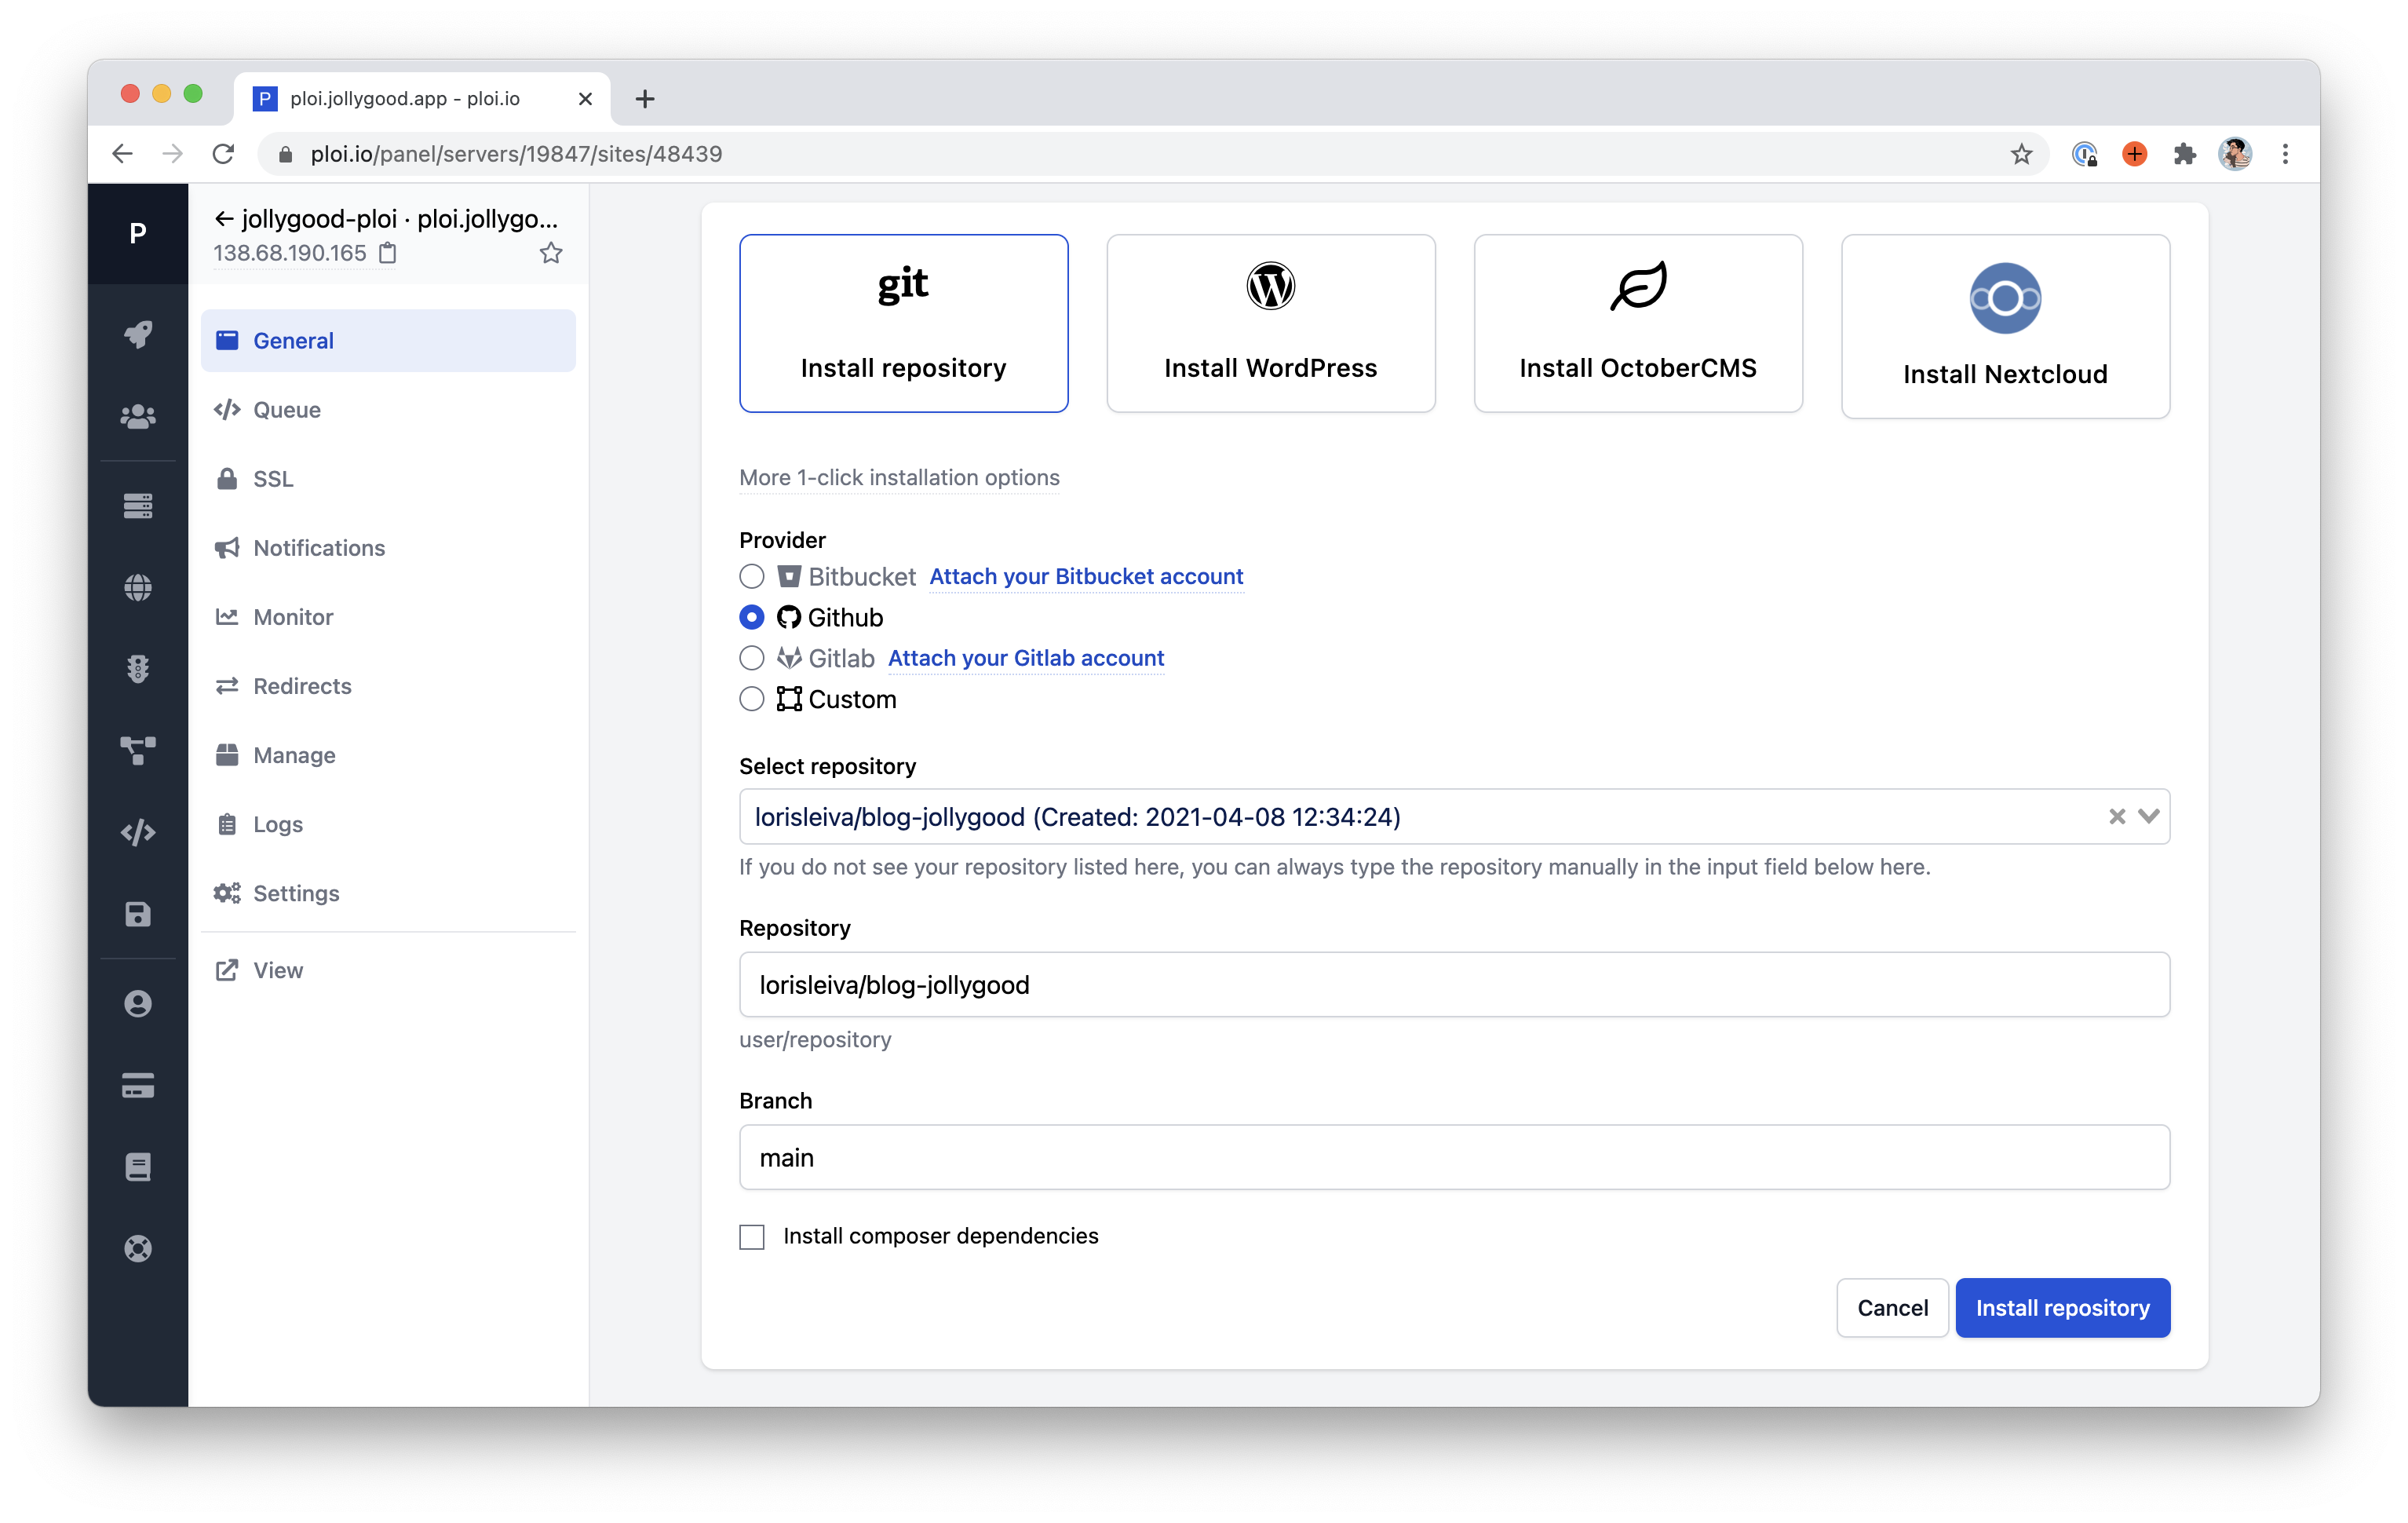
Thus, we’re going to play the game and add our Git repository even though we’ll re-deploy using Deployer in a minute.
Choose the Git provider of your choice and select your repository. There’s no need to tick “Install composer dependencies” since we’re going to re-deploy in a minute.
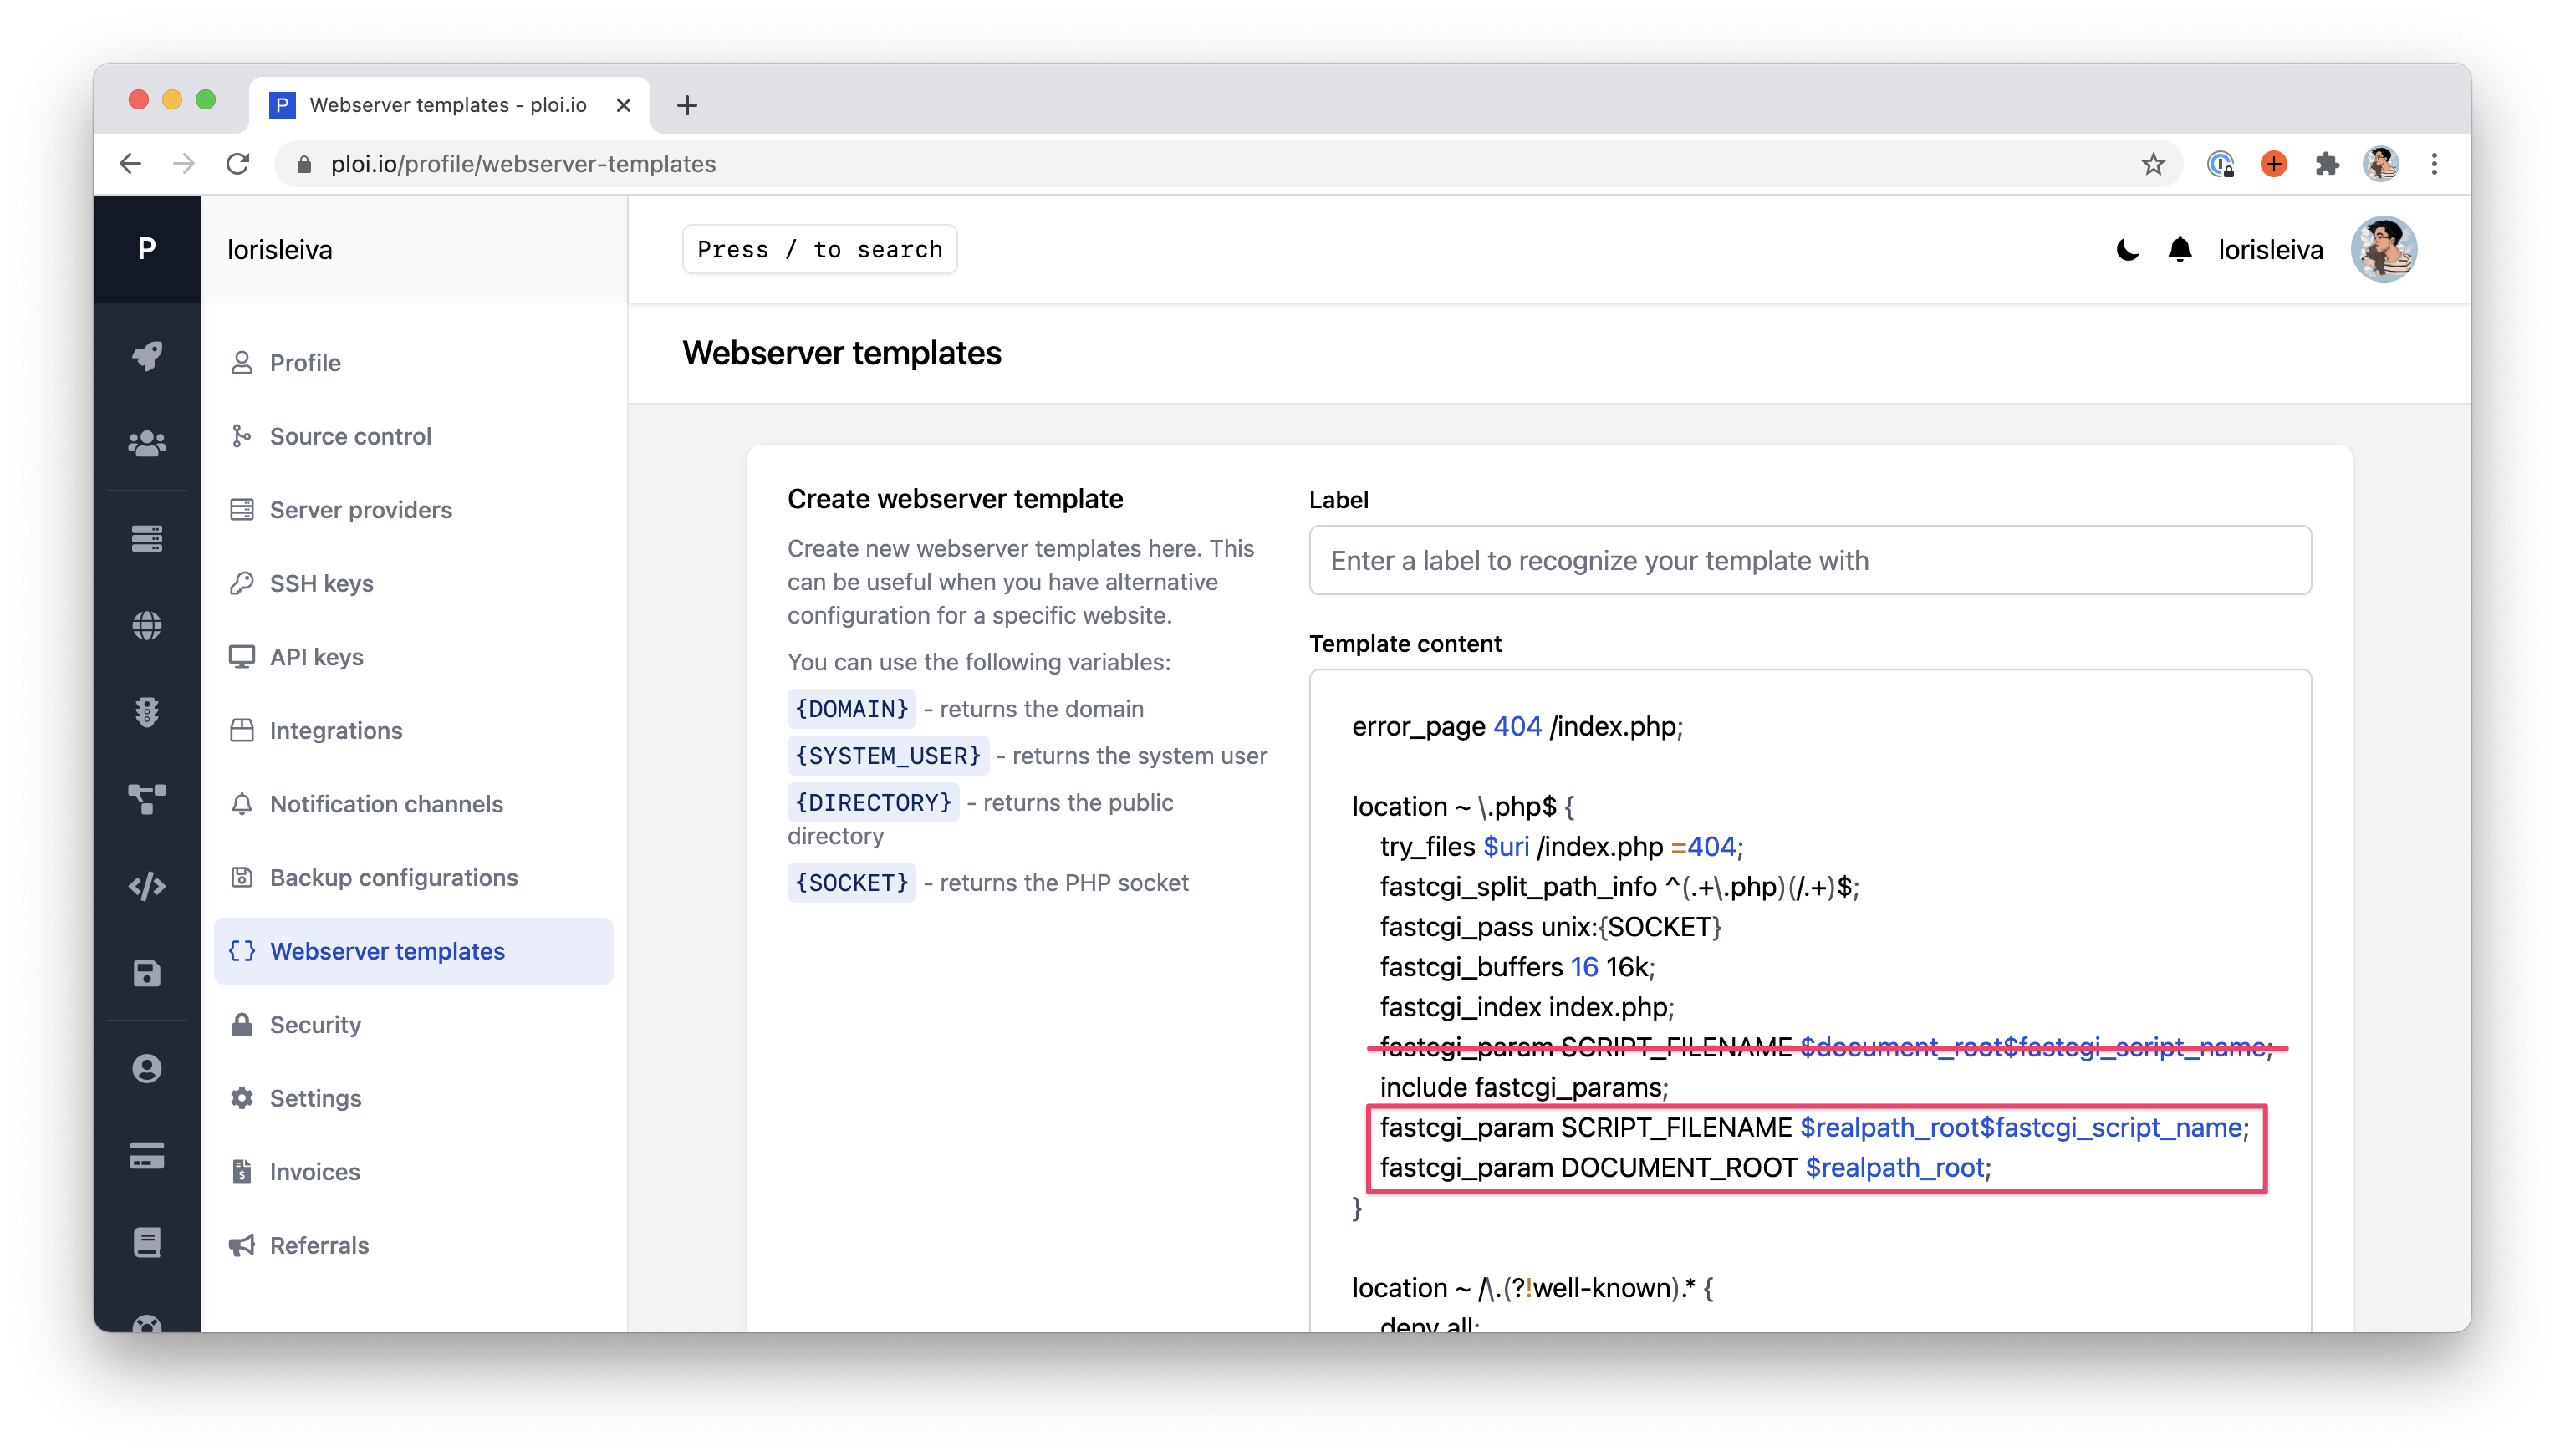
Next, there’s a little adjustment we need to make to our Nginx configuration file. If you remember, in episode 2, we mentioned that the SCRIPT_FILENAME and DOCUMENT_ROOT FastCGI parameters had to be overridden to use the real absolute path to avoid symlink paths being incorrectly cached. Since Ploi does not expect us to use Deployer by default, its Nginx configuration does not account for that. But that’s fine we can update this directly inside the UI.
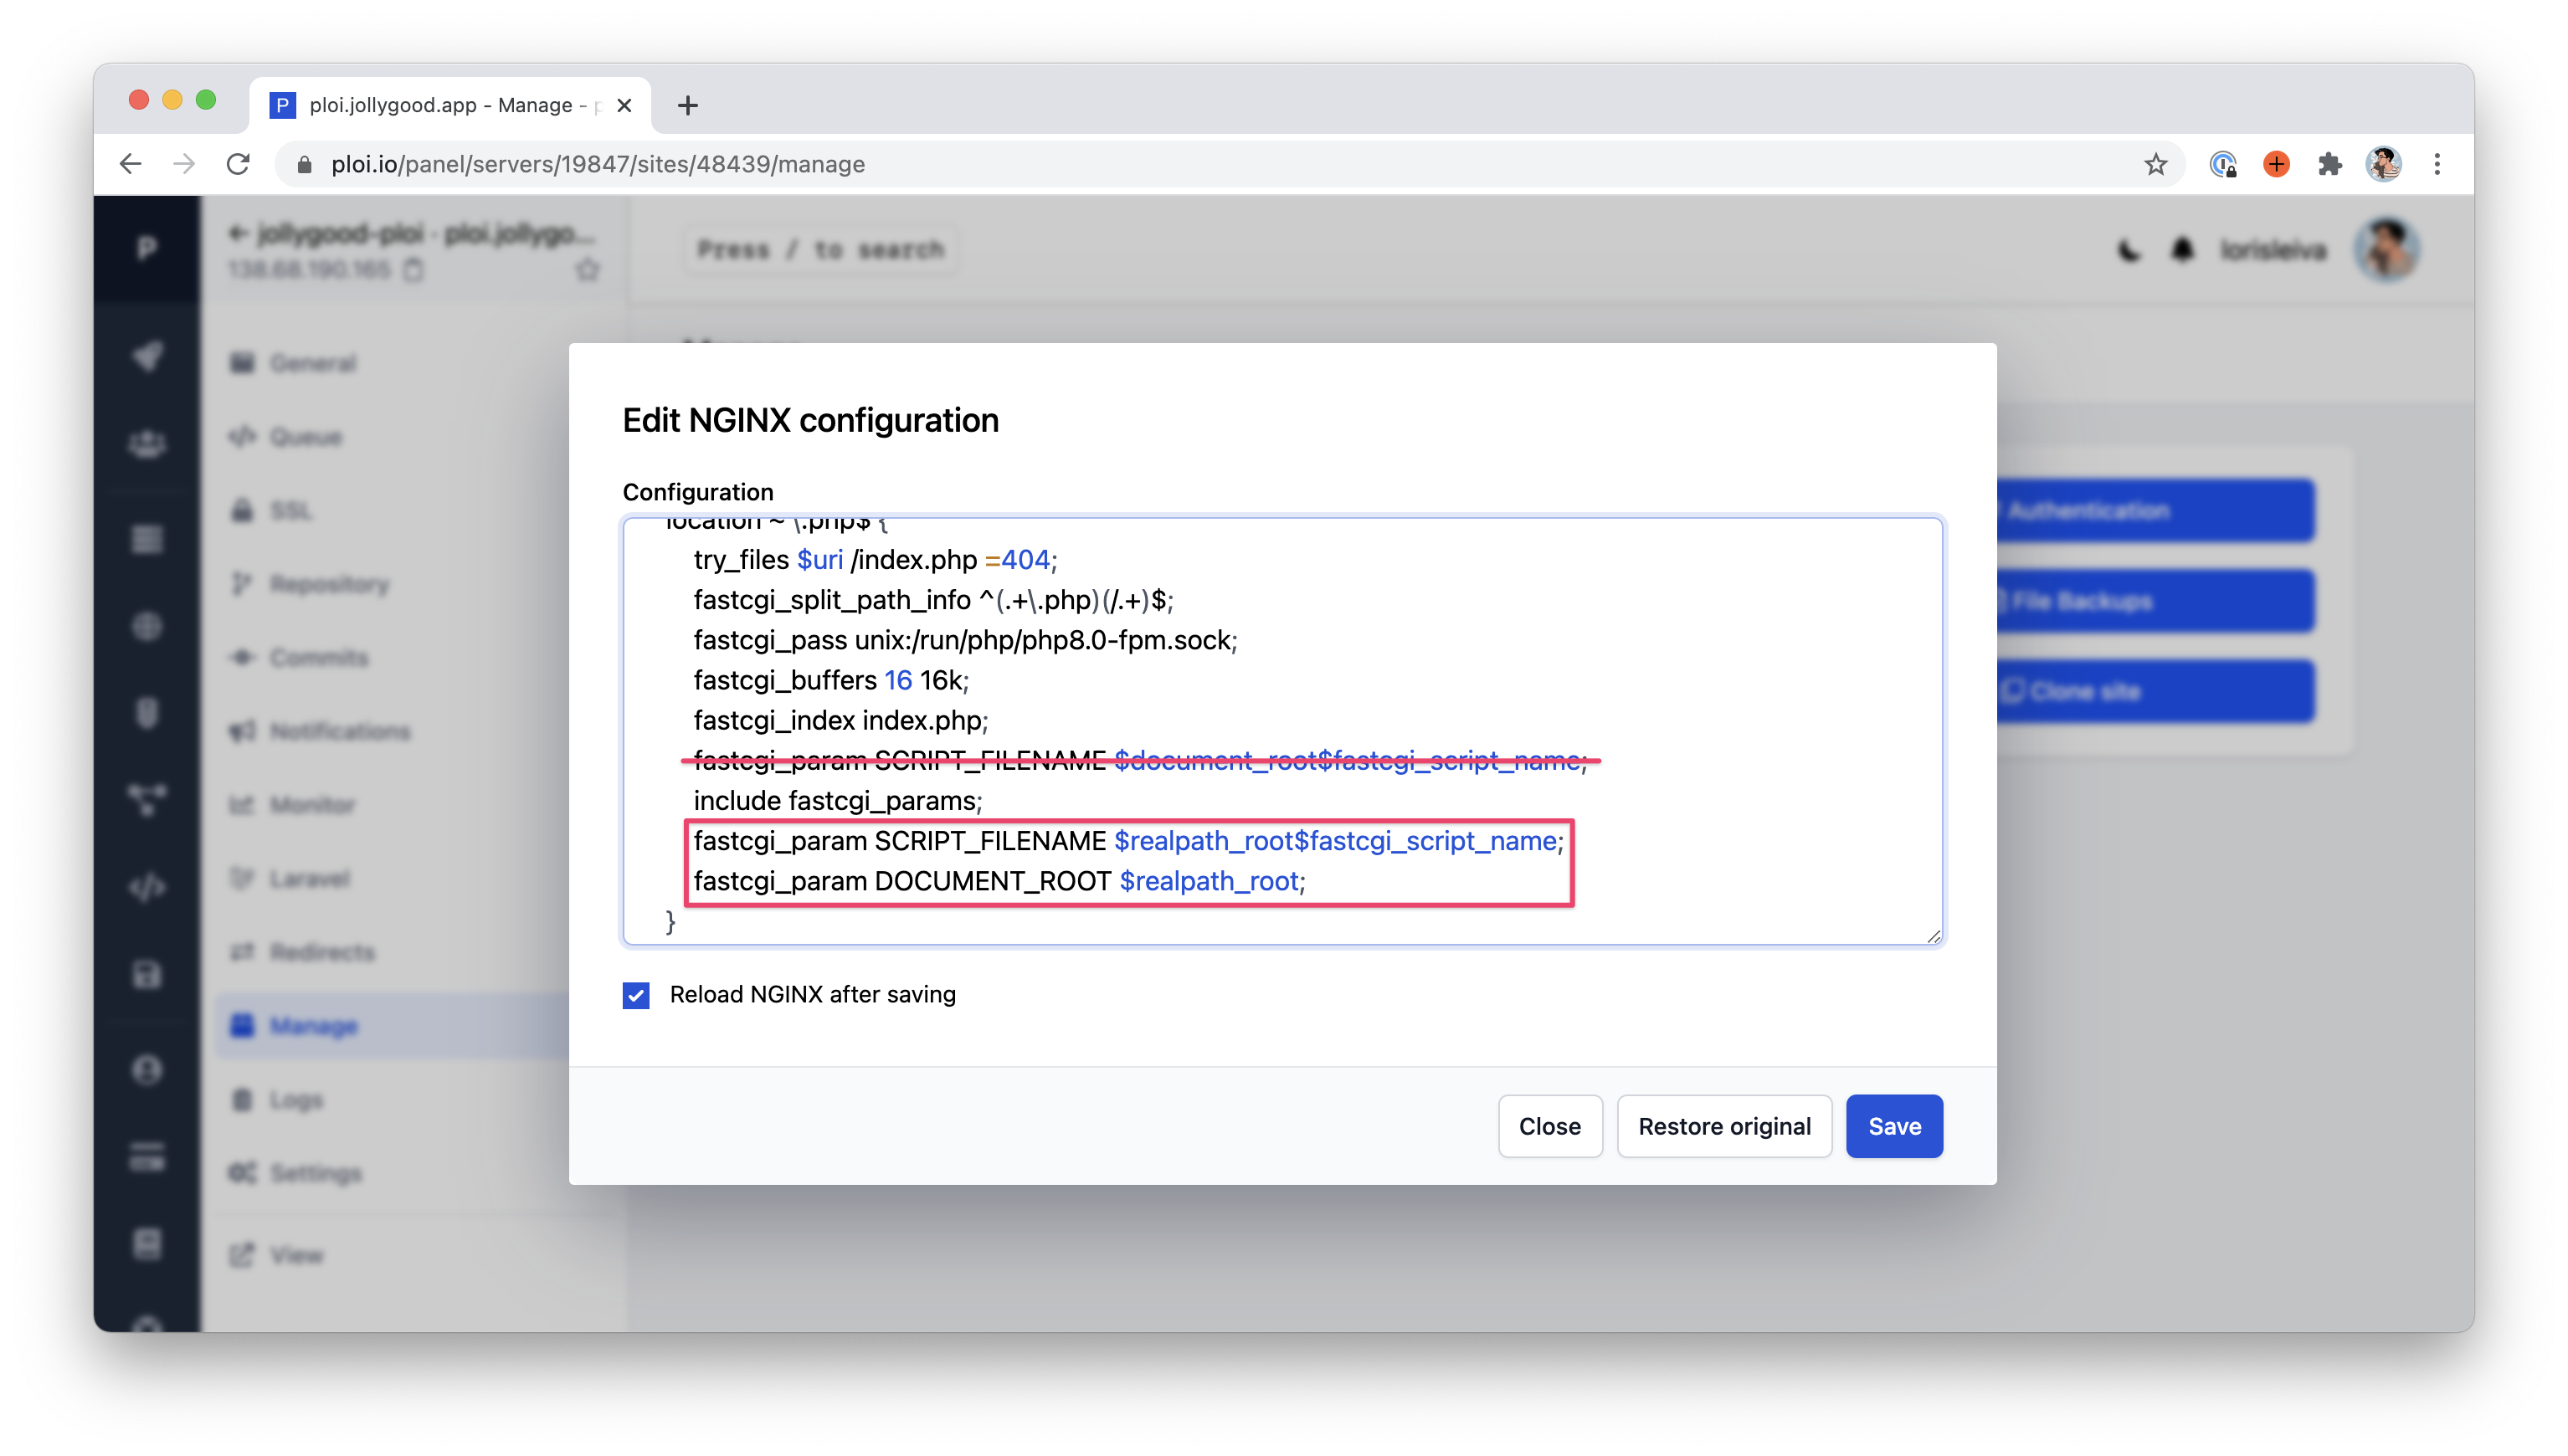
On your site's page, click on "Manage" from the sidebar. From there, you'll have a bunch of buttons to manage your site including "Edit NGINX configuration". Click on that button to open a modal allowing you to edit your Nginx config file.
Then, add the following lines after include fastcgi_params and remove the line before it since we're already overriding it.
- fastcgi_param SCRIPT_FILENAME $document_root$fastcgi_script_name;
  include fastcgi_params;
+ fastcgi_param SCRIPT_FILENAME $realpath_root$fastcgi_script_name;
+ fastcgi_param DOCUMENT_ROOT $realpath_root;
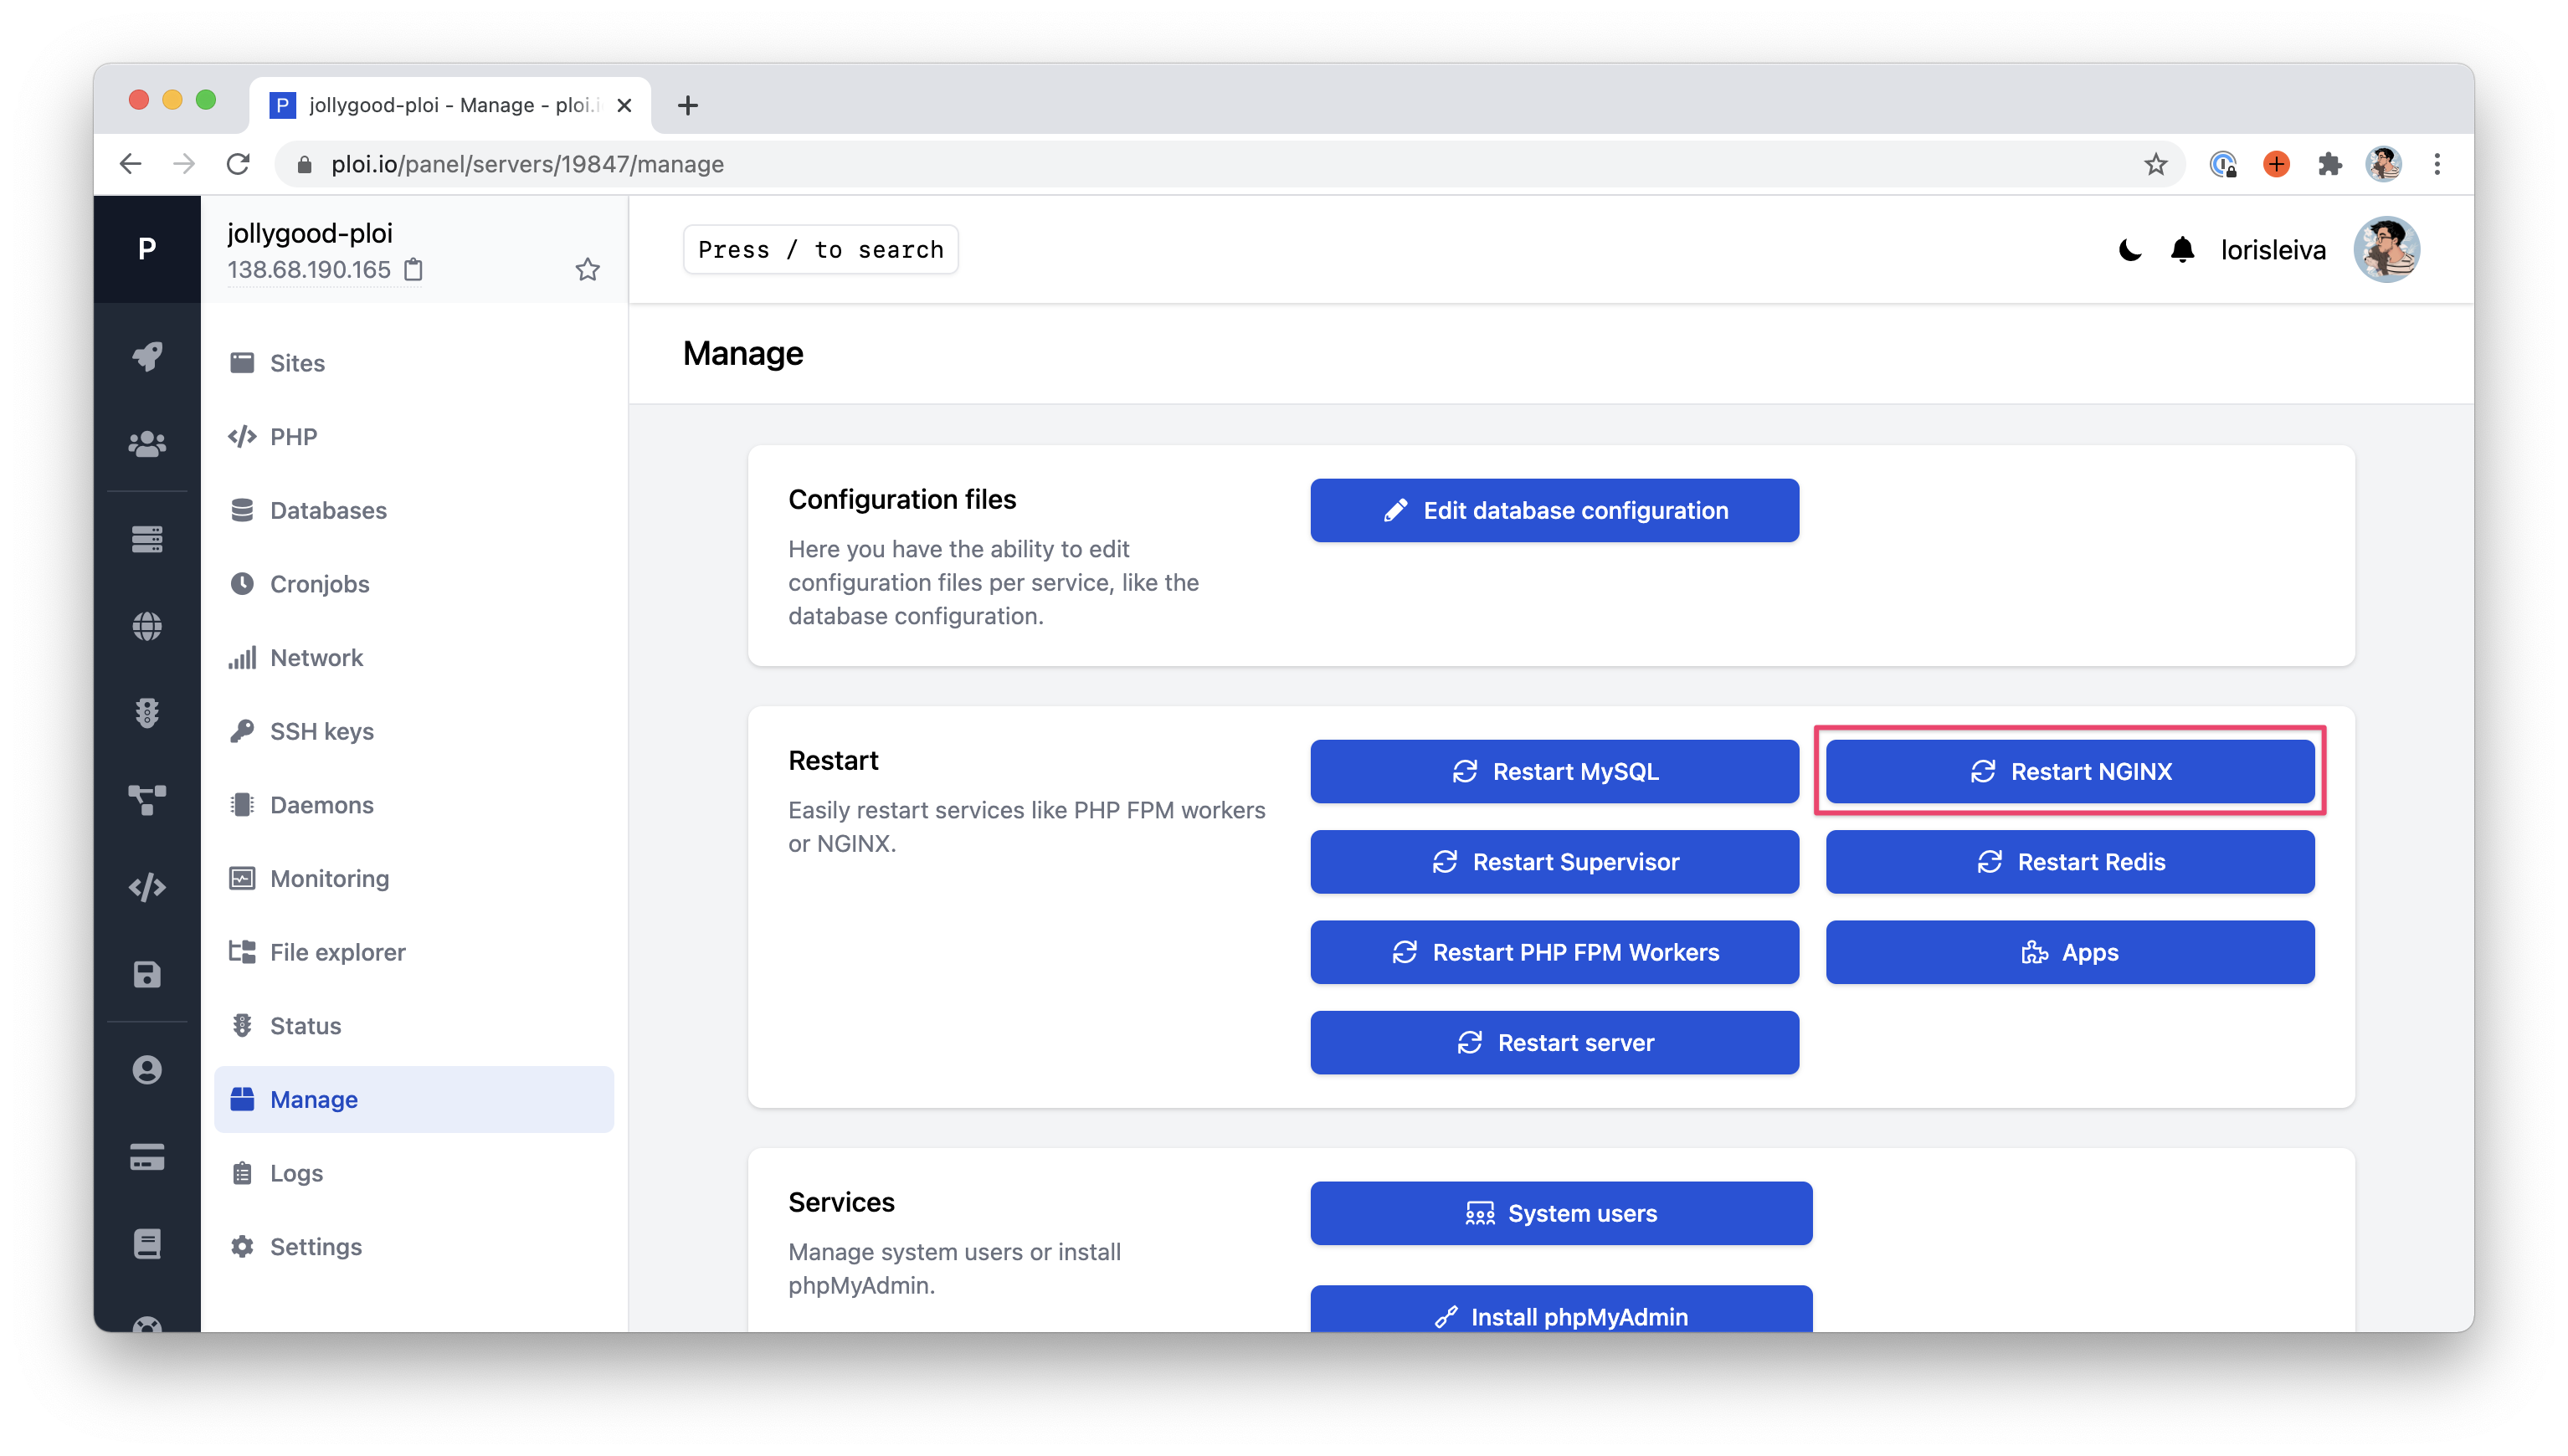
After that, make sure to restart Nginx to apply your changes. Go to your server's page, click on "Manage" on the sidebar and click on the "Restart NGINX" button.
If you’re planning on using Deployer for a lot of sites in the future, you may also create a new Nginx template that will be used instead of the default one. To do that, go to your profile’s page, click on “Webserver templates” on the sidebar and create a new template by adding the two lines above and removing the overridden line.
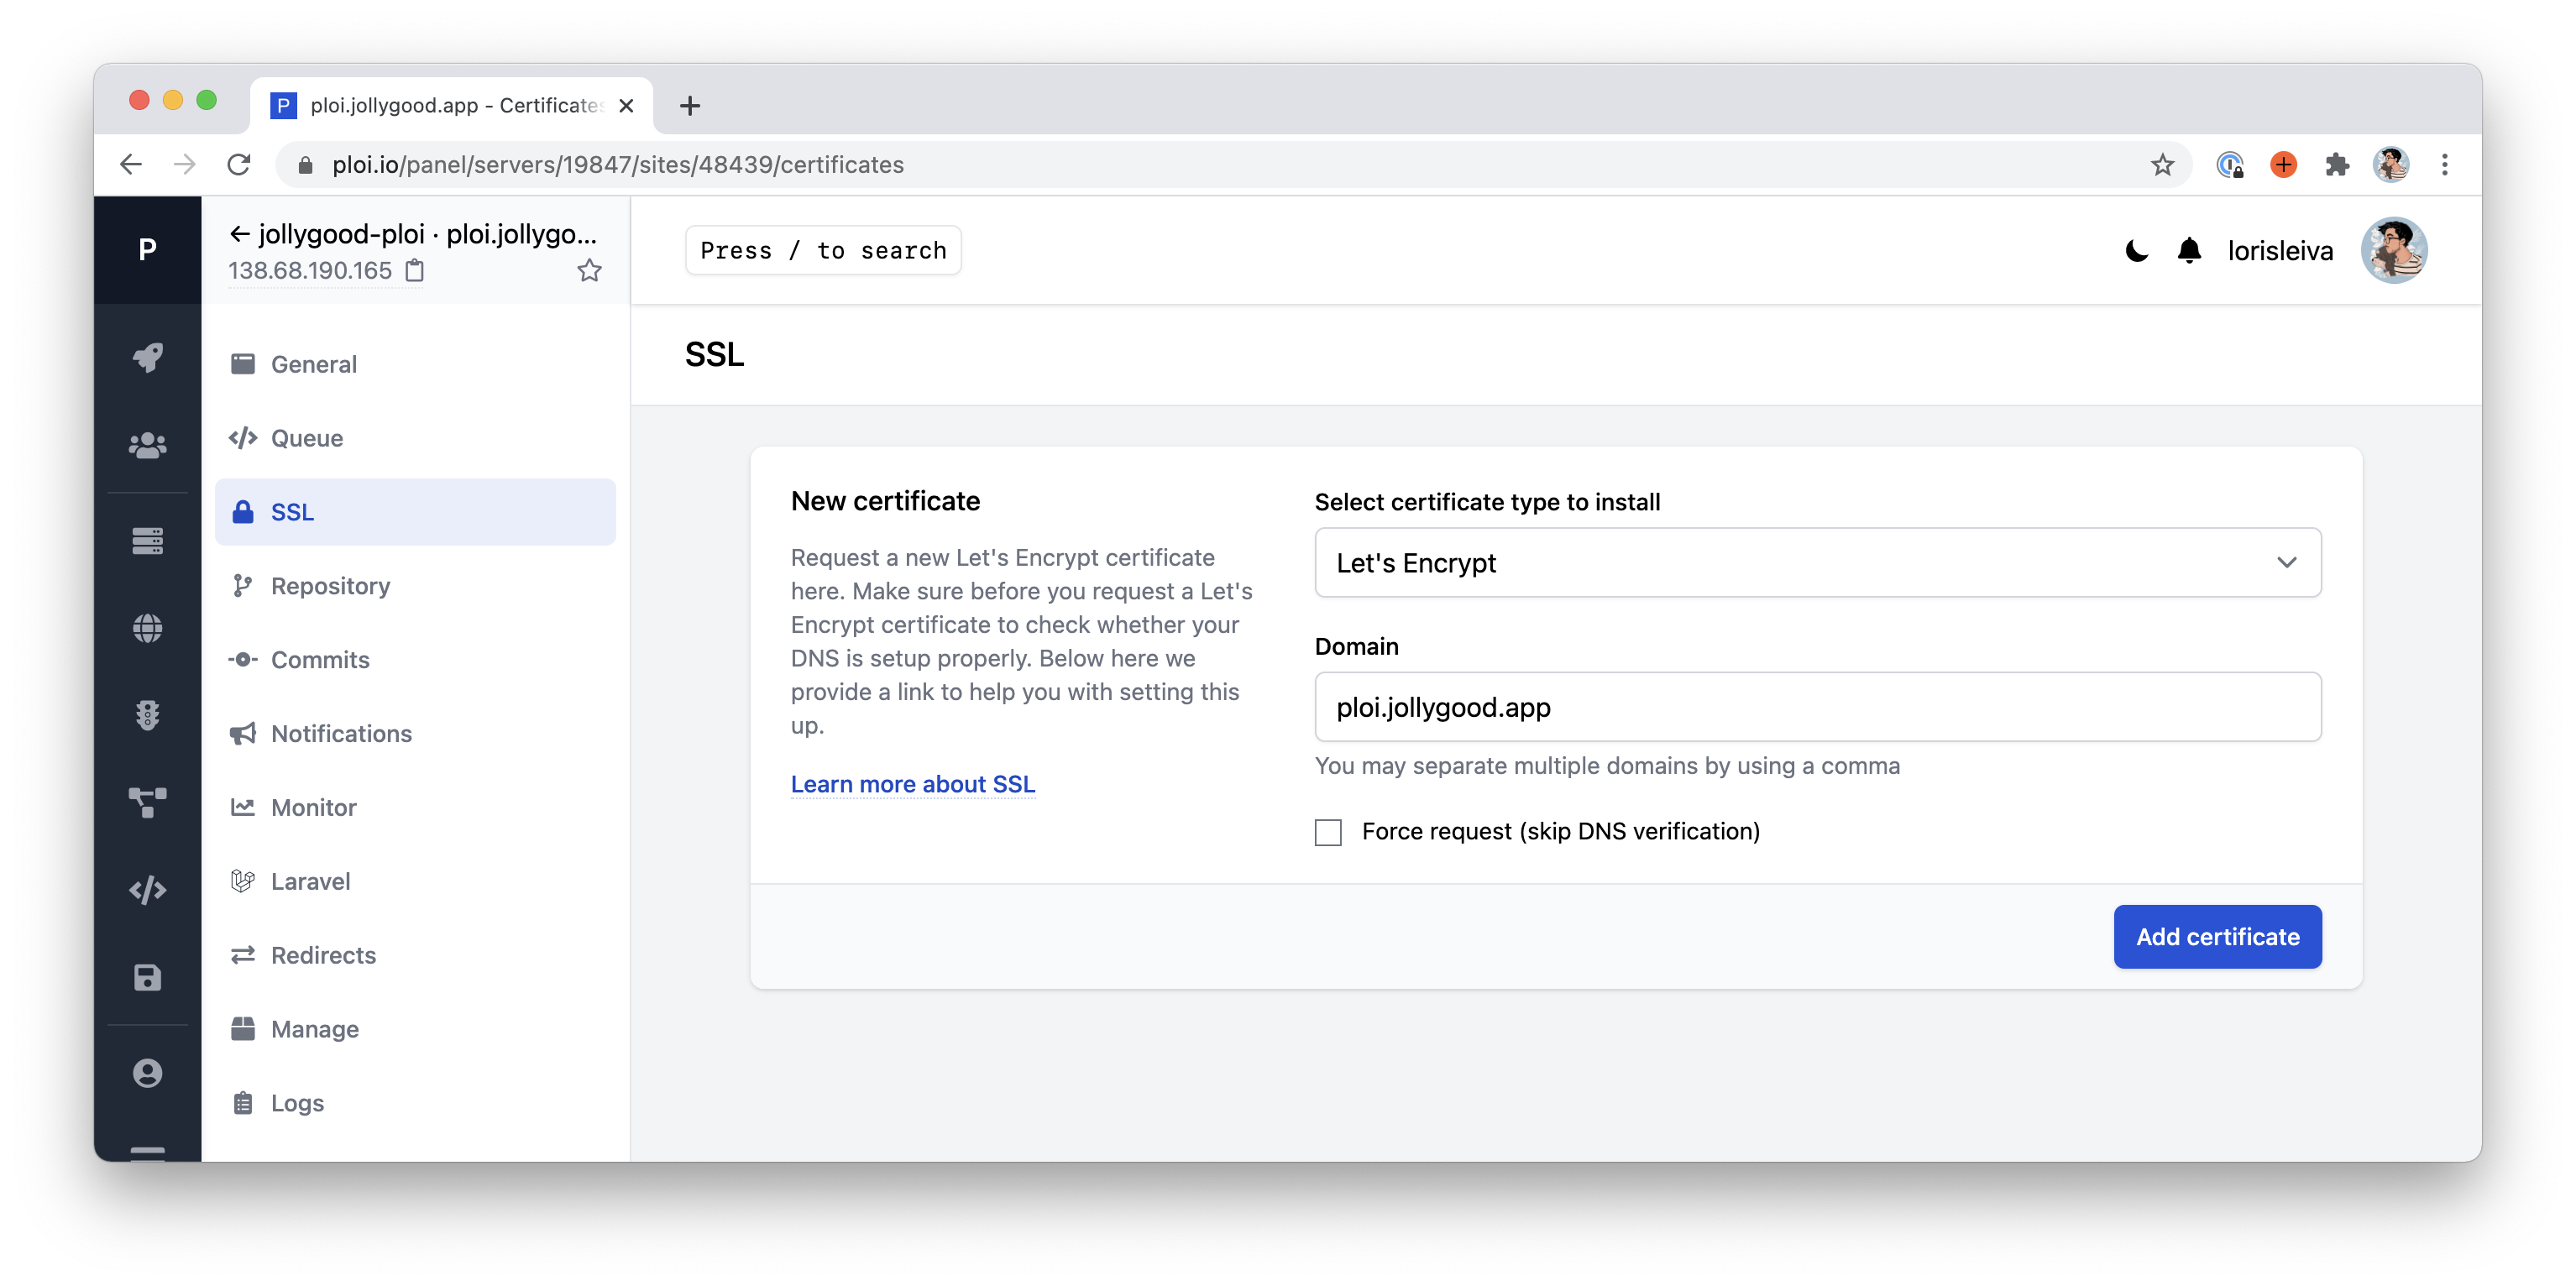
Finally, let’s make sure our domain is available via HTTPS. Ploi makes this super easy for us. On your site’s page, click on “SSL” on the sidebar and select “LetsEncrypt”.
Then make sure you enter the right domains and click “Add certificate”. And that’s it.
A Ploi friendly deploy.yaml
Okay, now that our server and our site are ready, let’s make sure we can deploy using Deployer.
For this article, I will use the same configuration file we ended up with after episode 4. However, I’m going to update the host configurations slightly so it works with Ploi.
- By default, we can access servers created on Ploi using the
ploiuser so we’ll use this asremote_user. - Then, we’ll use
ploi.jollygood.appas the hostname since we’ve created a DNS record that points to the IP address of our server. - Finally, Ploi installs our sites in the home directory of the
ploiuser and uses the site’s domain to name the site’s folder. So we’ll use the same convention here and deploy to/home/ploi/ploi.jollygood.appwhich can be simplified to~/{{hostname}}.
Additionally, we need to make sure the php_fpm_version matches the PHP version of our server.
Thus, we end up with the following deploy.yaml file.
import:
  - recipe/laravel.php
  - contrib/php-fpm.php
  - contrib/npm.php

config:
  application: 'blog-jollygood'
  repository: '[email protected]:lorisleiva/blog-jollygood.git'
  php_fpm_version: '8.0'

hosts:
  prod:
    remote_user: ploi
    hostname: 'ploi.jollygood.app'
    deploy_path: '~/{{hostname}}'

tasks:
  deploy:
    - deploy:prepare
    - deploy:vendors
    - artisan:storage:link
    - artisan:view:cache
    - artisan:config:cache
    - artisan:migrate
    - npm:install
    - npm:run:prod
    - deploy:publish
    - php-fpm:reload
  npm:run:prod:
    - run: 'cd {{release_or_current_path}} && npm run prod'

after:
  deploy:failed: deploy:unlock
Deploy once
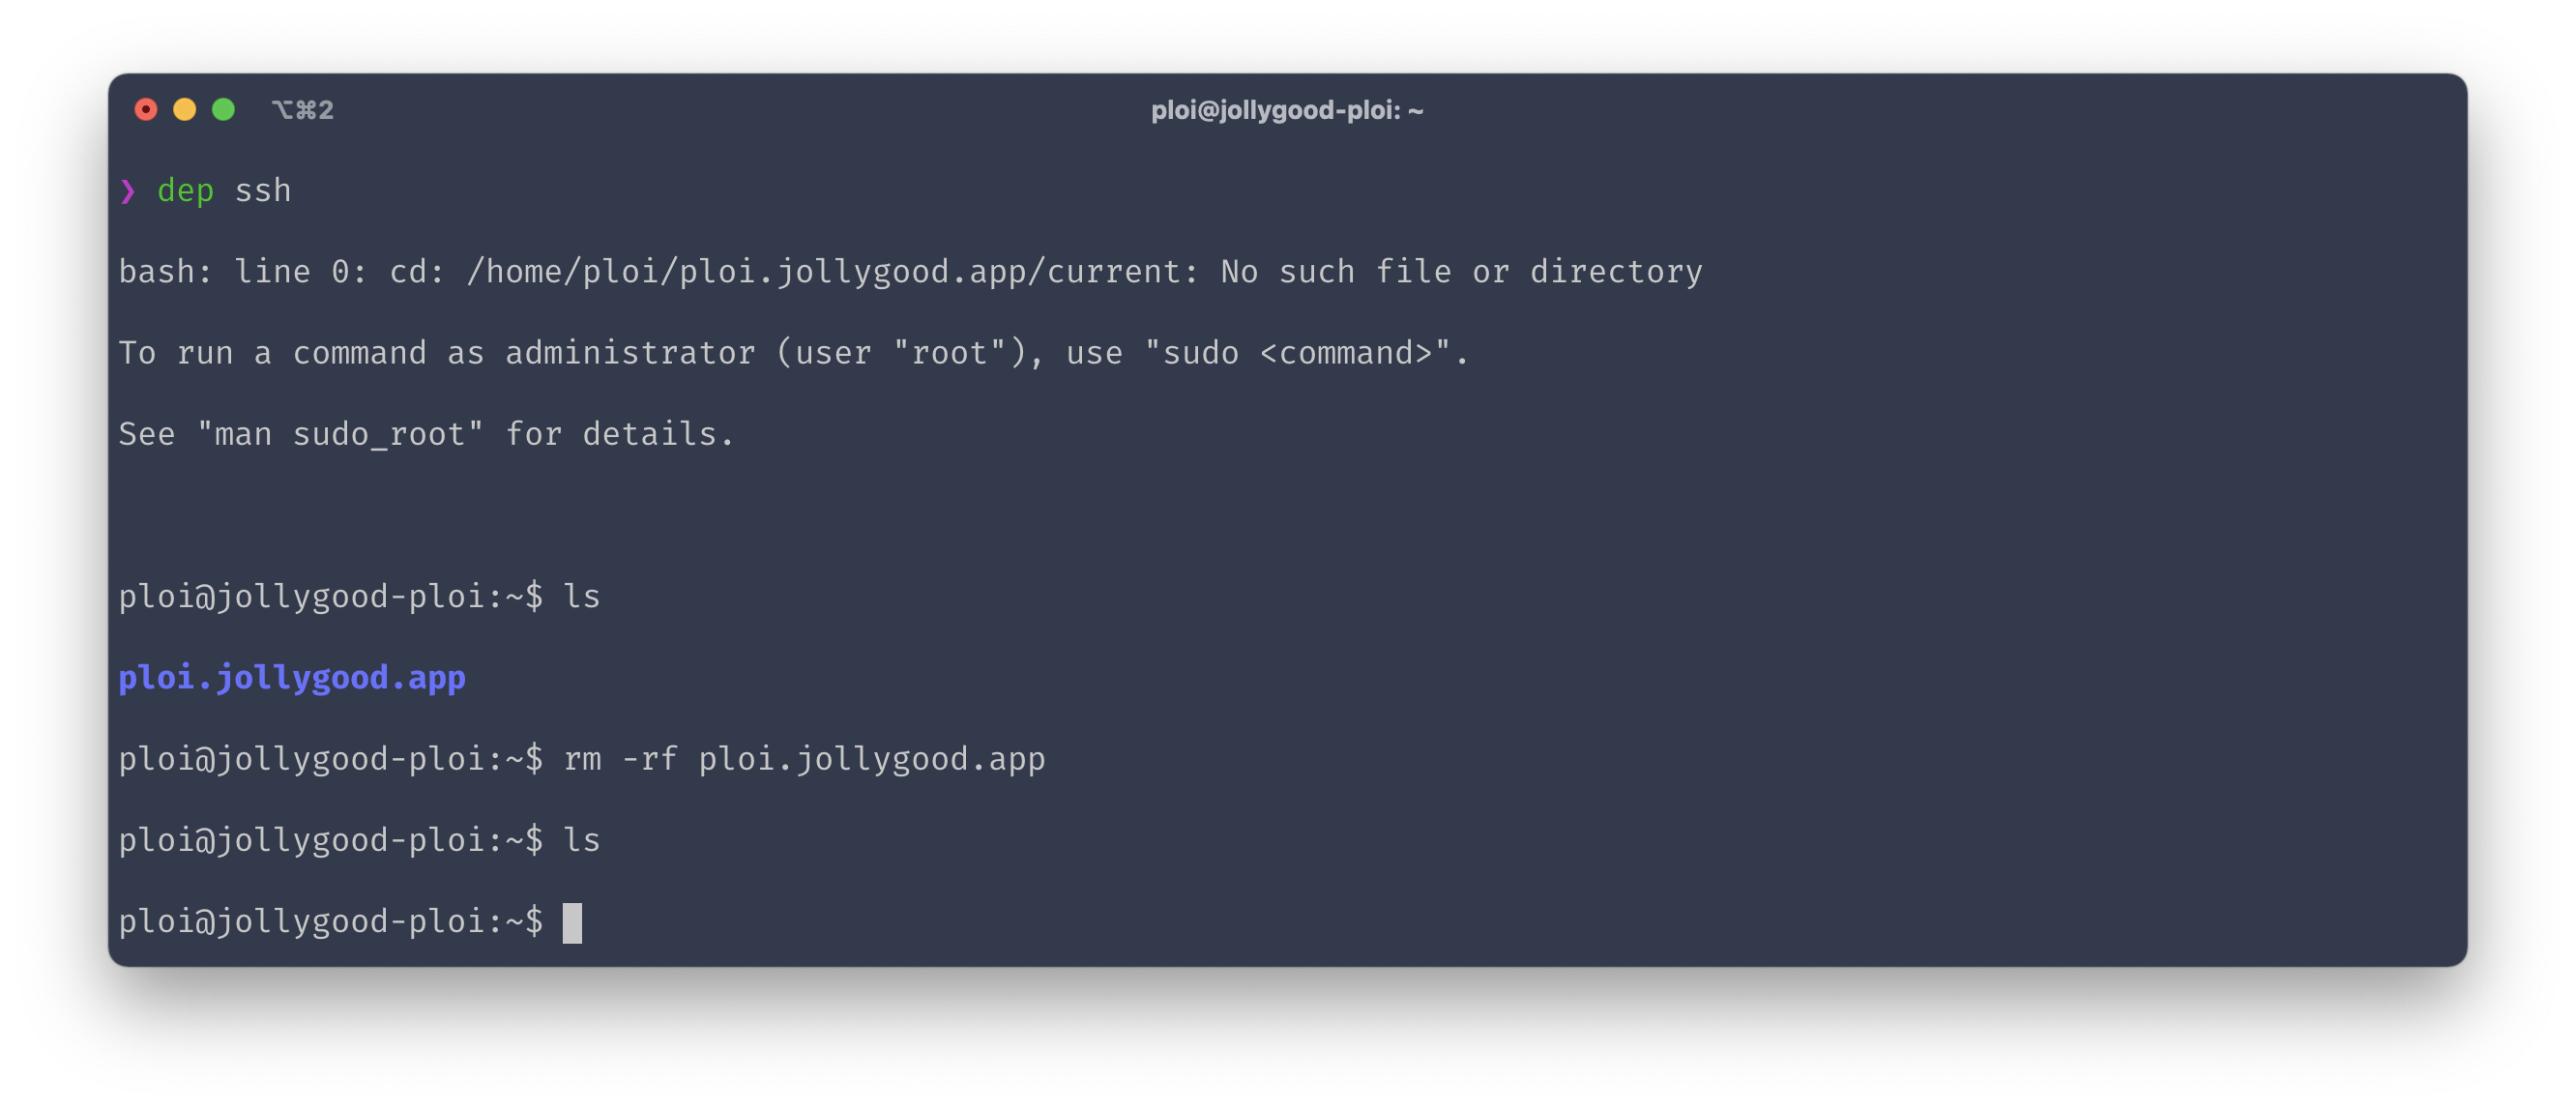
Okay now we should be ready to deploy but before we do let’s delete the folder generated by Ploi when we created our site.
Deployer will be generating a different folder structure with a releases folder and a current symlink. If we don’t delete the existing folder, we’ll end up with a strange fusion of Deployer and a traditional deployment.
Let’s SSH into our server by running dep ssh, then go to the home directory ~ and run rm -rf ploi.jollygood.app or whatever your domain is.
Whilst we're in our server, there's something extra we should install that was not provided by Ploi out-of-the-box. By default, Deployer uses the acl library to manage permissions which has to be installed on the server. Thus, we need to run the following command on our server to install it. Make sure to provide the sudo password received by email when the server was created.
sudo apt install acl
Alright, now we’re finally ready to deploy. Simply exit the server and run dep deploy. You should see the following familiar console output.

If you remember, the artisan:migrate did not run because our .env file has been generated in Deployer’s shared folder but it is empty. So let’s fix this.
First, we’ll copy the .env.example file and generate an application key randomly.
# SSH into your server.
dep ssh

# Prepare the .env file.
cp .env.example .env
php artisan key:generate

# Exit your server.
exit
Now, if you remember, in episode 4, we had to edit our .env file directly inside our server using vim.
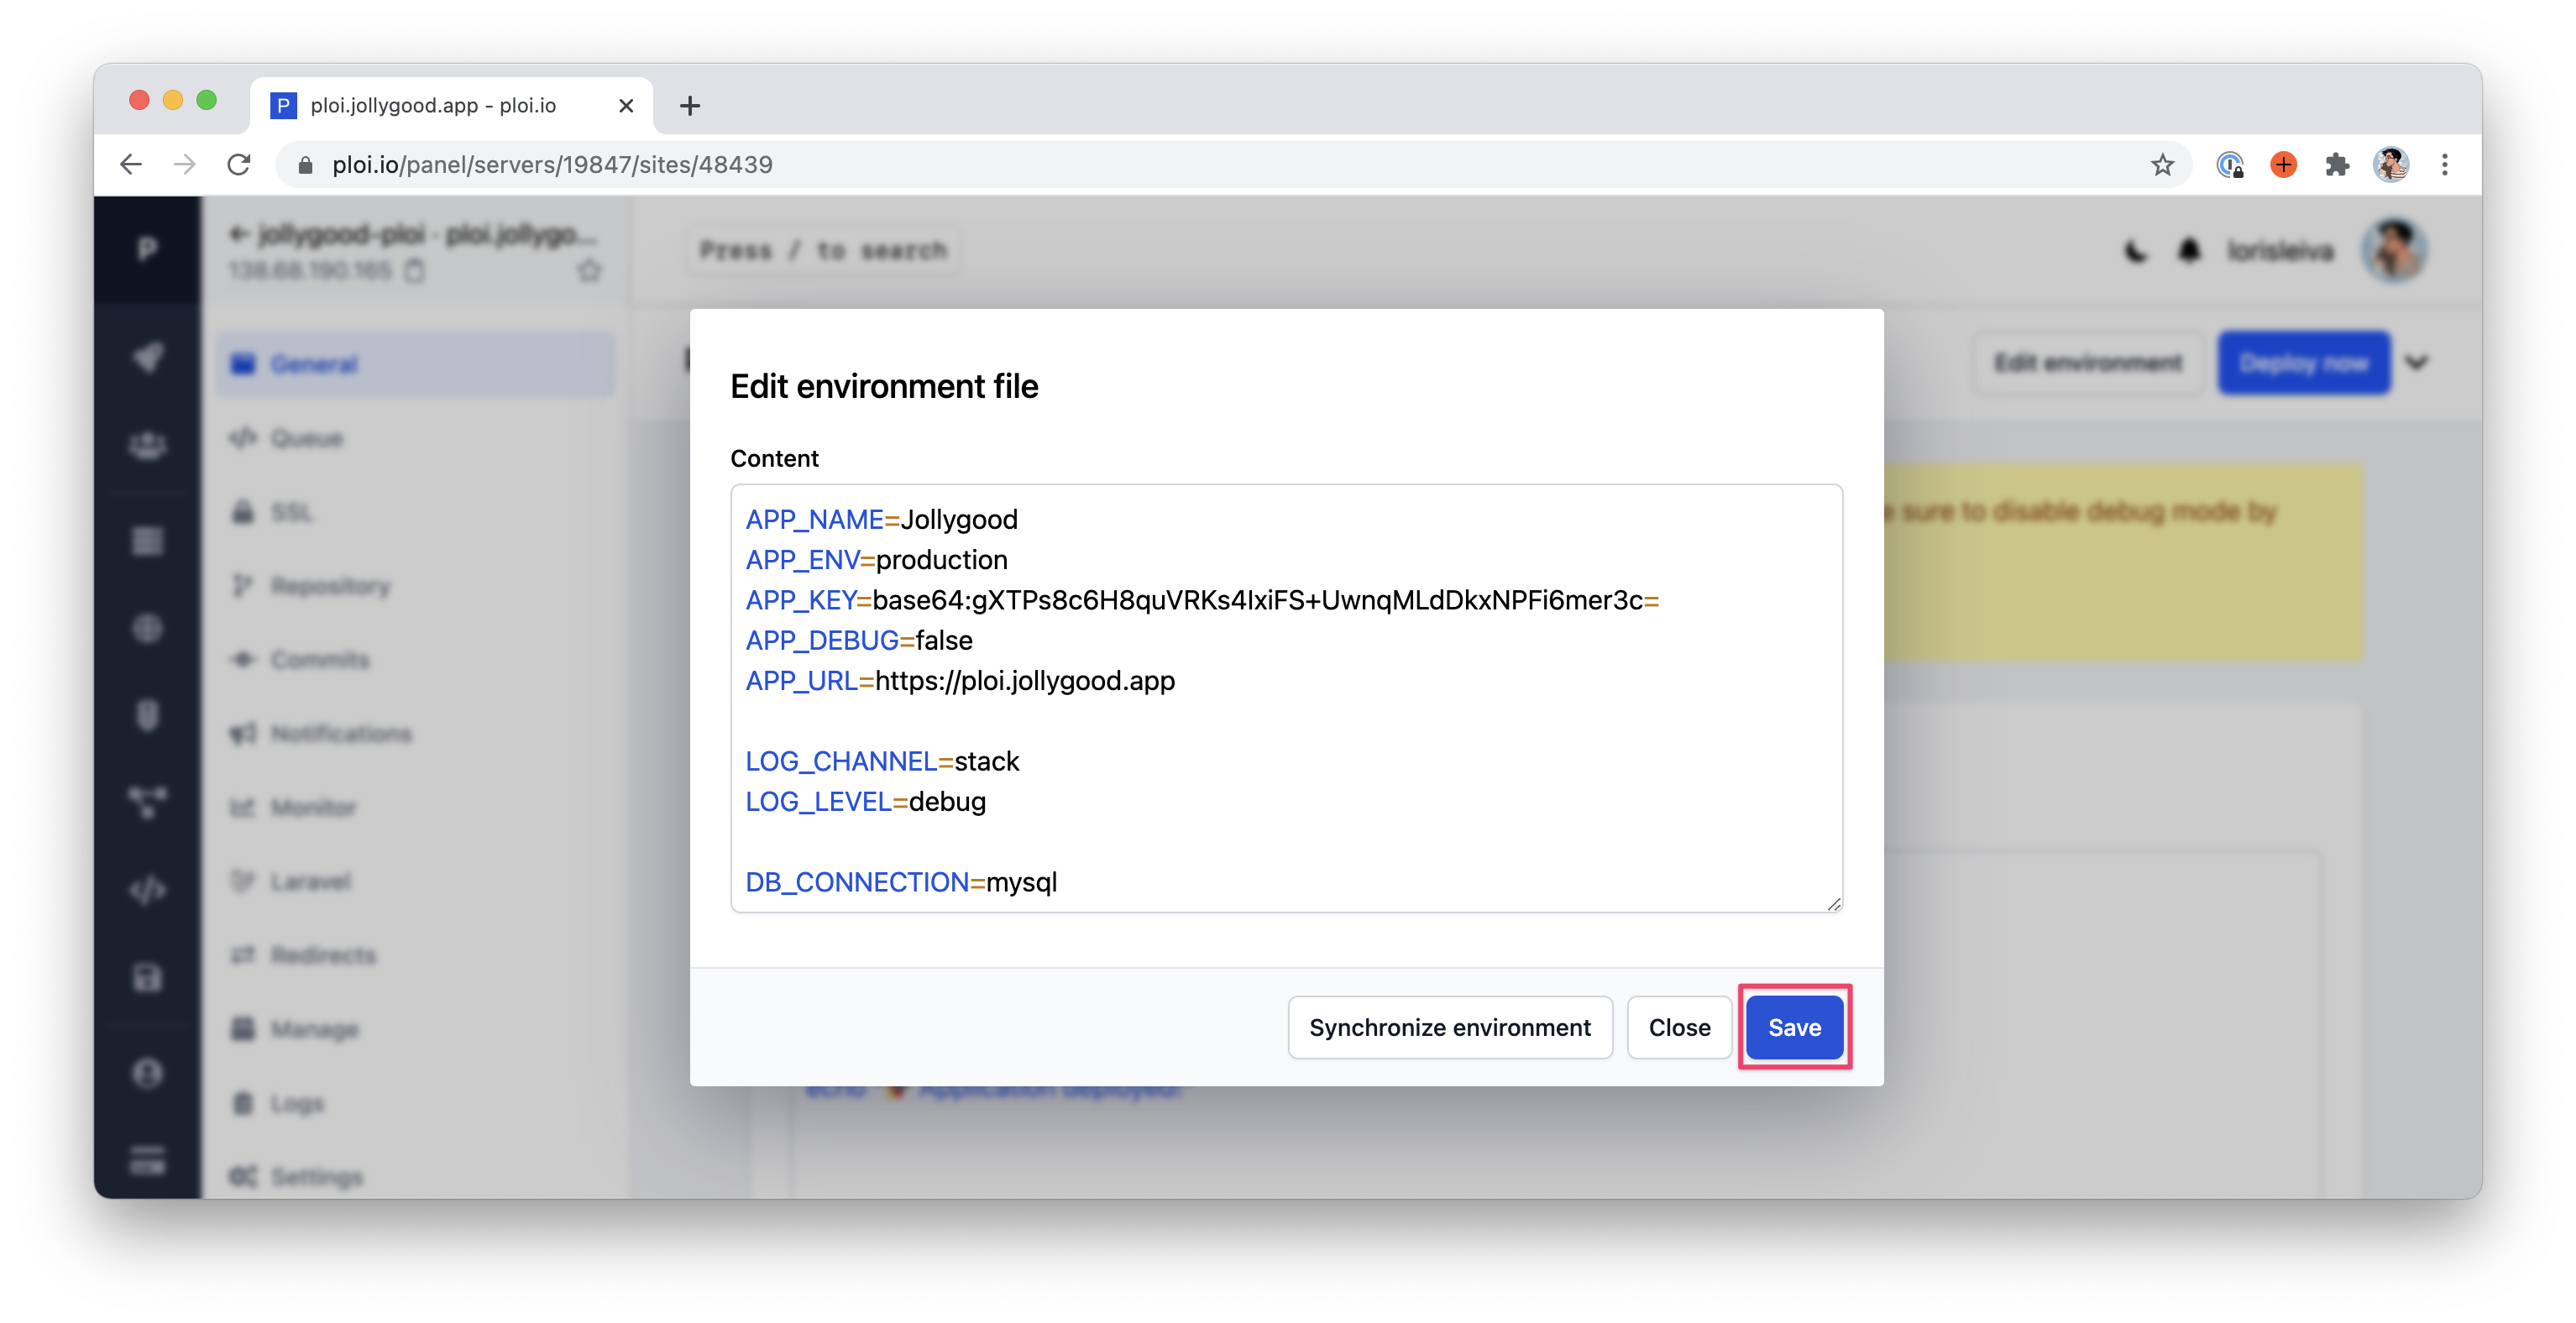
We can still do that, but Ploi provides a nice interface for us to update our .env directly from their application. Simply go to the "Site > General" page and you should see an "Edit environment" button on the right.
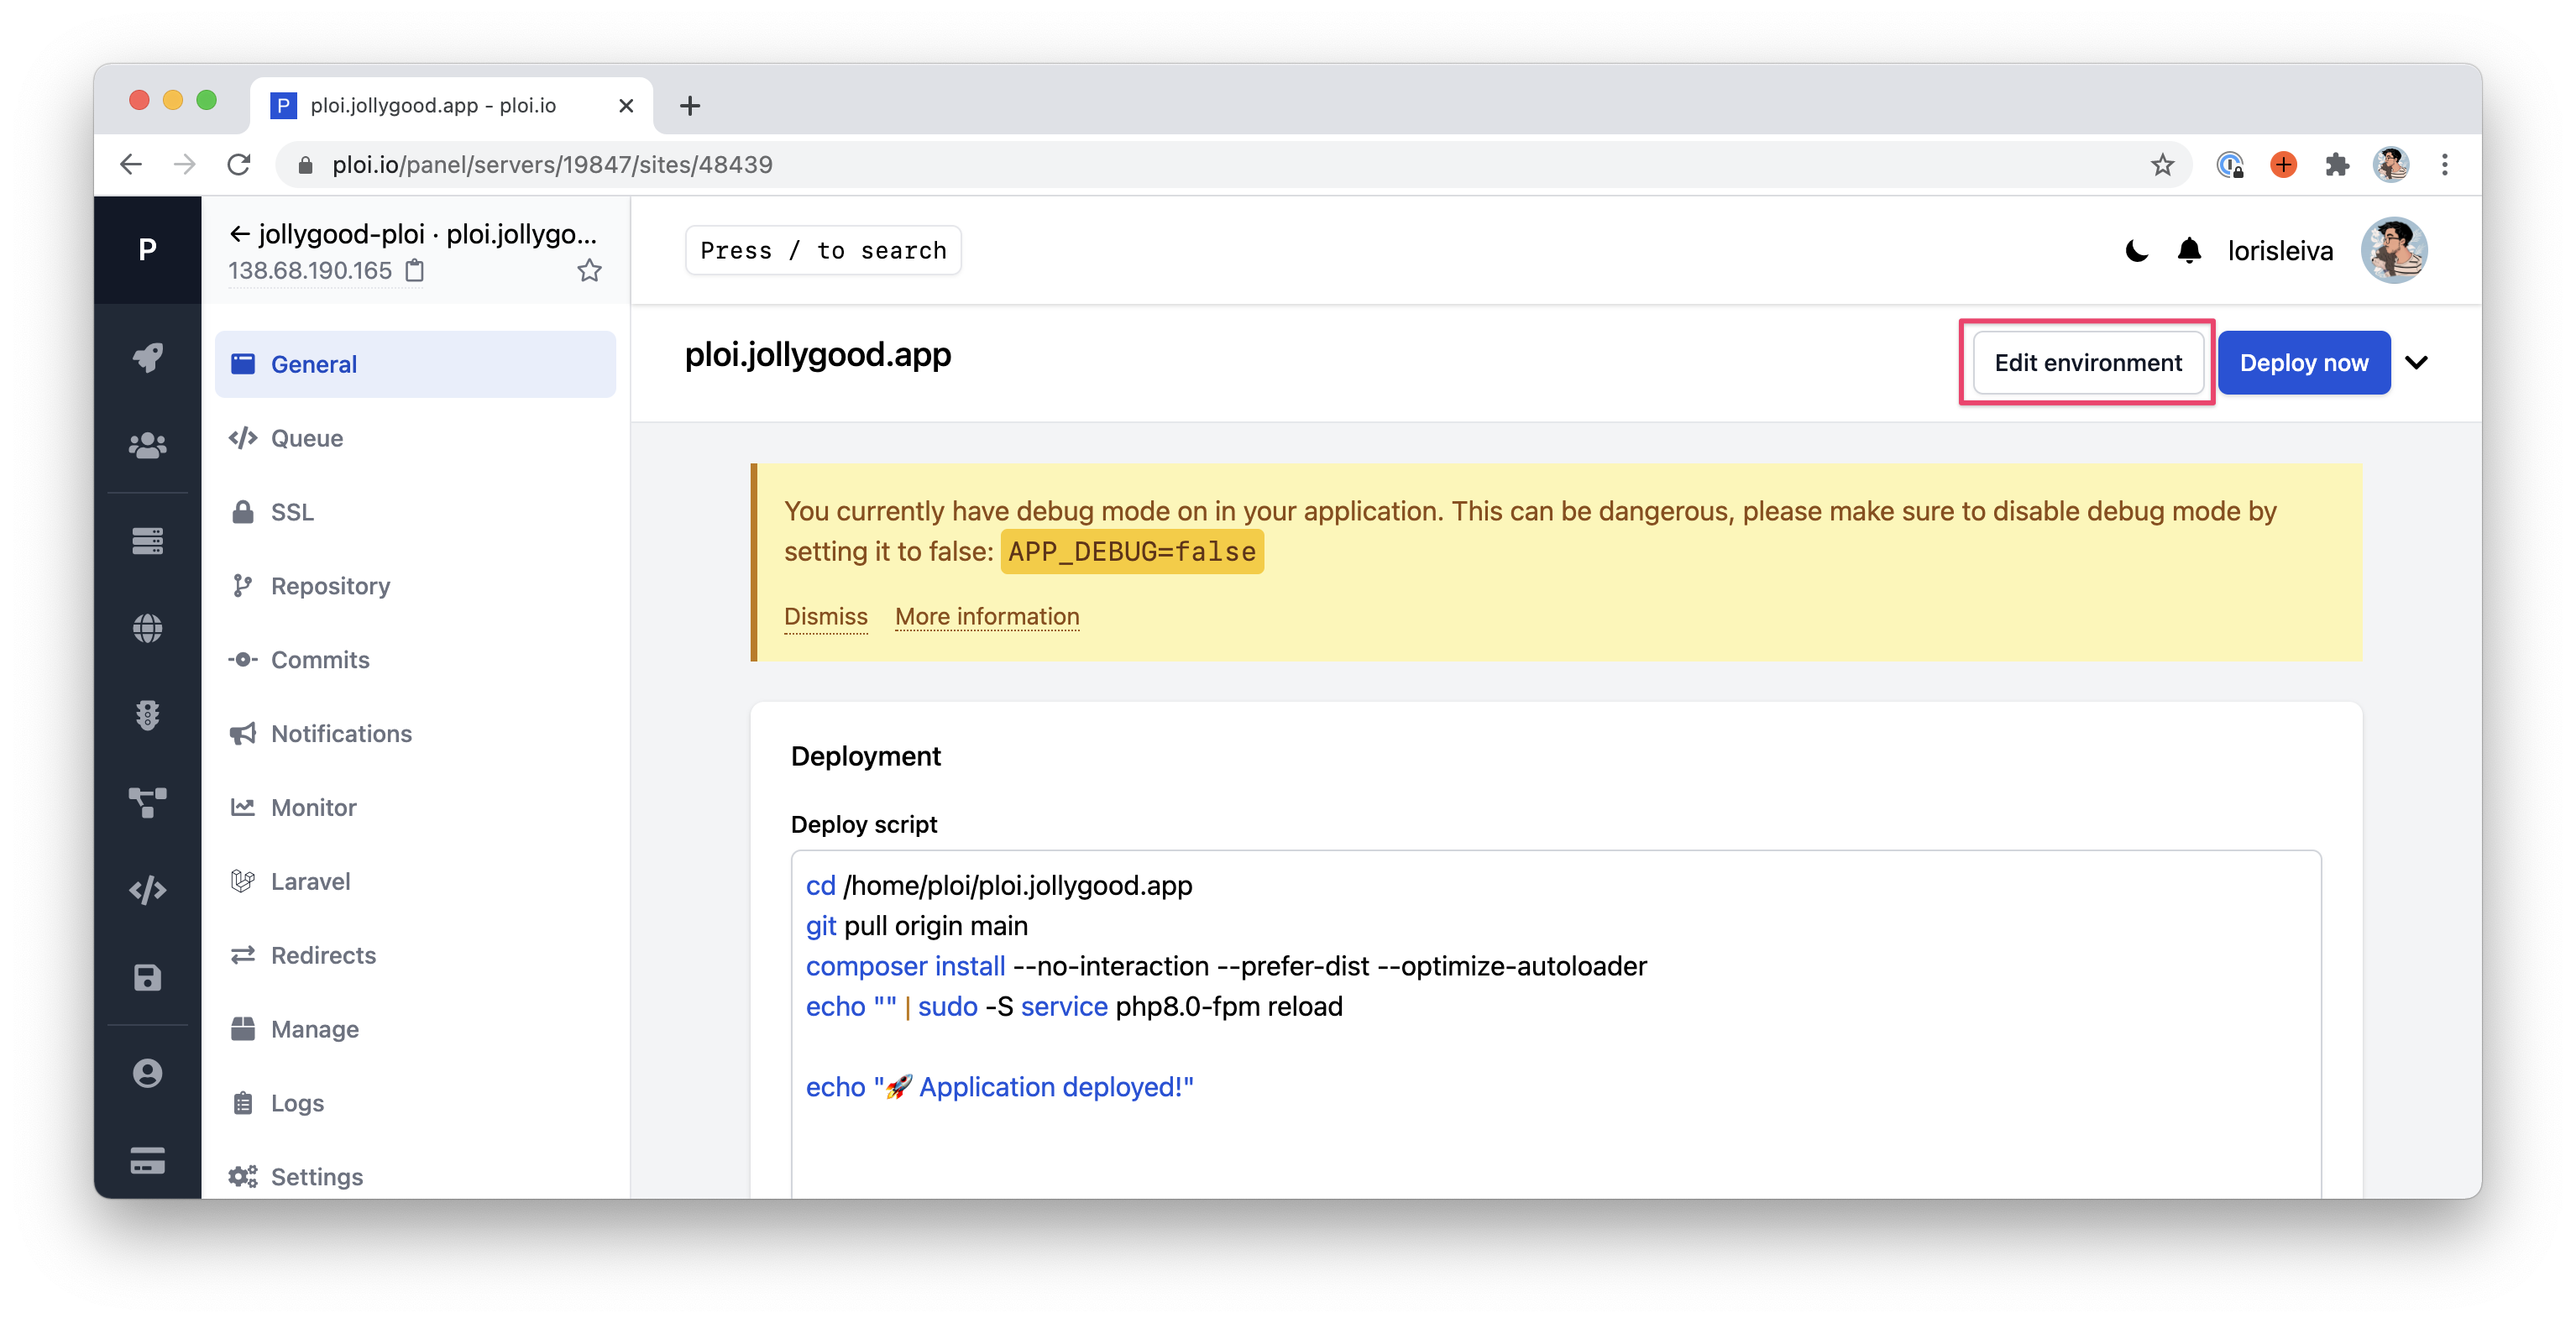
Make sure to update your production variables appropriately and use the database password provided earlier in the email.
Deploy twice
Now that our production environment is ready, let’s deploy a second time to ensure our database is migrated. Simply run dep deploy and with any luck, you should see the following output.
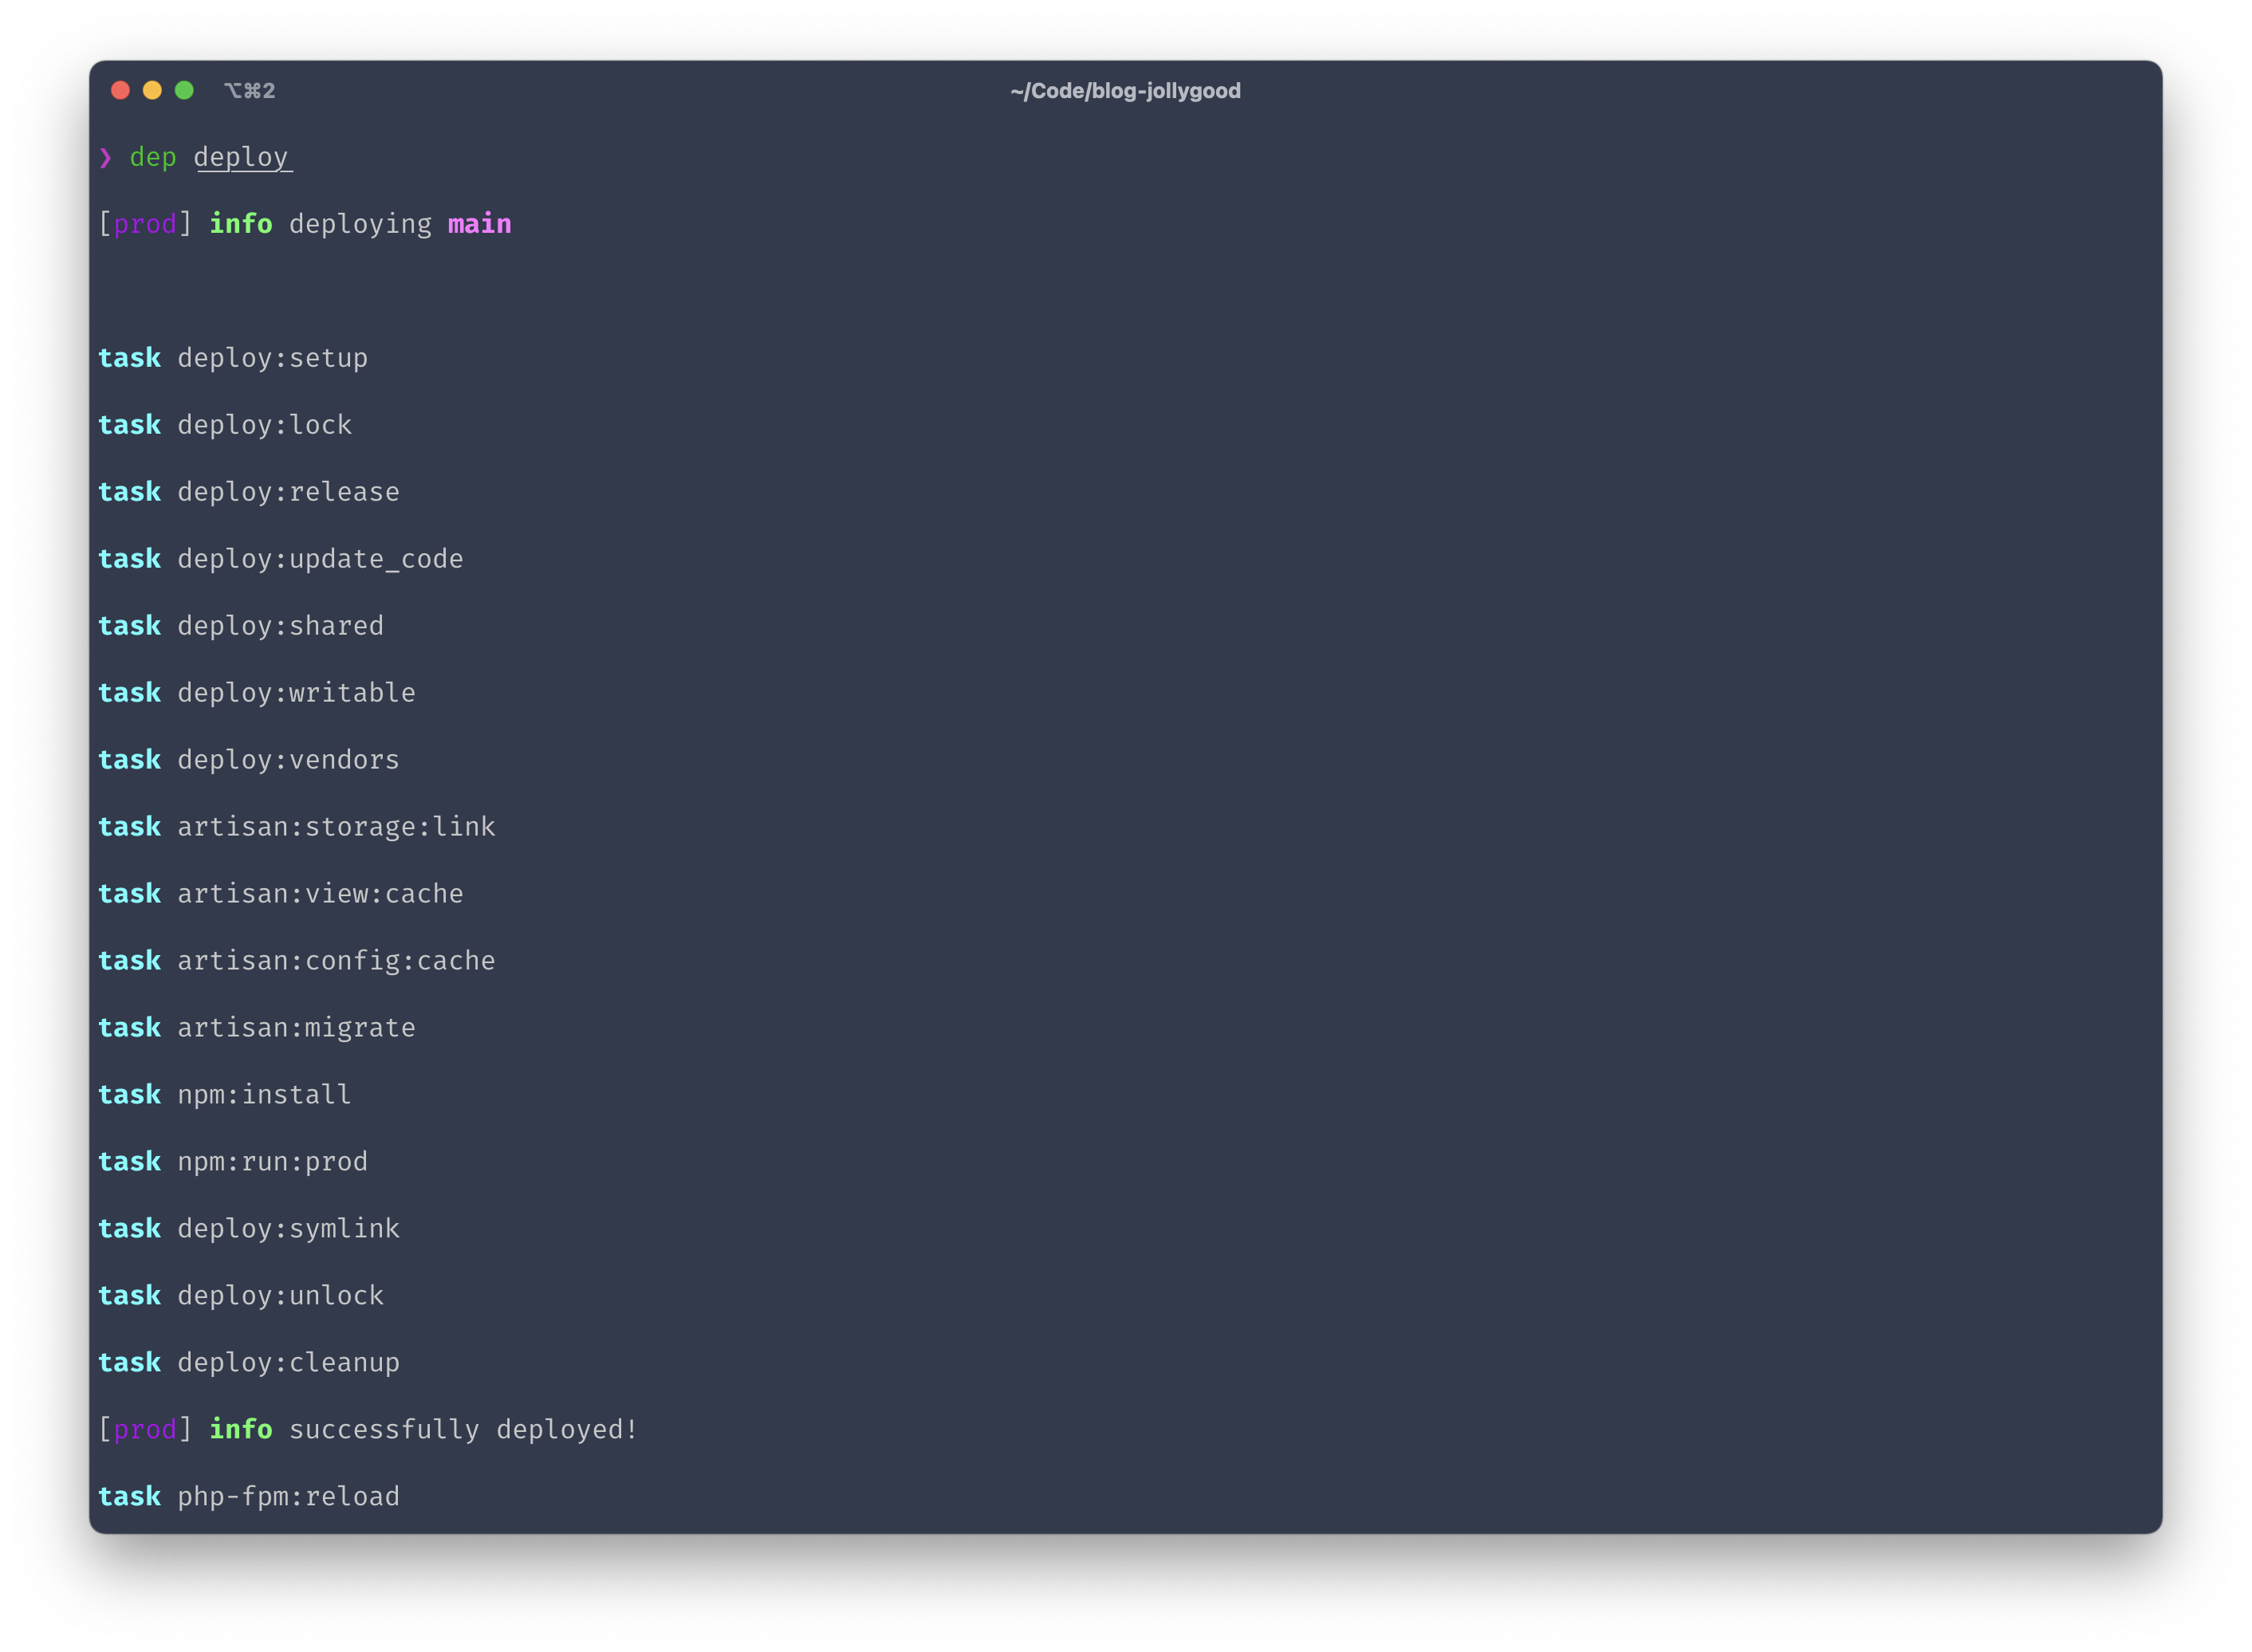
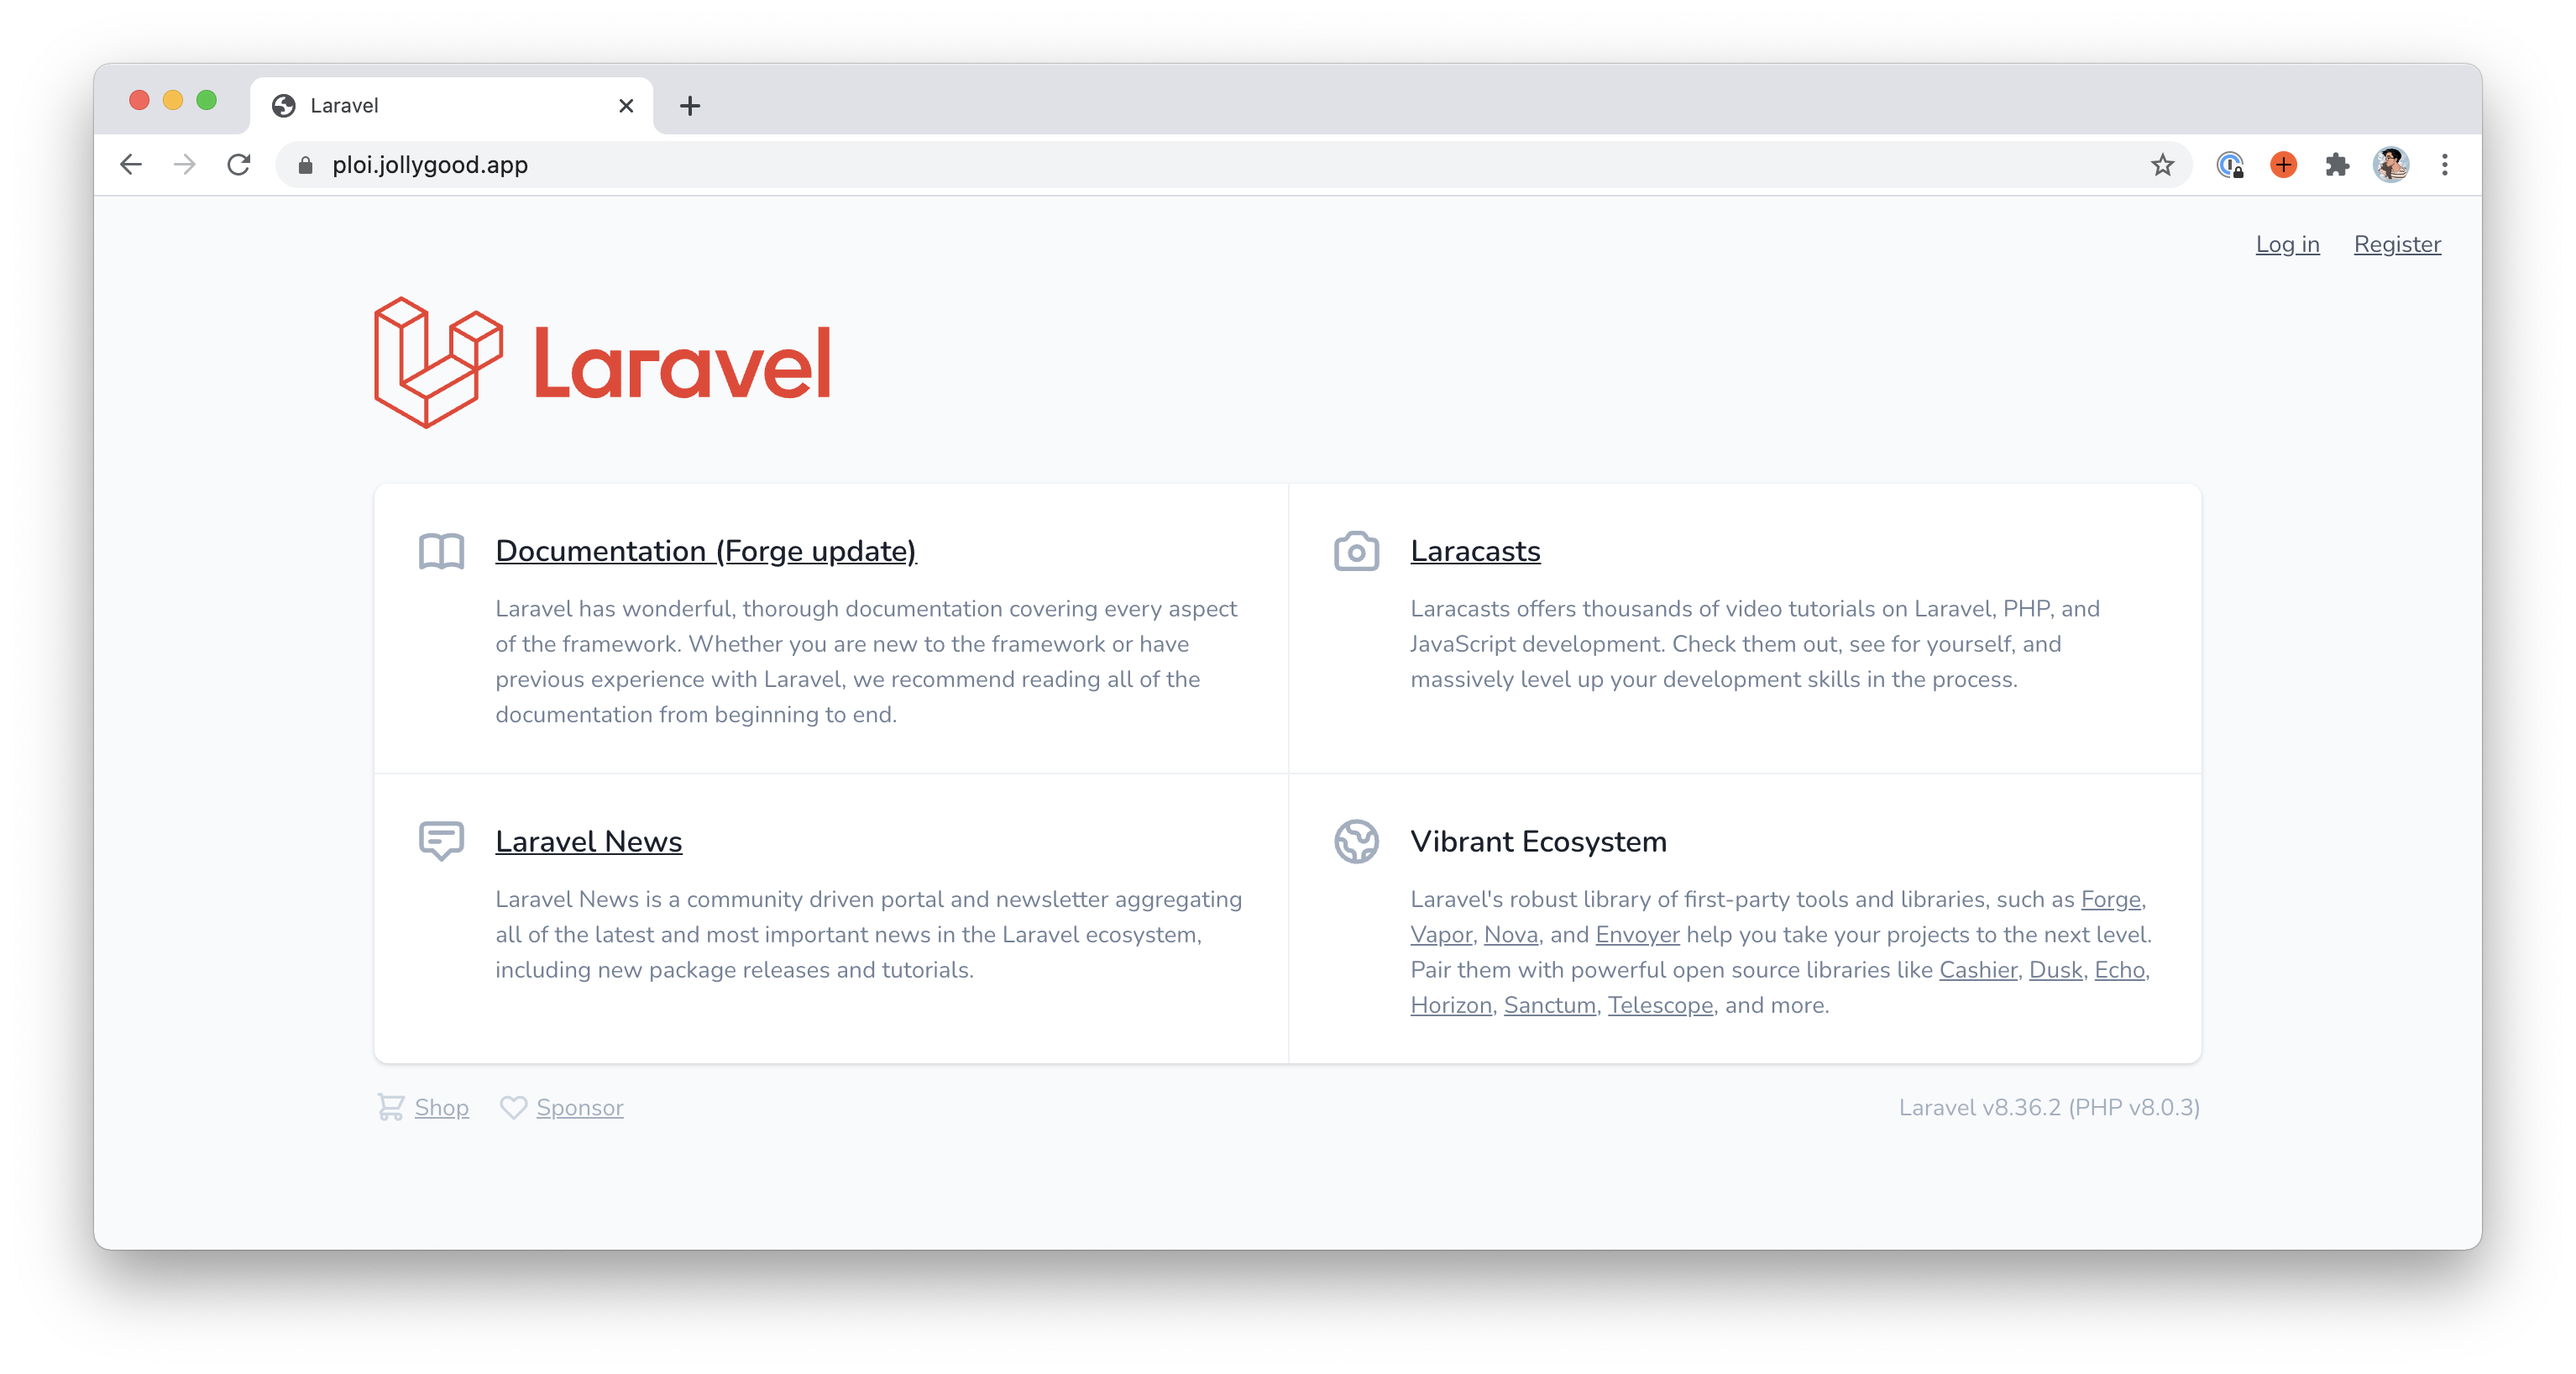
And that’s it! You should now be able to see your application live if you visit its URL. 🥳
Update env variables
Okay, we’ve successfully deployed our application using Ploi and Deployer but there are still a couple of points I’d like to mention.
The first point is that, once your application is deployed, you’ll likely want to update some environment variables from time to time
Since Ploi has a dedicated page to do so, it can be easy to forget that our configuration files are cached — due to the artisan:config:cache task we added to our deployment flow.
That means, whenever you update your .env file, the changes won’t be live until the next deployment.
That being said, if you want to regenerate the configuration cache without having to redeploy the application, you may do that by running php artisan config:cache on your server.
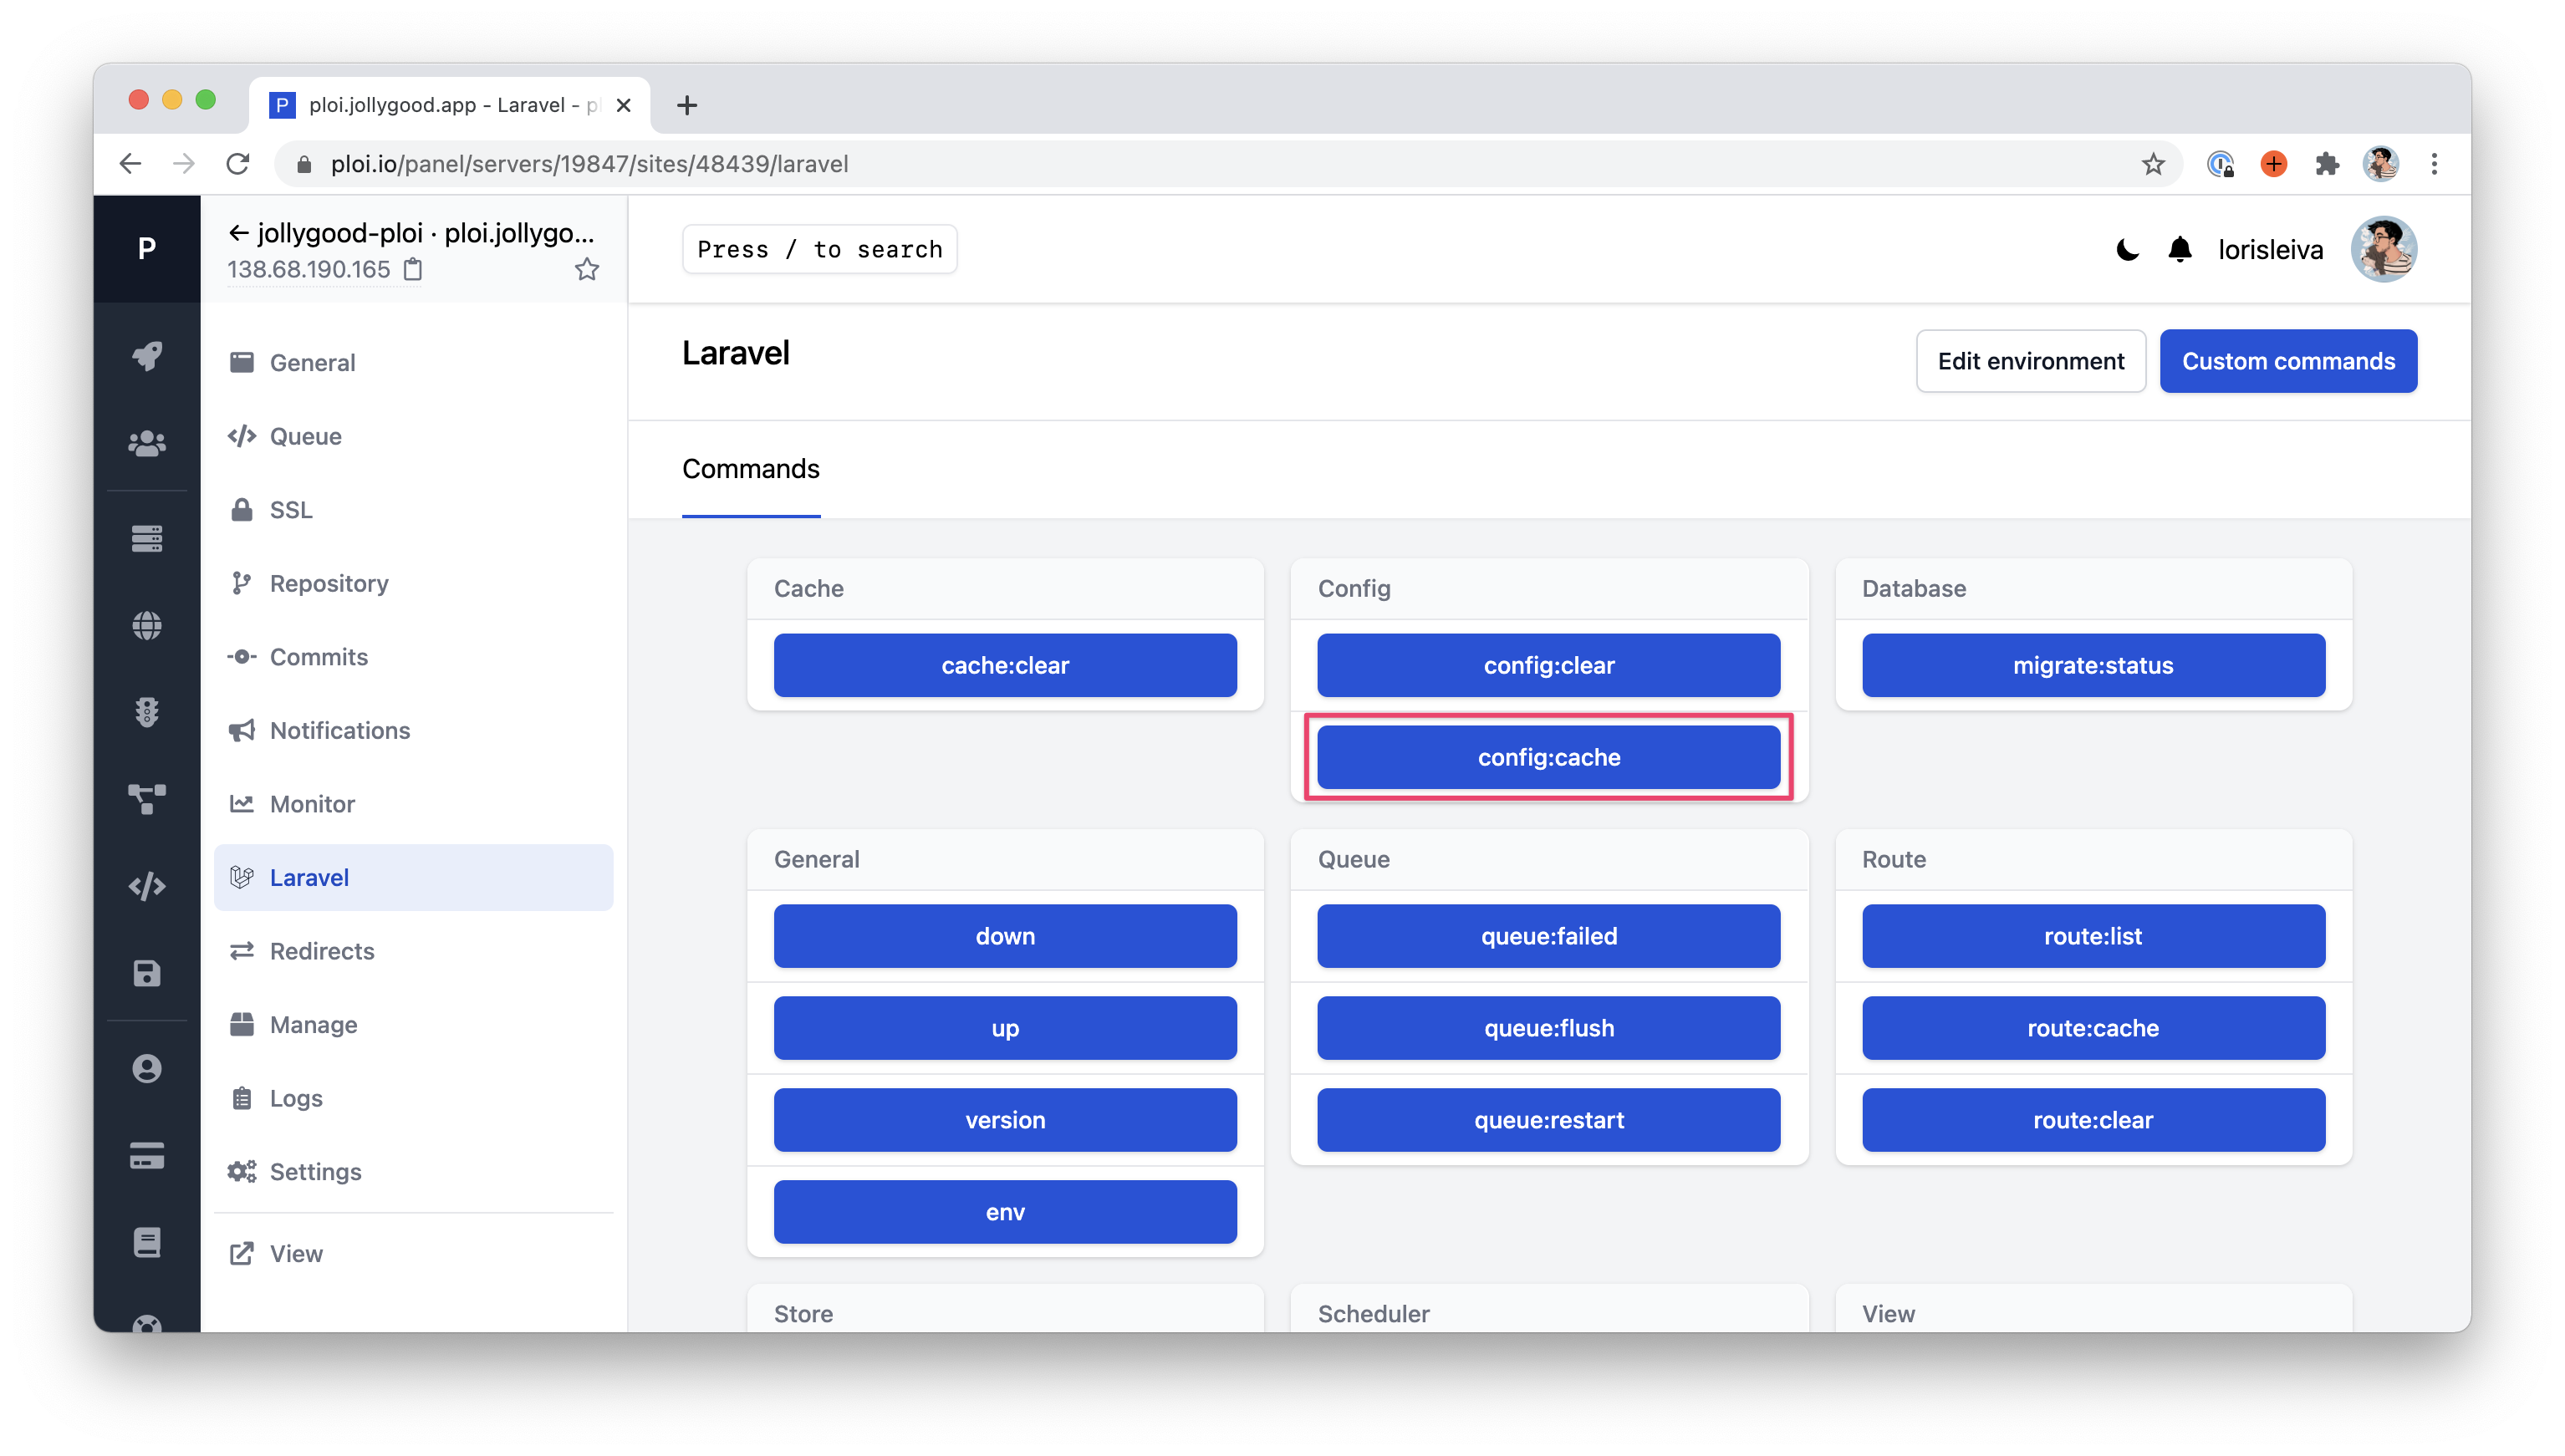
A nice touch from Ploi is that it allows you to run such commands directly from the UI. On your site’s page, click on “Laravel” on the sidebar and you'll have access to many php artisan commands that you can run by clicking a button. You may even add your own commands inside that dashboard by clicking the "Custom commands" button.
In our case, all we need to do is click the config:cache button and our environment variable will be live.
About the deploy script
My last point is about the "Deploy Script" available on the "Site > General" page.
If you've read the previous article on Laravel Forge, you've seen us work out a bit of magic to trigger a Deployer deployment directly from the Laravel Forge interface. Concretely, we ended up with a deploy script calling dep deploy.
Unfortunately, at this time, it is not possible to do that in Ploi since it runs more than our deploy script behind the scenes. If you remove all the lines from the deploy script, you should see the following error fatal: not a git repository (or any of the parent directories): .git. This is because deployed releases don’t have git initialised inside them. Instead, Deployer uses a cached repository inside the .dep folder.
That wasn't a problem for Laravel Forge since it just executed what we told it to execute. However, Ploi runs some extra commands behind the scenes trying to access git and therefore making this not possible.
On the other hand, it is worth noting that — starting from a certain plan — Ploi supports its own zero-downtime deployment system out-of-the-box. So with Ploi, you could ditch Deployer altogether, click on a button and have zero-downtime deployments configured.
That being said, you'll need to configure your entire deployment flow inside the deploy script. I prefer using Deployer since it allows us to create powerful deployment flows via reusable recipes and custom tasks written in PHP but — if you have a simple deployment flow — it might be worth considering.
Conclusion
Alright, I hope this article was useful for Ploi users and also for those who are looking for a solution to help them create and maintain servers.
As usual, you can find the deploy.yaml file updated for this episode on GitHub by click on the link below.
As an alternative to Ploi, you might also want to consider Laravel Forge which I have talked about in the previous episode.
I have no personal preference between the two and so I’m actually a customer of both because I'm a very indecisive person. 😅 Hopefully, these two articles will help you decide on which one suits you best.
In the next episode, I will provide a complete checklist of this entire series as a gift for my wholesome sponsors. This will be the perfect article to come back to when you’re ready to get your hands dirty and want a quick list of things to do to deploy your Laravel app from scratch.
Deploy using Laravel Forge
The complete checklist